Elements of Light and Shadow
118K views
lesson video
Elements of Light and Shadow
courseDrawing BasicsFull course (177 lessons)
-20%
$127.20
$159
You save $31.8
comments 21 submissions
Maria Bygrove
It's hard to control values with a pen but I like drawing with it so figured I'd try and practice.
LESSON NOTES

Want more? Join the premium course and get full access to all lessons, demos, assignments, and critiques!

Perspective adds depth to your drawings, but proper shading has an even bigger impact on realism. Many students draw beautiful outlines but flatten their forms with incorrect shading. To avoid this, you need to understand how light interacts with form.

Planes

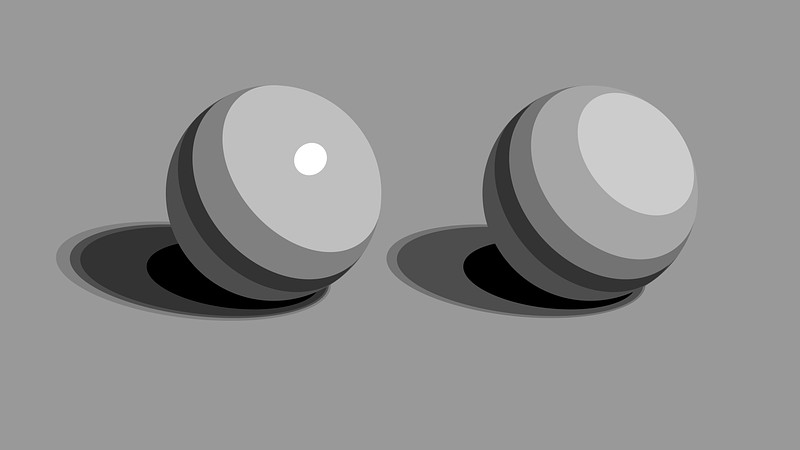
When light hits an object, it reveals the object's planes. Imagine planes as small flat tiles across the surface. Planes facing the light are part of the light family, and those facing away are part of the shadow family. Each value change you make in shading suggests a plane change. Even on smooth forms like spheres, thinking in terms of planes helps you understand how the form turns.

Parts of Light and Shadow

When shading, it's crucial to identify the different elements of light:

  • Terminator: The edge where light transitions into shadow.
  • Form Shadow: The area beyond the terminator, turned away from the light source.
  • Cast Shadow: Occurs when an object blocks light from hitting another surface.
  • Center Light: The point facing directly toward the light source.
  • Halftones: Light areas where the form turns away from the center light, getting progressively darker.
  • Highlights - Reflections of the light source on shiny surfaces, not present on matte materials.
  • Reflected Light: Light bouncing from the environment into the shadow, lightening it slightly.
  • Core Shadow: The darkest part of the form shadow, usually along the terminator.
  • Occlusion Shadow: The darkest value in tight crevices where objects touch.

Value Structure of Form

To organize your shading, group these elements into value zones. Let's look at a common template:

Start by clearly separating light and shadow shapes, no blending yet. Fill in the shadow at about a value 3.

In the lights, I usually think of three values. For matte surfaces without clear highlights, I use light halftones (values 8-9), medium halftones (6-7), and dark halftones (4-5). The largest area is the lightest halftone, with smaller areas for the darker halftones. If there’s a clear highlight, simplify to two halftones plus the highlight as the brightest spot (value 10).

In the shadows, I use two values. First, block in the reflected light (value 4) this is your lighter shadow value. Then add the darker core shadow (1-2). For simplicity you can make the occlusion shadow matches the core shadow, giving us five total values (three lights, two shadows), favoring more details in the lights. But realistically, occlusion shadows are often darker (0). Cast shadows can also get darker or softer as they move away from the object (2-3).

So, shading form isn’t as simple as smudging gradations, unfortunately. It’s not linear, we bounce around. Transitions in halftones are subtle, then quickly darken at core shadows, lighten with reflected light, darken again at occlusion, and finally lighten into cast shadows.

* * *

As you practice, you'll develop an intuition for how light describes form and you'll be more comfortable with all the subtle shifts in value that create realistic depth. You'll start to "feel" when a value or transition is wrong. Light and shadow are tools for creating the illusion of three dimensions on a flat surface. Master these tools and your drawings won't look flat.

Coming up I'm going to do a demonstration going over all of this slowly and in much more detail.

Want more? Join the premium course and get full access to all lessons, demos, assignments, and critiques!

DOWNLOADS
mp4
elements-of-light-and-shadow.mp4
219 MB
txt
elements-of-light-and-shadow-transcript-english.txt
7 kB
txt
elements-of-light-and-shadow-transcript-spanish.txt
7 kB
file
elements-of-light-and-shadow-captions-english.srt
11 kB
file
elements-of-light-and-shadow-captions-spanish.srt
12 kB
COMMENTS
Stan Prokopenko
An intro to shading light and shadow with a template of common value zones to make it easier to structure your shading.
Newest
Yevhen Syrchin
my value distillation practice
Nikita Tushynski
6:05 there is a typo in the darkest value, should be "Occlusion"
@ebendeelman
You're kinda good at this teaching thing. Keep it up, you will make it big some day.
Dennis Yeary
So does anyone know when the next lesson will be available?
Dennis Yeary
I was wondering if this applies to colors as well if so how do you determine a darker shade or lighter highlight for objects
@romero505
8mo
Dermot
8mo
Cool move Stan ! Back to Perspective ! Yeah ! :)
Juice
8mo
Good lesson. Ive watched this many times now. The parts when you talk about wich values you use where on the sphere Are the hardest parts to Grasp. But I did screen dumps of those pictures so i can study it
Josh Fiddler
Dorien Iten has some free lessons on this here on Proko and they are excellent. Might add some missing bits for you. But I hear you. breaking things down into distinct value groups in this very specific way was and still is a tad confusing. You've got the highlight version above, but Stan also talked about matte surfaces, that generally don't have a highlight due to the surface scattering the light that hits it. If you recall, a highlight is the reflection of the light source. The matte version might also help simplify the problem.
Zach Pipher
Regrettably the light and shadow section has been very daunting and I haven't participated in the course since it started. I want to practice the older stuff and draw on my own before I feel ready to do it.
@romero505
8mo
Hey guys! I'd love some feedback. It's really hard to get the values ​​right and try something more complex. In one, I had to blur to get a result similar to the image.
Samantha Maggard
This is a good start. I would like to add a little advice. The reflective/bounce light should not be lighter than anything in the light. It is still part of the shadow. The one reference photo for the egg standing up seems to have multiple light sources which is not idea especially if you’re a beginner.
Geert-Jan
8mo
Thanks for the lecture professor Proko! :)
ANX804U
8mo
lesssgooooo.. new lecture
Maria Bygrove
It's hard to control values with a pen but I like drawing with it so figured I'd try and practice.
Melanie Scearce
Incredible control of your mediums!!
Juice
8mo
Wow i thought that both were done with pencil. Good control!
Account deleted
Alright
Sita Rabeling
An attempt to see the values on the egg. You look and look and wonder constantly what's right. It seems to change all the time and you know it's not. 🧐
Vue Thao
8mo
Skelly: Yeah, Hasta vista baby.
Scott N
8mo
When I enrolled in this course, shading to create the illusion of depth was one of the skills that I most wanted to learn how to do.I'm very much looking forward to these next few lessons!
@romero505
8mo
Hey guys, I'd like to know how correctly I handle the values ​​and shading of this egg so I can do more complex things like a semi-professional illustration.
Stan Prokopenko
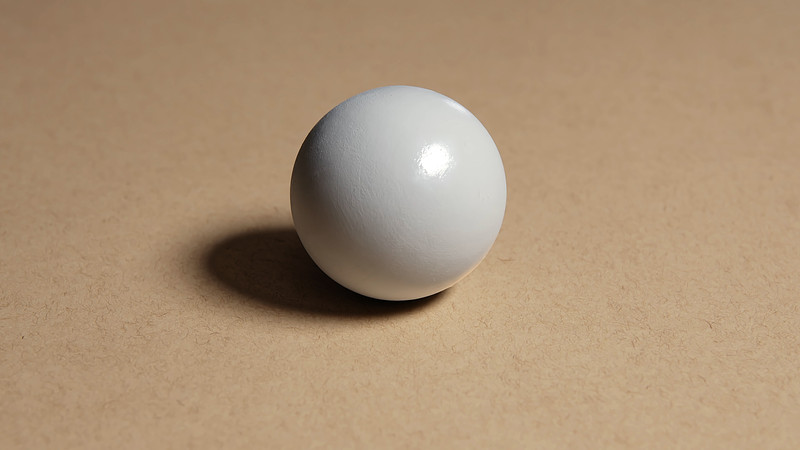
You did pretty good handling your edges, but the shadow values are not nearly as dark as in the reference. This egg has complex lighting on it. If this is one of your first attempts at shading I recommend something more clear and direct with a single source. Try this egg:
Josh Fiddler
I had the basics of this from Dorien Iten's materials and he's a phenomenal teacher. This lesson was really helpful though in one key area. You know when something is so obvious you kinda just overlook it? Well, yeah, OBVIOUSLY THE REFLECTED LIGHT IS THE LIGHTEST DARK of the Shadow Mass! Derp. I'm really looking forward to when we get to edges! The softening of the cast shadow made me immediately think of lost edges.
Dermot
8mo
Stan, thanks for the intro to Light and Shadow. Here are some eye balls I tried to shade a while back. They don't look right any help would be great, thanks.
Stan Prokopenko
Those are good! Next up you should try putting those irises on an eyeball and make that 3d. That's very appropriate since we just learned about spheres. After you get the hang of that, the challenge will be putting those eyeballs into eye sockets, and wrapping eyelids around them in a way that you can still feel the round eyeball pushing through!
Help!
Browse the FAQs or our more detailed Documentation. If you still need help or to contact us for any reason, drop us a line and we’ll get back to you as soon as possible!