


You should watch my previous video in which I cover some basic elements featuring shape, value, color and edge.
The first thing you need to understand when starting to shade is how light affects the appearance of form and how to properly capture 3 dimensional form based on the characteristics of the light in the scene.
In some of my previous videos I talked about things like shapes, values and edges. How do we know what shape, value or edge to draw? What exactly are we looking for? Well, we’re looking at Light and how it illuminates the objects in our picture. Light is the reason we see anything and the characteristics of light can completely change the appearance of the things it illuminates. So, I like to analyze the light in the scene and try to capture it, so the viewer can FEEL the light. Form looking 3-dimensional is a byproduct of correctly capturing the light on the form.Ok, so I hope I’ve convinced you that studying light on form is important. Now let’s take a look at all the elements. For this I’m gonna need an egg.
Ok, so I hope I’ve convinced you that studying light on form is important. Now let’s take a look at all the elements. For this I’m gonna need an egg.
There are two main zones. Light and shadow. The edge where the form transitions from light to shadow is the terminator. It’s located at the tangent between the light source and the form. In other words, just before the planes start to face away from the light.
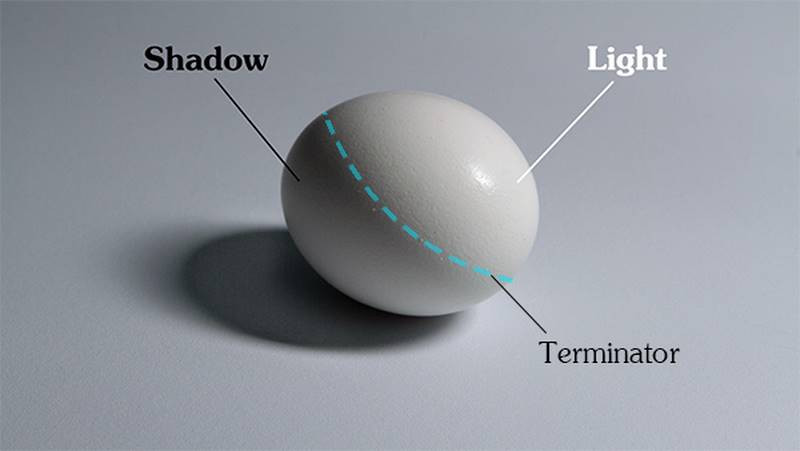
Shadows
There are two types of shadows. Form shadow is a shadow caused by the planes turning away from the light source. A cast shadow is caused by one form blocking the light from hitting another form.


This egg is blocking the light from reaching this part of the table. You can find this shape by projecting lines from the light source to the termination of the first form, and continuing those lines to the obstructed form.
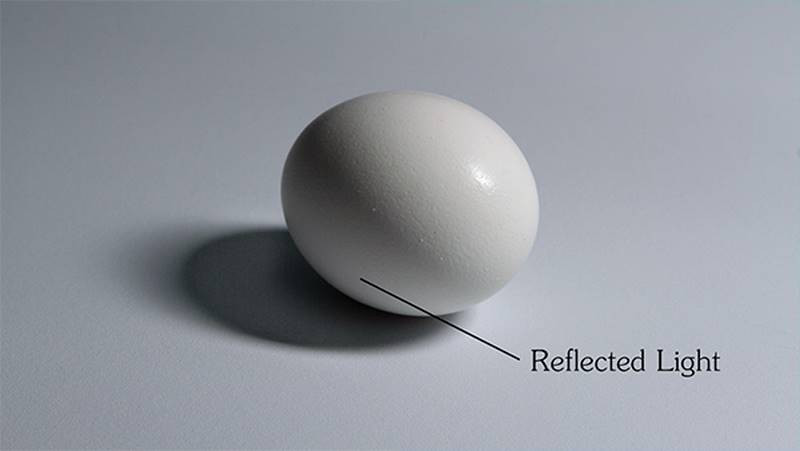
Shadows will rarely be completely black. Light bounces off objects in the environment and is reflected back into the shadows.
This is called reflected light. In this case the light will bounce off the paper and into the shadow on the egg.
Along the terminator, sometimes you will see a core shadow. It’s a darker plane that defines the edge of the shadow. The thickness and softness of the core shadow can vary quite a bit. It depends on the thickness of the form, how sharp the edge is between the planes of light and dark, or the angle and position of the reflecting light source.
Sometimes you won’t see the core shadow at all. Only if there is something on the shadow side, to reflect back enough light to create a visible difference in value. This dark piece of paper reflects less light than the white paper. You can see a drastic difference in the value of the reflected light.
Also, regarding the visibility of a core shadow, the reflection has to come from the right angle. If it’s directly behind the shadow side, it will create a nice core shadow. If we move the reflection source closer to the angle of the main light source, it will illuminate the area where the core shadow would have been.

If you don’t see a distinct core shadow, many artists choose to cheat one in because it can add to the 3-dimensionality of the form.
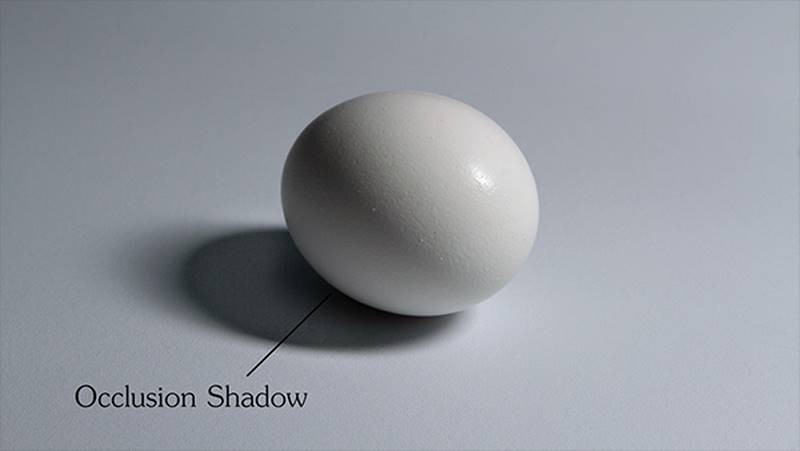
Reflected light doesn’t just affect form shadows. It also affects cast shadows. Less light can bounce into this deep crevice where the egg and table meet, and so that area gets darker as it goes deeper. This is called an Occlusion shadow
Moving on to the light zone, immediately after the terminator, is the halftone. These are planes of the form that are partially hit by the direct light. As the planes get closer and closer to facing the light, they will get lighter. And the point where the form points directly at the light is called the center light.
The center light shouldn’t get confused with the highlight. The difference between the two is that the center light is the plane facing the light source, whereas the highlight is a reflection of the light source. A reflection will move depending on where the viewer is. So let’s say this is the egg. The viewer, or camera is down here, and the light source is over here. The center light will be here facing the light source. The highlight, however, will need to be at the point where the light can bounce off the surface of the egg and reach the viewer’s eyes.

These two angles need to be equal. If you’ve played billiards, this is very similar.
To test this concept let’s mark the point of the highlight, and mark another point for the center light. Now let’s move the camera and see what happens. Ok, you can see here that the highlight moved to a different spot, following the camera. The center of light hasn’t changed.

Don’t let the math of all this confuse you. Highlights, and also cast shadows which we discussed earlier, can be changed and they can still look believable. People are not going to call you on a highlight being in the wrong spot. I can take the highlight on this egg, move it to a different spot, and change the shape. And it still looks believable… I’ll often change the shape of a cast shadow to better describe the form it is being cast onto. For example if I have an object that casts a shadow appearing to go against the form. The form of this paper towel roll is a cylinder and to show that I would change the cast shadow from the egg to wrap around the cylinder. I usually try to describe the form that the shadow is casting on to, rather than the form casting the shadow.

So, give yourself artistic license. Learn the rules, and then learn how you can break the rules to improve your drawing.
Want to learn more? Check out the next lesson on how to Shade a Drawing!
Shade an Egg
Take an egg out of your fridge and place it on a piece of white paper. Light it with a direct lightsource (desk lamp, flashlight, etc…) Shade the egg using what you learned from this lesson. Identify a clear shadow shape with the core shadow and cast shadow. When you fill in the values, separate the lights and dark and keep that separation and you add the halftones and occlusion shadows. Change the light angle and draw it again!


