How to Draw the Head from Any Angle
This lesson has a premium version with extra content. Get it now!

Portrait Drawing Fundamentals

The Loomis Method

How to Draw the Head from Any Angle

10M
Mark as Completed

How to Draw the Head from Any Angle

10M
Mark as Completed

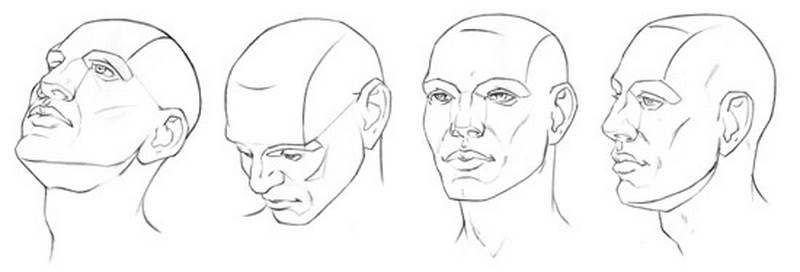
Draw the Loomis Head

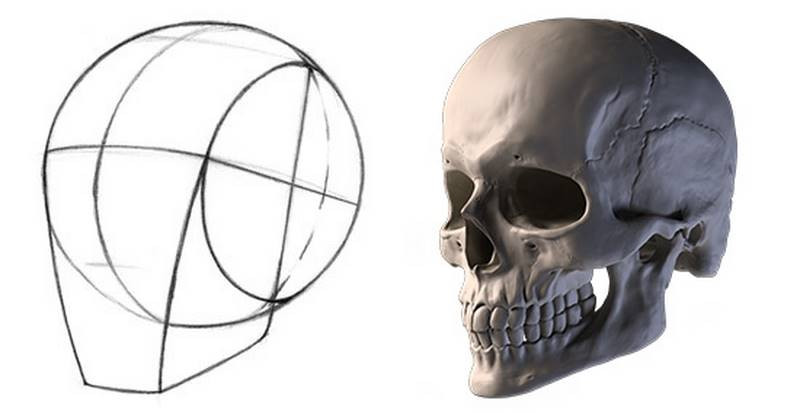
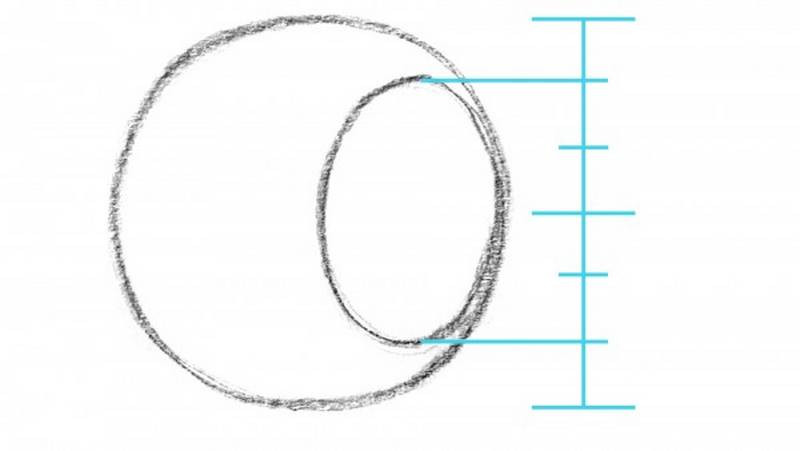
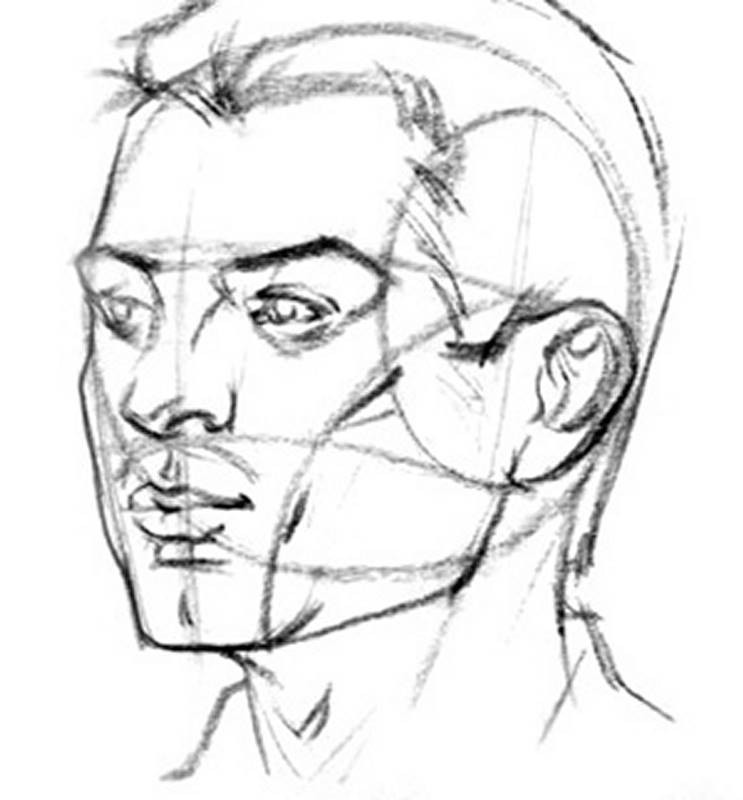
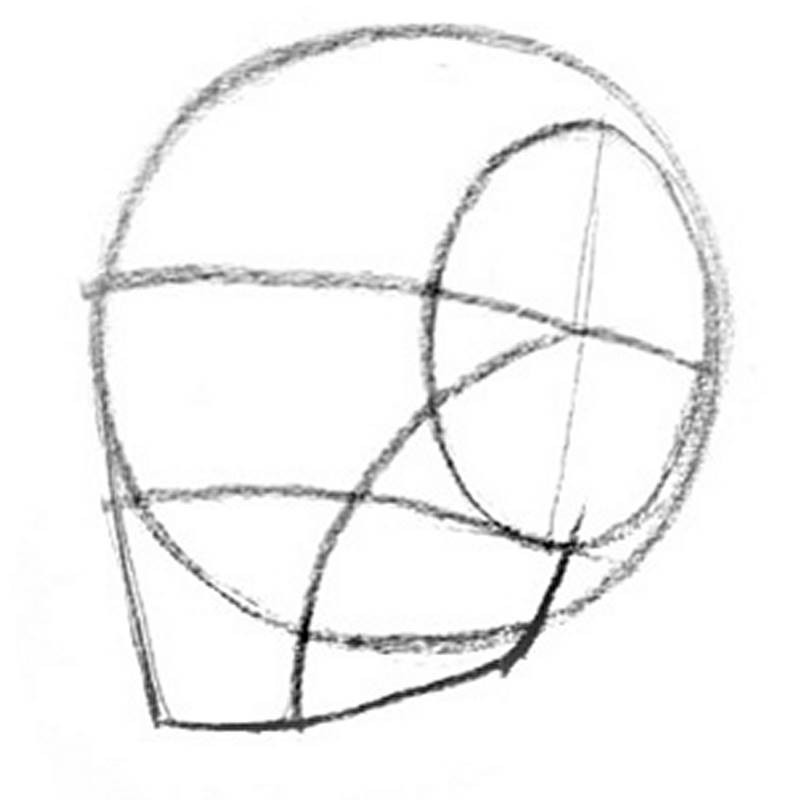
Take a bunch of pictures of either yourself or someone else and then use them to construct the head using the Loomis method. Focus on getting the up and down tilt correct. Make sure to make careful measurements that I mentioned in this video and keep your lines clean. Remember that every person has individual proportions that will be different from the average loomis head. At this point, just draw the average proportions. Once you’re comfortable with that, you can try to capture the distinct characteristics of the person you’re drawing.

If you’re having trouble drawing the circle or oval of the head, spend some at the beginning of each day warming up your hand with a lot of circles and oval.

Submit your assignments here
Drop images here to attach them to the message
Newest
Vin
14h
Here is my first attempts, not easy, I need to practice more. I would appreciate some feedback. Thank you.
Write reply...
Drop images here to attach them to the message
@grugrugru
Final page from real life reference I used average proportions rather than from reference. I had trouble with the down angles of the head especially. Critique or advice would be appreciated.
Write reply...
Drop images here to attach them to the message
Stan Prokopenko
The ones from the 3D model are awesome. I think you got that down. Try to do a few pages from memory and then more from photos.
Reply
@maddawg
I attempted this exercise noting where the facial features a placed but i feel like im doing something wrong! Help!
Write reply...
Drop images here to attach them to the message
Martha Muniz
It seems like you are struggling with the perspective of the head model. It can help to think about it as its most basic form, a box, to guide you as you rotate the head around in various angles and make it more manageable. Try practicing a few boxes in perspective and then using it as a guide to place your head and features within. If you want more perspective practice, then I highly recommend following the Drawing Basics course section on this: https://www.proko.com/s/YSjh
Reply
Regina F
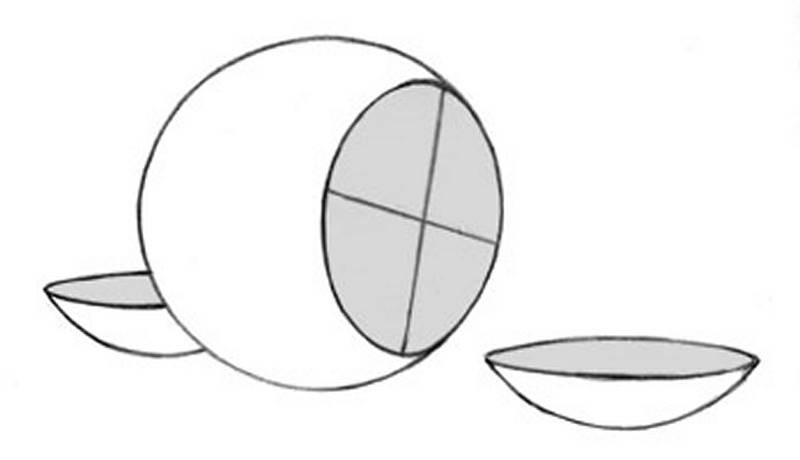
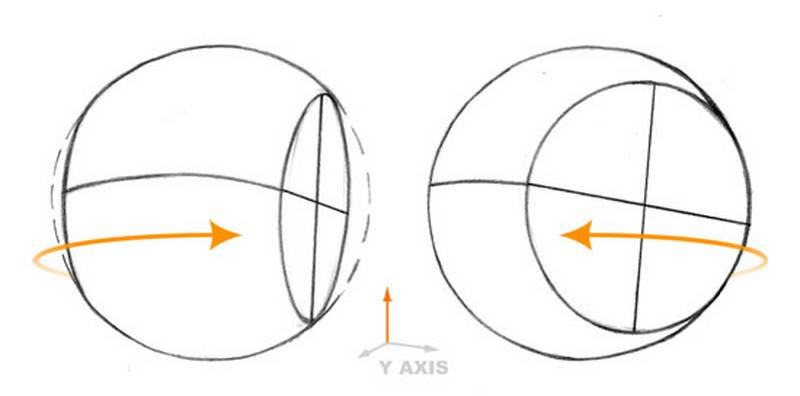
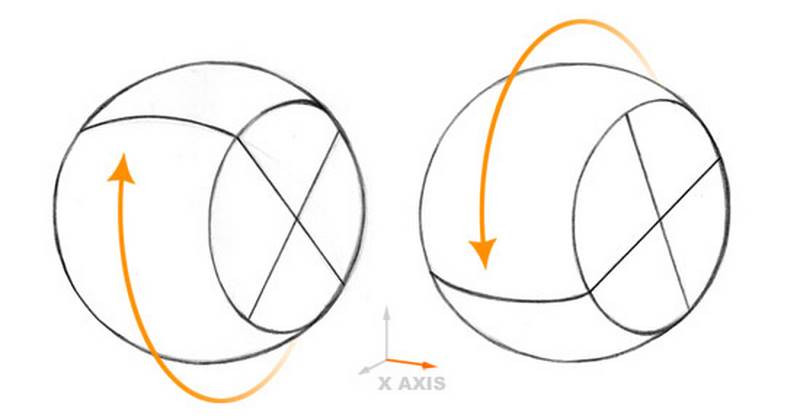
Hello everyone, this is my exercise for this lesson. I had to take a step back from drawing the loomis head, because I wanted to get a feeling for how the head, a ball with both planes 'cut' off, moves and behaves in 3d space. This was more difficult than I imagined, but was a very useful lesson. This helps me to place the planes and the center line in the right position. The next picture is the loomis head drawn from different angles, with the help of the 3d model in the next lesson. I look forward to receive critiques, as I see plenty mistakes. I hope you can help me find the mistakes I haven't seen yet 🙂 *Please excuse my English, it's not my first language
Write reply...
Drop images here to attach them to the message
Liandro
These are really good, @Regina F! All the various angles clearly convey the forms of the head. I can se you're "thinking in 3D" when I notice you're drawing cross-contours through the forms and showing even the "hidden" parts. I understand how it must have been a helpful attitude to practice just the cranium / sphere first, so great job taking that step. Also, it's good to know that the 3D model helped - if you drew all these heads using the 3D model as reference, maybe now you could try practicing a few from memory or from imagination? One nitpicky suggestion I'd have would be to remember to always keep an eye out for proportions. When I look at the Loomis heads page, I see some drawings with pretty consistent proportions (for example, the two ones on the uppermost right and the other two on the lowermost left, and even the foreshortened ones in the middle), but I also see a few where the proportions got slightly skewed (for example, the second one from left to right on the upper line and the one on the bottom right corner seem a bit too squished / narrow). Nothing that a few quick adjustments wouldn't help - as I mentioned, this is a nitpicky observation. Just something to be noted. Overall, of course, you don't have to worry about getting proportions right all the time in the first try - as long as you're aware to make proportion-checking a habit within your drawing process over the long run, you're good to keep going. Hope this helps! Please let me know in case you need any extra help.
Reply
Jonathan Rondon
I started to pursue portrait drawing (mainly on my own, through books and online classes) since 2020 and while I'm very grateful of how far my drawings have come, I want to improve the dimmensions and measurements in my drawings, so I've desited to look into the loomis method in order to advance my knowledge of the human skull and perhaps after that, continue learing to become a better artist. I appreciate and welcome any advise. Thank you!
Write reply...
Drop images here to attach them to the message
Jesper Axelsson
Hi @Jonathan Rondon, nice studies! They feel clear, controlled and done with good precision. I'll do my best to help you further :) - I would highly recommend taking the Drawing Basics. The course seems like a lot of fun and people taking it seems to be improving a lot. By strengthening your foundation your head drawings will improve automatically. - It would be nice to see some more of your drawings to get an understanding of how you apply your skills to different subjects and for finished work :) Feel free to also share what your art goals are. What type of work do you want to create? Any examples of artists who does that type of work? Please share any examples :) - The line that wraps around the head that the brows sit on, runs across the center of the sphere, and through the center of the circle on the side of the head. In the bottom right drawing, you have it running through the circle above it's center. - The angle and shape of the round side plane of the head, and the angle of the feature lines on the face could be improved. How much experience do you have in drawing boxes and cylinders? Do this exercise then post and tag me (@Jesper Axelsson ) if you want me to take a look: Draw 3 boxes from different angles from imagination. Draw through as if they were made out of glass; drawing the edges that are on the hidden side (lightly). Then do the same with 3 cylinders. I hope this helps :) Keep up the good work 😎
Reply
Carlos Javier Roo Soto
I haven't practice structure in a while, and since I'm working as a Live Caricature, I want to improve my exaggerations and anatomy, so I'm going back to basics starting with the overall head. Any advice you can give? You see anything I have got to work on?
Write reply...
Drop images here to attach them to the message
Martha Muniz
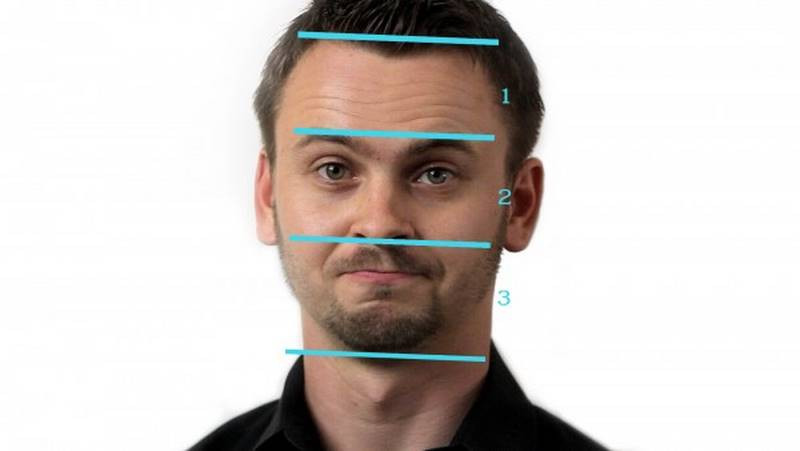
Very good work. You've got solid studies here that feel very structural and informed. Just don't be afraid to depart from the "standard" loomis head. It gives the average proportions, which is helpful to be rather familiar with, but use that knowledge to assess where a person's proportions deviate from that original model. You already show an inclination towards that in your drawings, but it still feels like it's holding back. It can help to first look at the face and assess just by the how the division of "thirds" are distributed--a larger forehead? short jaw? small middle? This video from later in the course focuses on this topic: https://www.proko.com/s/xU4i Also, if you haven't already, I would recommend checking out the caricature lessons as well, they're very helpful for exercises: https://www.proko.com/s/4AB2 And of course, feel free to post your caricatures any time and tag me if you want feedback. Hope this helps! :)
Reply
Miguel Camilo Téllez
How can I better this please
Write reply...
Drop images here to attach them to the message
Ralph
Place what exactly? The jaw/chin? from what I can tell with my own limited experience, the jaw in the left one is a bit off center. Drawing a middle axis onto your sphere might help you better understand where the middle of the face would be. Also drawing the parts of the form that you do not see might help with that, especially when you are starting out. The lines that halve the sphere ends in a 90° angle to the outline of the sphere on the left for example. That however implies to the viewer, that there is actually a 90 degree angle there, rather than the round form continuing. If you look at the sphere here: https://study.com/cimages/multimages/16/sphere_cross_section7245140437775505592.jpg you can see how the cross contour lines wrap around the sphere and do not just end in a T shape when they hit the outline of the sphere. You also seem to skip the rough sketch/underdrawing for these heads. The line quality is a bit restless, because it consists of many short lines being joined together. To be perfectly honest, a lot of this implies that your grasp on 3D shapes, representing them on a 2D piece of paper and other basics is not that firm yet and I would suggest you practice that first alongside more interesting topics like drawing heads and portraits. I am not saying this to discourage you, but to save you a lot of the headache I cause myself by taking a similar approach to yours. A few years ago, I jumped in at the deeper end of the pool and basically tried to learn how to draw by taking the figure drawing class here on Proko, because it was way more interesting than the basics like drawing straight lines and geometric shapes. I had to find out the hard way however, that I lacked the basic concepts to really learn from the figure course. I learned something, sure, but certainly not as much as I could have and I did not understand why. What really helped me to get a better grasp on 3D shapes in the end, was doing the first lesson(s) on www.drawabox.com as well as their 250 Boxes challenge. (just be vary of the texture exercises in lesson 2) Maybe taking the drawing basics course here on Proko might be an even better alternative as it begins with a better understanding of 2D shapes, line quality and other basics rather than jumping directly into the more complex 3D shapes. So in summary: I would suggest that you get more practice on the basics like line quality, loose sketches/underdrawings and 3D shapes, while also practicing the more interesting topics that actually interest you (because doing only basics is boring.) Try to keep a 50:50 ration between drawings that are fun and practicing the fundamental skills. Otherwise you risk losing the joy in drawing.
Reply
Vue Thao
Nicely done.
Reply
S R
2mo
Here are a few Loomis heads I did based on some references. Low angles are really hard! I find that in general I struggle with figuring out where the side oval goes. I found it helped a bit to think of the head like a box and sketch in the brow line and brow-to-ear angle first, so I could figure out where the side of the head begins.
Write reply...
Drop images here to attach them to the message
@aeyt
I’ve been sent to the head drawing prison until my heads improve, any tips and/or feedback that can help me escape or reduce my sentence are greatly appreciated! I’ve gone with the quick sketch method again to get the training quantity up, these were about 10 minutes each. This was the second batch so so far I’ve drawn about 20 heads this way.
Write reply...
Drop images here to attach them to the message
Martha Muniz
Hello! I did a drawover for some of your heads, I hope it helps :) Overall, it seems like you have an understanding of the features and loomis dimensions, but placing them together as a 3D object is a bit trickier. Try sketching from the skull model in different angles, as this can help get a feeling for the structure underneath and the features, and also I would highly recommend checking out the Asaro head, which is a simplified model of the face planes.
Reply
@aeyt
More heads today, got more lenient with the time limit
Reply
@aeyt
Couldn't find all the references again but here are 2,3 6 and 7.
Reply
@moton
I’ve been having a hard time staying consistent with practice. But I’ll keep pushing through. Any critique welcome.
Write reply...
Drop images here to attach them to the message
Jesper Axelsson
Hi @moton, nice studies! I like how solid the heads feel! I'll do my best to help you further: - The vertical line on the circle, and the center line of the face should be at the same angle in the standard loomis head. - Knowing how to draw the box and the cylinder is a big help when drawing the loomis head, since it will help you with constructing it. If you'd like me to guide you in how to draw the box and the cylinder, draw three boxes from different angles from imagination. Then do the same with cylinders. Draw through the forms as if they were made out of glass. Then tag me (@Jesper Axelsson) and I'll try to take a look. I hope this helps :)
Reply
@moton
Reply
@aeyt
Since the loomis method seems quite technical I went with the quick sketch route to get as many goes as possible with it in a relatively short period of study time. These were 2 minutes each. Didn’t result in the prettiest of drawings but I think this is a good way to get experience with the method. In addition to filling pages with these I should probably try to get some skull studies and general box/perspective practise in also.
Write reply...
Drop images here to attach them to the message
Marco Sordi
2023/8/21. Good evening everybody. I’m in vacation but I can’t stay even a day without drawing. Here’s some character sketches I made using Looomis method. Thanks and have good week.
Write reply...
Drop images here to attach them to the message
Johnathan
Wow do you work for an animation studio?
Reply
Peter Anton
I love your expressions! Your characters feel very alive
Reply
Crimson The Vixen
6/8/2023 Row 5 (Pic 1 = Top, Pic 2 = Middle, Pic 3 = Bottom)
Write reply...
Drop images here to attach them to the message
Crimson The Vixen
6/8/2023 Row 4 (Pic 1 = Top, Pic 2 = Middle, Pic 3 = Bottom)
Write reply...
Drop images here to attach them to the message
Crimson The Vixen
6/8/2023 Row 3 (Pic 1 = Top, Pic 2 = Middle, Pic 3 = Bottom)
Write reply...
Drop images here to attach them to the message
Crimson The Vixen
6/8/2023 Row 2 (Pic 1 = Top, Pic 2 = Middle, Pic 3 = Bottom)
Write reply...
Drop images here to attach them to the message
Crimson The Vixen
6/8/2023 Row 1 (Pic 1 = Top, Pic 2 = Middle, Pic 3 = Bottom)
Write reply...
Drop images here to attach them to the message
@nightfall
i actually started learning the loomis method months ago but not for the sake of making portraits , so now i will try again with the goal of making faces of real peopleee ,im gonna try again tomorrow
Write reply...
Drop images here to attach them to the message
Martha Muniz
Really nice work--just remember to check that the side oval/plane aligns with the front plane in terms of perspective. The head can be simplified into a simple box shape, so that makes things easier to place when practicing different angles. Getting a good understanding and developing an intuition for this placement over repeated practice, like you are already doing, will give your drawings believability and dimensionality and overall a solid foundation for any style you choose to pursue. Hope this helps :)
Reply
Reilly Herbst
I’m feeling a lot more confident with the loomis method. I’m starting to study the eyes and I want to make sure I’m placing them in the right spot. I split the brow and bottom of the nose in half and then I split that in half again. Please any advice and critiques are welcomed! Thank you
Write reply...
Drop images here to attach them to the message
Peter Anton
Looks great! The horizontal lines of the face should be parallel. You have the chin and nose markers going to a different vanishing point than the brows/eyes. On the side plane, you also don't have the jaw going at a steep enough angle (the part that goes from the ear to the chin). Imagine a stunt man driving a motocycle off a ramp. In the original, he goes really high! In yours, he is not getting much air. It would also be good to see an indication for the hair line and mouth
Reply
Michael Paul Caoile
Here are some of what I have done so far. Some drawings are from memory. Trying to do some different angles. I tried a few different posts from reference photos. I also tried to draw the features. I was unsure if the woman looking back had her head tilted a bit. Any feedback would be greatly appreciated. Thank you in advance!
Write reply...
Drop images here to attach them to the message
Give a gift
Give a gift card for art students to use on anything in the Proko store.
Or gift this course:
About instructor
Founder of Proko, artist and teacher of drawing, painting, and anatomy. I try to make my lessons fun and ultra packed with information.
Help!
Browse the FAQs or our more detailed Documentation. If you still need help or to contact us for any reason, drop us a line and we’ll get back to you as soon as possible!
Your name
Email
Message