


Just like the front view , the side view is a flat angle. You are looking directly at the side plane of the head. The process is the same as 3/4 and front view, but I’d like to show you an example just to make it even more clear.
Start with the ball for the cranium and chop off the side plane. Notice that this time the side plane is a perfect circle instead of an oval and it’s in the middle of the cranial mass because we are looking directly at it.
Now let’s indicate this head looking slightly upward with an angle from ear to brow. Make sure that this angle is in the center of the side plane. Establishing the angle from one brow to the other is tricky, since we can only see one side. But keep in mind that if there is a twist, the angle will follow. Also, notice that the side plane is lower on the cranium when the top of the head is pointing at you and higher when its pointing away. I’ll go into more depth in the next lesson on extreme angles. For now, I’ll keep it straight and make the brow horizontal.
A perpendicular vertical line is helpful on the side plane. We will use it later to find the jaw. This should be close to the angle of the front plane of the face.
The curvature of the front plane varies from person to person. Sometimes it will be straight and sometimes curve out from the forehead to the chin. Also, sometimes the chin will be closer to the back of the head, or protrude out from the face. So pay attention to the angle from forehead to the front plane of the chin, as well as it’s curvature.
From the bottom of the ear draw that same angle over to the bottom of the nose. Find the hairline and chin using the rule of thirds.
Now add the jaw.
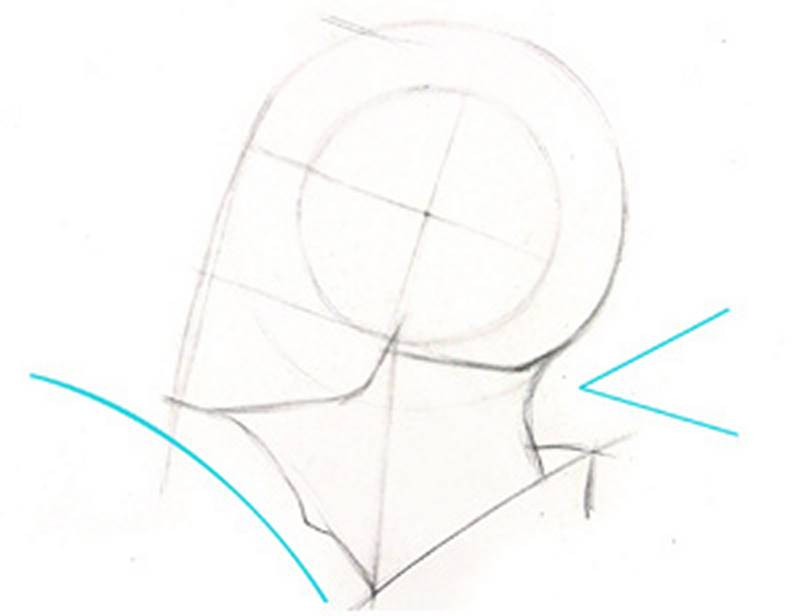
The cranial mass at the bottom back of the head is actually a bit higher than the perfect ball indicates. So, I’ll make that little correction. And add the neck.
When someone looks up, the chin goes away from the body and the back of the head gets closer. So we need to show the neck stretching in the front and squashing in the back.
Okay, here's a little advice on features.From the side, it's hard to draw the features accurately just by following the contour. I like to observe as many angle relationships as possible.
Brow to chin, brow to nose, nose to chin, nose to top lip, top lip to bottom lip, and so on.
Plotting these points first makes it a lot easier.
Now let’s learn how to draw head from extreme angles!

Draw the Loomis Head - Side View
Browse the interwebs for “side profile pictures” and choose your favorite ones. Practice constructing the loomis head from the side view using what you learned in this lesson. This time, try to capture the proportions and characteristics of the subject. Figure out how they are different from the average loomis head proportions and make sure to capture those differences. Observe the major angle changes of the forehead, brow, nose, lips and chin of the contour.


