


You should watch my previous video in which I cover some anatomy and structure of the lips.
Step 1 - The Lay-In
With lips, I start my layins with the landmarks. Find the width and angle of the lips by indicating the corners. Since, she’s looking slightly away from us to the left, the center line will curve out and to the left. This will help me find the placement of the top of the tubercle and bottom of the bottom lip.
With the landmarks in place, lets think about those squishy little pillows. Remember how in the last video I said there are three at the top and 2 at the bottom? On her, the tubercle is flat and you can barely see it.
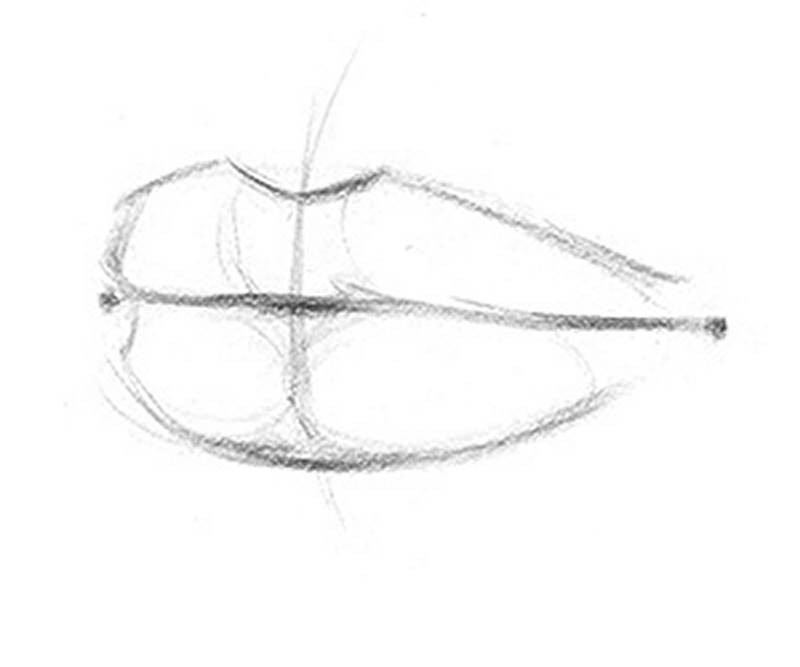
This is actually quite common. The tubercle is just fatty tissue, so its prominence will vary. The wings on the sides of her lips are very round and easy to see. The two pads on the lower lip are subtle, so the separation is kinda hard to see.
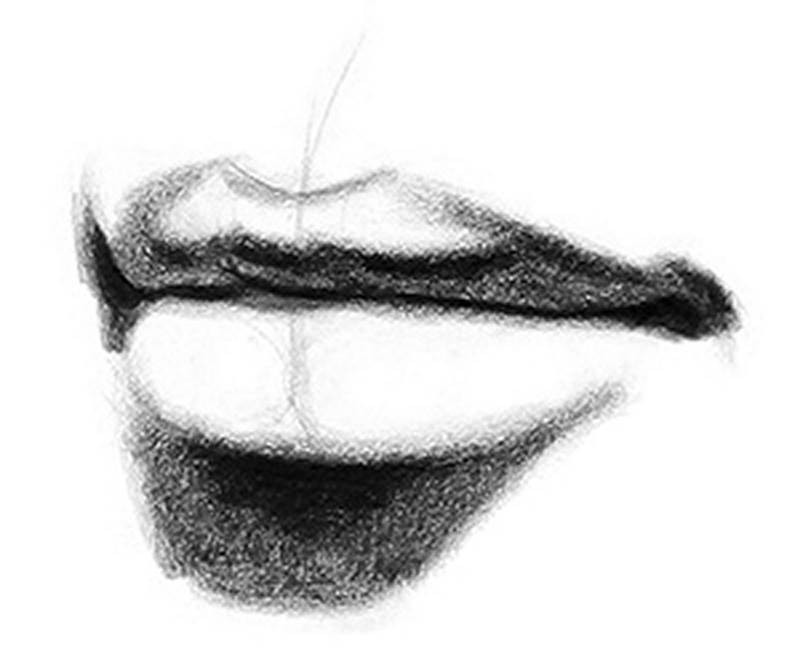
Step 2 – Two-Values
When I start shading a drawing I like to first determine the angle from which the light source is coming from. This will help me visualize what values to make each plane. If the plane is facing the light it will be lighter, if its facing away it will be darker, and everything in between. To figure out the direction of the light source I mainly just look at 2 things. First, the cast shadows. The bottom lip is casting a shadow on to the left side of the chin. So, I know that the light source is at the top right. But it’s not too far to the right, its very close to center. The other indication of the direction of the light source is the highlight. It’s on the right side of the lip, towards the top, same as the light source.

So, all the planes that are facing down and to the left, are in shadow.
Now, notice how there is actually a second light source coming directly from the left. This secondary light source isn’t as bright as the main light source, and for now I’m going to ignore it. Most of the volume is defined by the main light source, so I’ll focus on that first.
The side of the top lip face down and are in shadow, but as we get closer to the middle, her top lip gets very round and the top portion actually points up at the light source.

So, the core shadow in this case is towards the bottom in the middle, and along the top ridge on the sides.
Step 3 – Full Value / Dark Accents
The darkest accents on the lips will almost always be in the corners, along the crease, core shadows, and just under the bottom of the bottom lip. When defining the crease, make sure to think about the overlapping forms and vary your line weight, so it doesn’t just look like an outline.
Step 4 – Halftones and Highlights
The top lip, even though it curves and points up, doesn’t curve enough to point directly at the light source, like the bottom lip. So, the entire lit area of the top lip will all be a darker value halftone. With gradations to define the roundness of the squishy little pillows.
Add some gradations to define the bottom lip. I want the highlight to be bright and sharp, so I need to make sure the halftones around it are dark enough the make the highlight stand out. Once you start making your halftones dark, double check to make sure that the shadows are significantly darker, so that the halftones don’t start looking like shadows.
The corners of the lips have a slight gradation, but the bean shape of the nodes, is not very prominent on her.
I’ll define the plane changes of the region about the top lip. I’m going to take out the cast shadow from the nose. I feel like it would look strange there without a nose casting it. And instead I’ll define the planes of the philtrum.
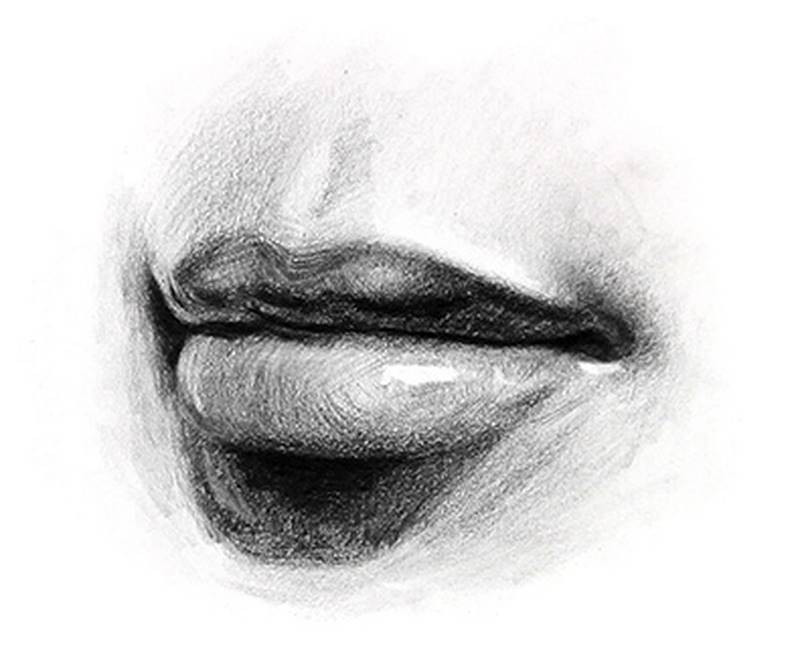
The area under the lips will be mostly halftone since these planes face down.
Now I’ll add that secondary light source and make sure it stays in a supporting role and doesn’t become the main character.
Want to learn more? Check out the next lesson on how to draw the ears!
Draw the Lips
Take a picture of your own lips or find some good photos online (get some with clear light and shadows). Follow my step-by-step lesson to complete the drawing. Rewatch the lesson to review all the anatomical details. Those take a few times to understand.


