
How to Draw the Head – Front View
This lesson has a premium version with extra content. Get it now!
3.6M views
lesson video
How to Draw the Head – Front View
coursePortrait Drawing FundamentalsFull course (35 lessons)
$65
assignments 192 submissions
Andreia Schemid
I am trying to do all the assignments, using the 3D model as reference. Any feedback is appreciated.
LESSON NOTES

Check out the Premium Portrait course to support the lessons and get access to every portrait video.

Drawing the Head - Front View

The Loomis method shows its true power in a more dynamic angle like the ¾, which I demonstrated in the previous lesson, but it still works on flat angles like the front and profile.

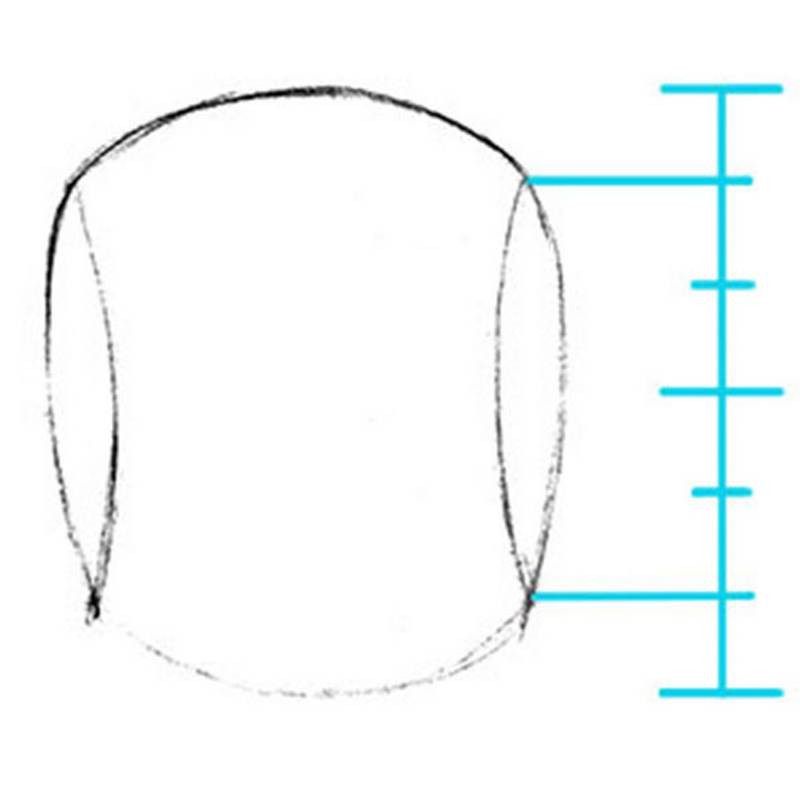
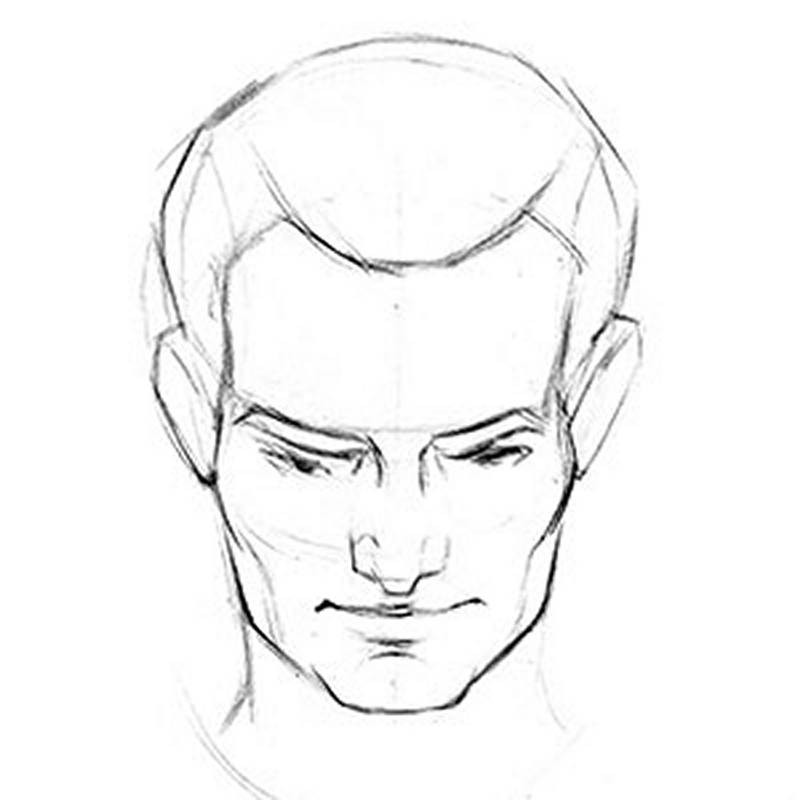
I’ll start with that circle for the cranium, and chop off the sides. Remember, the height of the side plane should be ⅔ of the circle. You can see a very thin piece of each side plane, since the front of the head is thinner than the side.

Now let’s determine whether the person is looking up, down, or straight ahead. A good way to do this is by looking at the distance from ear to brow.

Center of Circle
angles of the head front

If the ear is below the brow, then the person is looking up and the brow line will be above the center of the circle. And the opposite if the ears are above the brow. If they are at the same level, then the person is looking straight ahead and the brow will be in the middle of the circle.

Earlier we established the side plane as ⅔ of the circle. This is important because half of that side plane is ⅓ of the face. So, we can take that distance and drop it from the brow to find the bottom of the nose. And again to find the bottom of the chin. Bring it up from the brow to the hairline.

Then attach the jaw to the cranium. The sides of the jaw usually get thinner at the bottom. Establish the width of the chin and complete the jaw. Add the centerline and the neck – the front view is the only angle when the center line is actually in the center of the head shape. Usually it will be farther in the direction the person is looking. The ears sit in the middle third and usually end at the outside of the original circle.
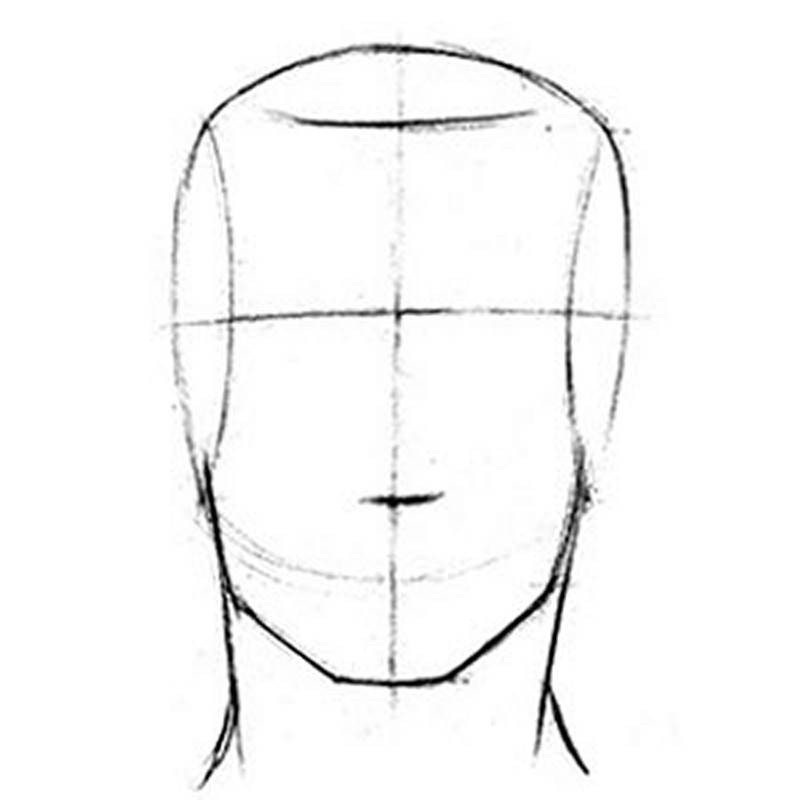
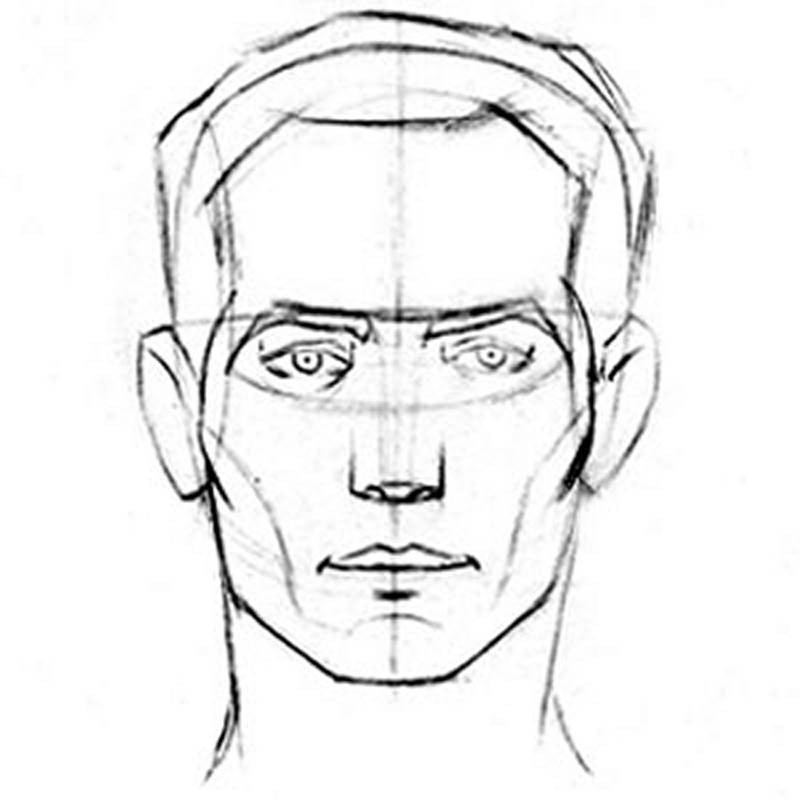
angles of the loomis head

Before we add the thirds, let’s take a little side trip and explore foreshortening.
forshortening example

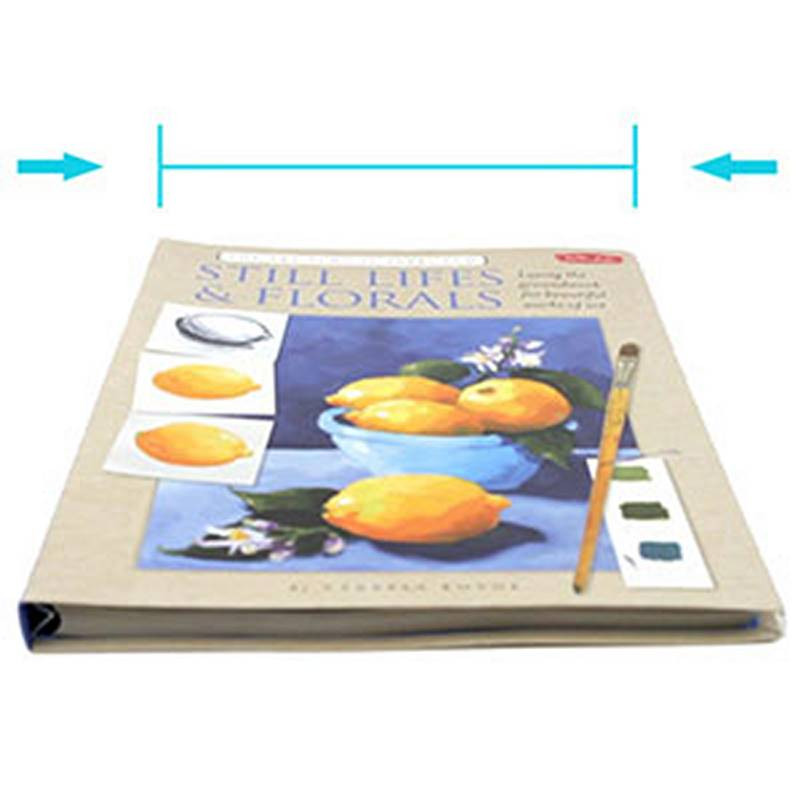
"Foreshortening occurs when an object appears compressed when seen from a particular viewpoint, and the effect of perspective causes distortion."

This can easily be seen when looking at a flat surface, like a book. When looking directly at the book, we see its full length. But, if we move to a different angle, perspective distorts its length. As things go further away from us, they appear smaller.

See that? That’s foreshortening.

Applying this concept to the face, means that our "perfect thirds" will now be distorted. The third closest to us (in this case the forehead) will be just about the same as half of the side plane. And the other two thirds will get progressively smaller.

Attach the jaw, neck and centerline. The ears are very important in this case because they help to show the downtilt. Always put them in the bottom half of the oval.

And of course, the features.
loomis head from above

Now let’s learn how to draw the side view!

DOWNLOADS
txt
how-to-draw-the-head front-view-transcript.txt
3 kB
mp4
How to Draw the Head - Front View.mp4
343 MB
ASSIGNMENTS

Draw the Loomis Head - Front View

Draw some more loomis heads from front view. Draw some looking up and some looking down and don’t forget about foreshortening.

Rhubarb
2yr
Used photo references for the female and male sets of heads, but not the first two individual ones. I studied a bunch of photos and looked for differences between the average female and male head, but with so many combinations of different camera angles, focal lengths, and facial features, it was difficult to get any clarity on that. The main differences I found were the angles of the jaw, shape/width of the chin, and size of the ears. Did Loomis also come up with a way to construct the average female head but we just didn't get a demo for it? Or do you simply adjust as you go along? 🤔
Patrick Bosworth
Really great studies! You captured a diverse range of faces and features! Overall, you found excellent areas to hone in on when constructing different face types. Subtle changes to the angle of the jaw and shape of the chin will yield dramatic differences in likeness. In Loomis's Drawing the Head and Hands he does cover a way to construct an average female head, but the rhythms and method of construction are nearly identical to male heads. His focus when drawing female heads is mainly on how to handle the subtle differences in the proportions of the underlying structure of the male and female skull, and how to use those differences to guide your portrait construction. Take a look at the 3D male and female skull models in the "Features" section and do a few studies from the front, side, and 3/4 views. Keep an eye out for proportional differences particularly in the jaw, chin, cheekbones, brow ridge, nose etc. In general, Loomis suggests softening the angular/broad features of the male head when approaching female portraits. So if you learn the blockier more angular male head construction as a base, you can use that as a framework to whittle it down and soften it until you reach your desired likeness for a female character. A more slender, rounded jaw line, pointier chin, smaller nose, with a slightly more slender, graceful neck width will quickly visually separate the female characters from the blockier male head/neck. Keep up the great work, the more studies you do the more you'll start to piece together how you like to show differences in your portrait construction methods. Hope this helps!
Jack Mills
2yr
front view sketches
@rafalmichalkrawczyk
Julia Pe
2yr
Front head downtilt. I think I want to do a whole series of the head in order to understand how the perspective works.
Stephen Clark
You asked for help on this one but this looks like you're grasping the core concepts well so far! If you do that series of them, it'll help to bring out any areas where you may need more practice. Personally, I really like the look of the 360° exploded diagrams like this one. It's a cool image to look at AND handy practice. Ask for help on it again so I can see it later when you do!
Julia Pe
2yr
@dcordes
2yr
First two took an hour each. Last two perhaps 30m, so big speed increase as I got familiar with the form. The foreshortening in the upward facing head (2 and 6) kinda threw me. 6 is as I expect the relative measurements to be as stated in the lesson, 1/2 the height of the cut oval for the close to viewer sections and reducing in those more distant. 2 looked like what 6 does, squashed, until I reworked it by eye without measurements. Did I maybe foreshorten too much? I only took off a few mm's, so could use some feedback there. I also enjoy seeing the more masculine (1, 6) and more gracile faces (4, 5) based on chin width, jawline shape and cheek gesture. Another great practice!
@xdejong
3yr
I don't really understand how to do this, can someone help me please
@desmond68
2yr
The features aren't in line with the center line.
carla toms
3yr
Yeah I’m struggling, too. I’ve been breaking the Loomis head into steps: 1) draw a circle 2) draw a sphere in perspective 3) just the cranium I’ve been using sketchfab to generate the references. For the “circle in perspective” i used a basketball, which has a set of perpendicular lines on it to practice from. For the cranium, there are Loomis head references for just the cranium to practice from. I’m getting better, little by little, and I’m starting to see things in more 3d than I did a few days ago, which makes me hopeful.
@grugrugru
3yr
I couldn't get the top angle right on the third one
S R
3yr
Some front view Loomis heads. I'm finding the jaw angles especially tricky when the face is tilted downwards.
@artfeedback
I asked proko this but not sure if he will answer. When he says a thin piece of the side plane can be seen from the front, does that mean the side plane isn't totally flat, but curves a bit toward the front? Or does that mean when seen from the top, it is tilted kinda like the first image? In that case, in a profile view, wouldn't the side plane be slightly to the front of the head instead of right in the middle? Or am I misunderstanding something?
Peter N
3yr
What Thieum said. Additionally to answer the other question, yes, the profile would not be two concentric circles. The inner circle would be slightly elliptic and slightly towards the face. No need to overthink it though. It is a simplification after all :)
Thieum
3yr
The front of the skull is narrower than the back. Side planes are therefore not parallel , they converge towards the front. So you can see them a little when you look at the skull from the front (but not from behind)
@draft_al
3yr
You are correct!
@nightfall
3yr
im having some trouble with the jaws and i feel like theres something wrong but i cant pinpoint itt but heres my attemptt
Liandro
3yr
Hey, @nightfall, these are nice studies! Overall, I imagine you could be facing sobre difficulties with perspective and proportion. Remember that, if the head tilts up or down, the basic proportions should change accordingly. I’m attaching a draw-over with some additional notes. Please let me know if you have any questions. Hope this helps!
Usagi D. Soma
30/7/2023 Looking Forward & Downwards.
Usagi D. Soma
23/7/2023
Alex S
3yr
I'm pretty sure I messed up the side planes of the heads. I know that they're typically 2/3rds the height of the cranium (ball), but are there any tips on drawing the curves that form the front and back of the side planes?
Arianna Dall'Alba
Hi guys, what do you think about my attempts? I'm a bit discouraged because it's seems something is missing or wrong, sigh. And I can't figure out where is the problem. I'm just pretty proud of the lateral view by the way.
Auzul Vox
3yr
realized too late that I forgot to carve the initial circle, and just straight draw the oval
@oka1
3yr
hello, I'm new here this is my drawing, please give feedback.
Nelly Skeen
Vue Thao
3yr
@Nelly Skeen This is a special tip for you to position Loomis's head at any angle. Draw a vertical line in the center that runs through the sphere.
Nelly Skeen
Bryan
3yr
I still get lost in chin placement when it overlaps the ball shape.
Help!
Browse the FAQs or our more detailed Documentation. If you still need help or to contact us for any reason, drop us a line and we’ll get back to you as soon as possible!