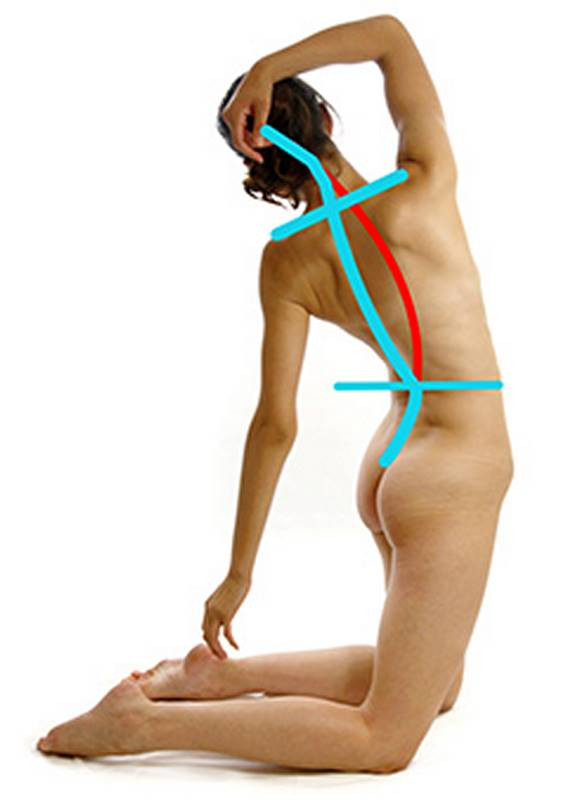
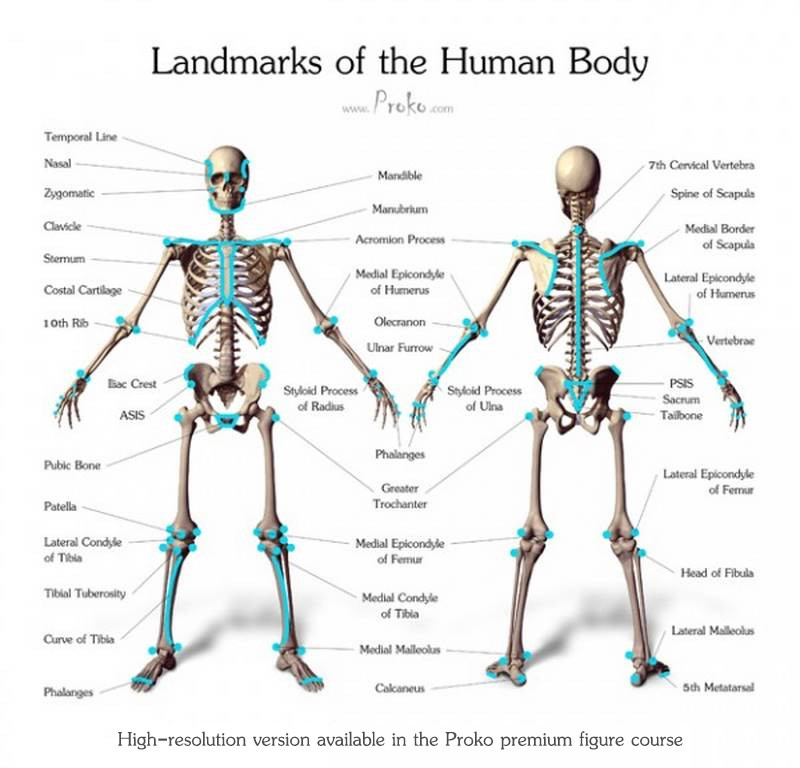
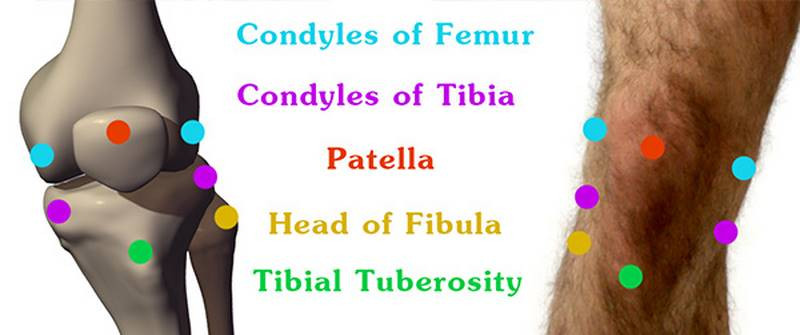
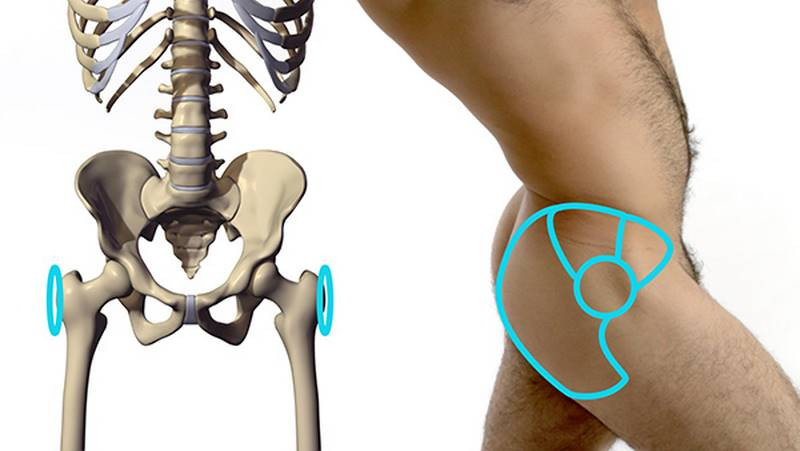
Landmarks of the Human Body
This lesson has a premium version with extra content. Get it now!

Figure Drawing Fundamentals

Landmarks

Landmarks of the Human Body

603K
Mark as Completed

Landmarks of the Human Body

603K
Mark as Completed

The best way to learn the landmarks is to draw from life or from photos and try to identify them. Use them in the construction of your drawing. Attempt them on your own before you watch my examples below.

Post your work and participate.

Submit your assignments here
Drop images here to attach them to the message
Newest
@robot0906
I had a bit of trouble identifying the landmarks with this one. I really want a critique on what I could better for next time.
Write reply...
Drop images here to attach them to the message
Kevin C
A few of my landmark drawings. Enjoyed this one and definitely got more in the swing of things the more drawings I did (posted here from oldest to most recent). I definitely found the landmarks of the back the hardest to visualize. I would draw the PSIS, the delt and then being like "uhh ok, hard to see from here." Though I tried.
Write reply...
Drop images here to attach them to the message
Martha Muniz
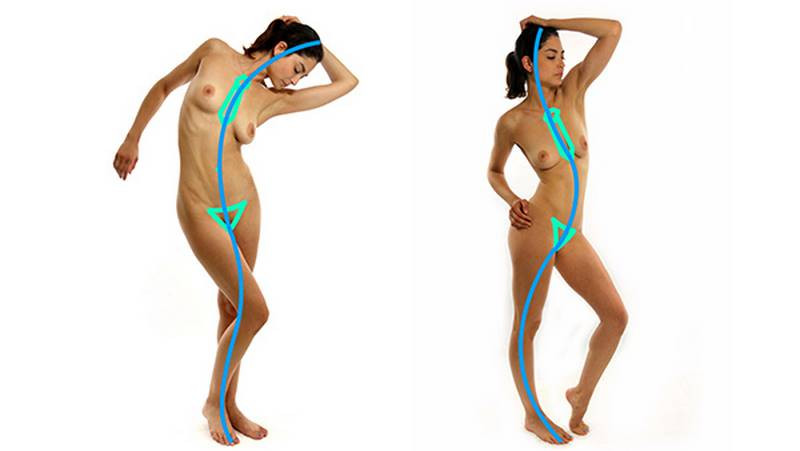
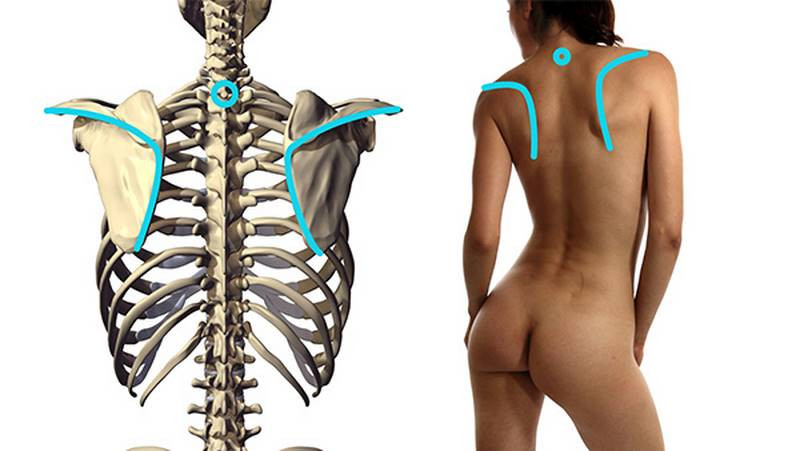
Looking good, there's a big improvement from the oldest to the most recent--so good work :) For the back, after already having placed the ribcage, spine, and PSIS, what helps me the most is to start off with the scapulae, as this serves as a key landmark for the major muscles of the back, like the trapezius, erector spinae, and placement/connections to the arm. Placing the scapula first also gives you information about how the muscles will stretch or compress against it. Also, continue to look out for the rhythms of the body's structure, as the body has a natural asymmetrical ebb-and-flow rhythm throughout. Even looking at it for a more general gesture, the way the figure is posed will often have some compression and stretch occurring, so being aware of it is helpful information to both your initial lay-in and the form of the muscles on the body as they respond to the motion. Hope this helps!
Reply
hArtMann
Took my time to find rhythms, design shapes and get proportions right while also trying to identify the landmarks. After practicing more the rhythm lesson in the beginner course, I'm definitely seeing a massive impact in my figure drawing.
Write reply...
Drop images here to attach them to the message
Jesper Axelsson
Hi @h3art, nice studies! Good job searching for the landmarks. I'm glad that you're benefiting from the Drawing Basics course😎 - One thing that makes these points useful is that angles are created between them. Asis to asis gives you the angle of the hip; ribcage corners give you the angle of the ribcage; acromion process to acromion proces gives you the angle of the shoulders ≈ angle of ribcage. These angles are useful for communicating the pose. In the second reference for example, note how the hips are tipping to the right. Capturing this would have given your drawing a better sense of weight, as the straight leg pushes the hip up. The ribcage counters by tilting the other way, for balance. A similar thing for the hips could have been done in the third drawing. The shoulders clearly counter the angle of the hips. You got that in your drawing, but you could put the upper body a bit more to the right, for balance. I hope this helps :)
Reply
@thesmokingrotoscope
This one ended up being trickier than I thought it'd be, so I'm definitely going to give the demos a watch while I wait for critique and to prep what will likely be a second pass at the assignment. I sadly don't have much more to say than that.
Write reply...
Drop images here to attach them to the message
Martha Muniz
Hey there @thesmokingrotoscope! I think it would be helpful in your process to start out with gesture and structure--thinking about the spine, pelvis, ribcage, and any other constructions you find helpful, like arms and legs for instance, or breaking the figure up into shapes fow now (or forms, which will be explained in the next lesson). Incorporating this into your process can both be helpful in seeing how the landmarks connect together, and also help you lay in the initial drawing much easier--it can be rather tricky to freehand the outline of the figure all at once! Gesture and construction serve to help you get started with the figure and also give more information to viewers about the feeling and 3-dimensionality of the figure, so don't feel limited to just the outline of the figure. Let me know if you have any questions. Hope this helps!
Reply
@grugrugru
Drawings for this week, oldest to newest. Critique would be very much appreciated.
Write reply...
Drop images here to attach them to the message
Liandro
Hey, @grugrugru, pretty good work! Seems like you’ve practiced quite a lot with this assignment. If you allow me, I’d have two main comments: . Since this assignment is specifically about landmarks, I think it can be helpful to direct as much energy as possible to acknowledging the landmarks and where they’re located on the body. I see that your drawings show a lot of the muscle anatomy, but hopefully this didn’t distract you from keeping your main focus on the bony landmarks as you were drawing. One strategy that I found to be helpful to keep my attention on the landmarks when I’m doing this assignment is to visually highlight them in some way, whether by using a different color or a different line weight, or maybe even by pulling some arrows and writing their names on the side. I’m attaching a visual example of what I mean. . I'd also suggest always keeping the gesture in mind! Within the logic of Stan’s Figure Drawing course, the point of knowing the landmarks is to use them as a tool to help with the gesture and the proportions. When considering gesture, don’t be afraid to exaggerate and push the poses - then, once you have a nice gesture sketch, go over it one more time to add the landmarks or any other layers of development that you wish. Hope this helps! Keep up the good work.
Reply
@needsmuchhelp
here are my attempts  please let me know what I can do better
Write reply...
Drop images here to attach them to the message
Noe Luis
Here are two drawings for the lesson. Capture different flows of the models. The only landmark that I am confident to say that I pin pointed is the legs or the wrench as Proko likes to call it.
Write reply...
Drop images here to attach them to the message
Martha Muniz
I really love that first gesture, it really captures the man's twist with great flow throughout. I also like the gesture in the woman's legs, great S curve from the tibia to the thigh on her right leg as well as bringing the energy up to exaggerate the hip position. I do think the flow could be further improved for her top half--the torso appears bigger in proportion than in the reference, which causes the drawing to feel more horizontally static, and bringing this in can also lead to bringing in the shoulders closer. This will help continue the upwards gesture you started with the legs and the push created by the head into the shoulder.
Reply
Samuel Sanjaya
I did another figure drawing. I personally feel that my proportion look more correct by finding landmark like this, rather than meticulously doing the pencil measurement and the envelope method and just do the measurement for the distance between the landmark itself. Any feedback or critiques will be greatly appreciated.
Write reply...
Drop images here to attach them to the message
Noe Luis
Okay I'm pretty sure I'm spot on the bony landmarks Still very new to the exercise so maybe there is something I'm missing on I don't know. Anyway I like how did the gesture to this model that's all I got to say.
Write reply...
Drop images here to attach them to the message
Martha Muniz
Hi! Something that can help more generally for observational drawing, and can be especially useful for studying poses like this one where the model isn't standing straightforward, is to measure the middle of the subject between top and bottom, and use that landmark for the middle of your drawing. Right now, I notice the proportions are skewing smaller for the bottom half, and measuring halfway will show the bottom leg as spanning the entire bottom half of the area in the reference. Also, keep a look out for the tendency to make the feet and hands too small. You did a great job nonetheless, and I hope these few tweaks will help as you progress forward :)
Reply
Billy Morris
Here are some of my landmark studies before looking at the examples. (Photo refs from lineofaction.com) Not quite sure about the best way to approach these. What I did was draw right next to the photo references with no time limit and no erasing. Maybe there is a variable here I should change to approach this assignment more effectively? Any sort of critiques, thoughts or feedback would be much appreciated.
Write reply...
Drop images here to attach them to the message
Billy Morris
(Photo refs from lineofaction.com) Some more after watching the lesson examples not quite certain how to depict some of these lands marks in the drawings such as the smaller parts like the acromion process or the epicondyles but I plan on trying to figure this out while I move forward with the next lessons.
Reply
John Connell
This stuff is NOT easy! Ugly as these sketches are, I am actually starting to feel like maybe someday I may actually get better. An anatomy book and a little skeleton model made a huge difference! All suggestions or observations welcome!!
Write reply...
Drop images here to attach them to the message
@ugoduardo
hi :D this is my assignment, I wanted to know if I’m correct.
Write reply...
Drop images here to attach them to the message
Samuel Sanjaya
My landmark assignment. Still have trouble with proportions, I think i focused too much on the angle that i neglecting the form. Any feedback/critiques will be appreaciated
Write reply...
Drop images here to attach them to the message
John Harper
Another reason I like the wax pastels is that I have to be okay with the marks I put down because they are hard to erase. It is helping me gain some confidence in my mark making.
Reply
John Harper
Here is my quick sketch try.
Reply
John Harper
Hey Sam, good try. I grabbed the first one and gave it a whirl. I put some notes on the drawing. They are crucial. Most important, have fun and remember those accidental, happy, little trees, to quote the man. RIP Bob Ross.
Reply
jon
5mo
some landmarks w/ examples from Stan too any critique is welcome!
Write reply...
Drop images here to attach them to the message
Samuel Sanjaya
my landmarking, also relying heavily on angles relations and mannequin. Any feedback or critiques will be appreciated.
Write reply...
Drop images here to attach them to the message
Gregory Comey
First two are my own attempts. Last three are from following along. Feedback would be highly appreciated.
Write reply...
Drop images here to attach them to the message
@matthews
Beginner artist here trying to seek critiques for improvement. Here are a few examples to look at.
Write reply...
Drop images here to attach them to the message
@decentworking
Here are a few more, after watching Stan’s Back example. Any critique welcome!
Write reply...
Drop images here to attach them to the message
Steffen Nielsen
I think these look great! You could probably push your gestures even more, if you wanted to ie. finding the flow and gesture lines. As for this lesson though you seem to be aware of and adding lots of the landmarks, keep it up these are really good.
Reply
@decentworking
First four drawings - I have not watched Stan’s examples yet. Looking forward to drawing more gesture/muscle and less contour.
Write reply...
Drop images here to attach them to the message
Steffen Nielsen
Hi everyone! Here's a bunch of exercises I've done for this lesson. Any feedback is super appreciated; I feel like my main struggle was pinpointing the corners of the scapula (as you can see I've had to correct myself) - is it just that it can be hard to see in certain poses or am I looking at it wrong? I'm also unsure if I'm placing the ASIS properly? Thanks so much in advance! :)
Write reply...
Drop images here to attach them to the message
@decentworking
I love your sketch style. Vilppu inspired? I also have issues identifying the scapula location in stretched poses or on people with a little more fatty tissue. I think more study of in-depth anatomy, and repetition, is the fix.
Reply
Give a gift
Give a gift card for art students to use on anything in the Proko store.
Or gift this course:
About instructor
Founder of Proko, artist and teacher of drawing, painting, and anatomy. I try to make my lessons fun and ultra packed with information.
Help!
Browse the FAQs or our more detailed Documentation. If you still need help or to contact us for any reason, drop us a line and we’ll get back to you as soon as possible!
Your name
Email
Message