How to Draw the Head – Side View
This lesson has a premium version with extra content. Get it now!
1.9M views
lesson video
How to Draw the Head – Side View
coursePortrait Drawing FundamentalsFull course (35 lessons)
-20%
$52
$65
You save $13
assignments 52 submissions
@elkad
A few side view sketches :)
LESSON NOTES
side cranium circle drawing

Just like the front view , the side view is a flat angle. You are looking directly at the side plane of the head. The process is the same as 3/4 and front view, but I’d like to show you an example just to make it even more clear.

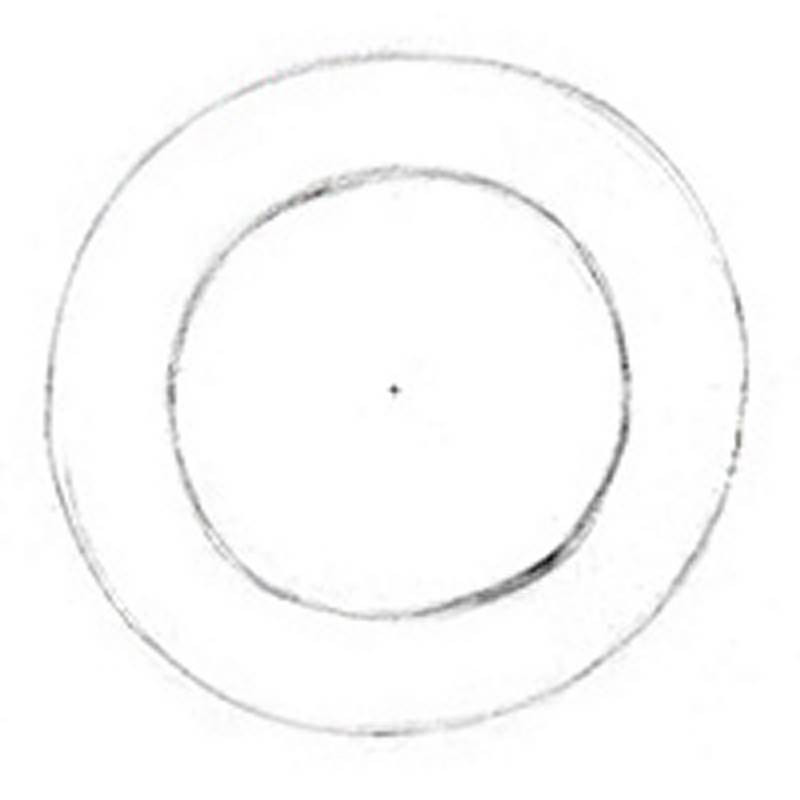
Start with the ball for the cranium and chop off the side plane. Notice that this time the side plane is a perfect circle instead of an oval and it’s in the middle of the cranial mass because we are looking directly at it.

Now let’s indicate this head looking slightly upward with an angle from ear to brow. Make sure that this angle is in the center of the side plane. Establishing the angle from one brow to the other is tricky, since we can only see one side. But keep in mind that if there is a twist, the angle will follow. Also, notice that the side plane is lower on the cranium when the top of the head is pointing at you and higher when its pointing away. I’ll go into more depth in the next lesson on extreme angles. For now, I’ll keep it straight and make the brow horizontal.

A perpendicular vertical line is helpful on the side plane. We will use it later to find the jaw. This should be close to the angle of the front plane of the face.

The curvature of the front plane varies from person to person. Sometimes it will be straight and sometimes curve out from the forehead to the chin. Also, sometimes the chin will be closer to the back of the head, or protrude out from the face. So pay attention to the angle from forehead to the front plane of the chin, as well as it’s curvature.

From the bottom of the ear draw that same angle over to the bottom of the nose. Find the hairline and chin using the rule of thirds.

Now add the jaw.

The cranial mass at the bottom back of the head is actually a bit higher than the perfect ball indicates. So, I’ll make that little correction. And add the neck.

When someone looks up, the chin goes away from the body and the back of the head gets closer. So we need to show the neck stretching in the front and squashing in the back.
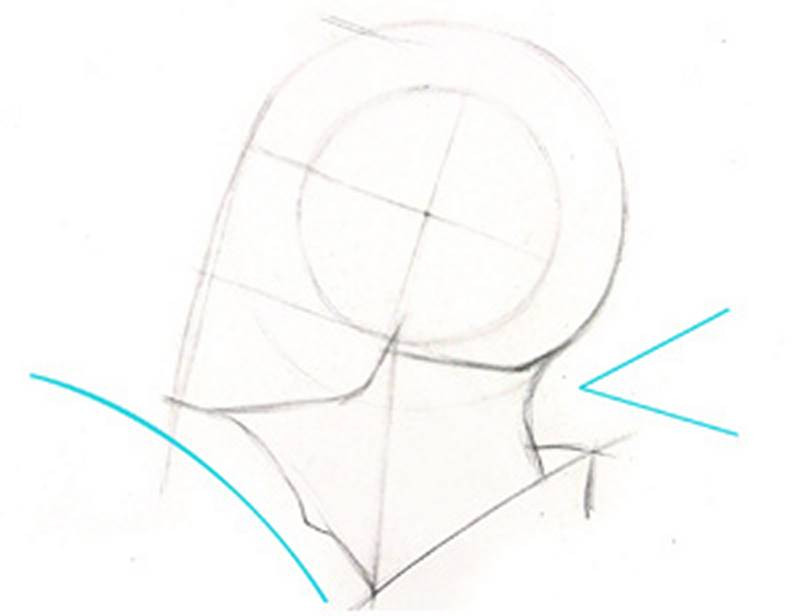
proko neck stretching drawing

Okay, here's a little advice on features.From the side, it's hard to draw the features accurately just by following the contour. I like to observe as many angle relationships as possible.

Brow to chin, brow to nose, nose to chin, nose to top lip, top lip to bottom lip, and so on.

Plotting these points first makes it a lot easier.

Now let’s learn how to draw head from extreme angles!
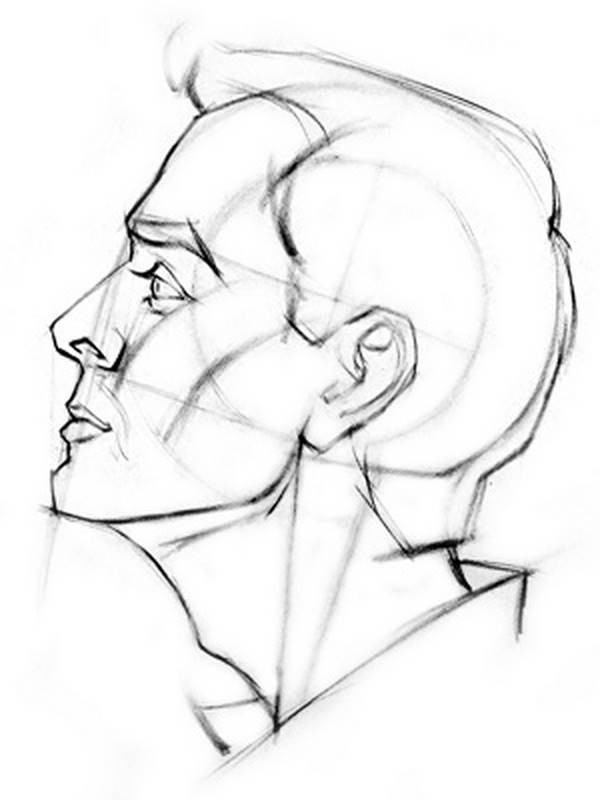
side view loomis head
DOWNLOADS
txt
how-to-draw-the-head-side-view-transcript.txt
3 kB
mp4
How to Draw the Head - Side View.mp4
335 MB
ASSIGNMENTS

Draw the Loomis Head - Side View

Browse the interwebs for “side profile pictures” and choose your favorite ones. Practice constructing the loomis head from the side view using what you learned in this lesson. This time, try to capture the proportions and characteristics of the subject. Figure out how they are different from the average loomis head proportions and make sure to capture those differences. Observe the major angle changes of the forehead, brow, nose, lips and chin of the contour.

Newest
Michael
15h
some tryouts from the side, must try couple more to capture the characteristic
Christopher Corbell
Here are my side view heads with reference photos (found on Pinterest). One thing I'm trying to notice is whether (and how) the loomis head rhythm from top of ear to chin appears in real models, and whether other rhythms are also there to notice. Also, trying to fake it with the back of the head shape when you can only see a layer of hair.
faye zhang
1yr
Reminder: everyone who posted is brave for pushing through and meeting the challenges. It’s easy for bystanders to critique, but only we know how difficult it was and the mental obstacles we had to overcome to draw. So keep at it! The eye is too low on my drawing, but hey drawing along is not easy.
maciek szczech
Thank you @faye zhang. Comment nesting does not allow me to reply directly under your question: Quite a long time ago, without really studying and understanding the basics that I took seriously at the beginning of this year. I hope you don't mind such an enigmatic reply, but in the end it doesn't really matter. We are all different, some will be great at what they do relatively quickly, others will not achieve much even with hard practice.. although hard practice does pay off
maciek szczech
Good reminder. Good profile sketch. Keep up practicing!
Melanie Scearce
Agreed, it takes a lot of courage to make a drawing, even more to post it! Nice work here 👍
soupbonep Lee
soupbonep Lee
From the free Loomis series it wasn't supposed to look like Stan, but I used a screen shot at the end to finish it as he was not only the narrator, but the head model. I hope you think it is a good likeness.
Vera Robson
@smeet
1yr
this is great
Gannon Beck
Well done!
@sharpjab
1yr
Nicole Guz
1yr
Pedro Branco
Here's a side view drawing. I lost the reference sadly.
Jack Mills
2yr
Side view sketches.
@kaskaderski
@dcordes
2yr
Can't wait to get to eyes/nose/ears/mouth so I have a better idea of what I'm doing there. Profile, and the attention to relative angles was really useful exercise. I made very large improvements over the course of this exercise. Still struggling with shading, but getting a bit better. Ratios are difficult as well. I'm happiest with 5, although the head is a bit stretched.
@grugrugru
2yr
S R
2yr
It's tricky! I often feel like I don't have enough space for the jaw.
S R
2yr
I tried another four, to incorporate feedback. Getting a little closer.
Martha Muniz
When drawing the profile view, keep in mind that the features typically protrude outwards from the flat front face plane. This will be in varying degrees from person to person, so it helps to note the curvature created from the forehead to the nose to the jaw. This extra space can account for the room you feel is needed for the jaw area. Hope this helps!
@nightfall
2yr
heres attempt for todayy
*Reworking Profile* From The Game.
6/8/2023 Side View Starter.
*Reworking Profile* From The Game.
30/7/2023 Side view of the head.
Alex S
2yr
I'll need to work on features a bit more... If it's not the proportions that are off then it's the shapes
Martha Muniz
There's a tendency to keep the features close to the loomis center line, and while this proportion changes from person to person, generally the features protrude further out. It helps to note down the angle of this curvature, something like forehead to nose to chin. It also helps with placing the smaller curves, like the mouth, eye sockets, nostrils, etc. but feel free to continue noting down the smaller angles for these on the reference itself.
Vue Thao
2yr
I like the lower right. The Loomis method well spot on.
Samuel Sanjaya
Side view assignments. I really need to watch out for the proportions. I hope I can get some feedbacks
@oka1
2yr
please give feedback
Pocopa Chan
Help!
Browse the FAQs or our more detailed Documentation. If you still need help or to contact us for any reason, drop us a line and we’ll get back to you as soon as possible!