


Premium extended version of this video and full Figure Drawing Series available – Figure Drawing Fundamentals
***
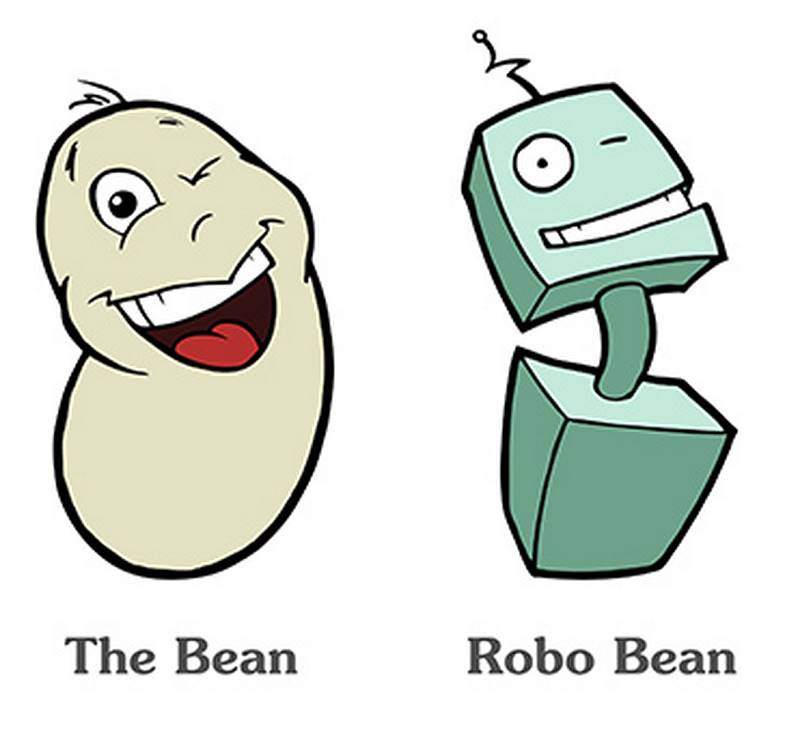
In this episode we'll add structure to the bean to create the Robo Bean.
If you haven't seen the bean, structure or landmarks videos, you might be a little confused with some of the things in this video because we'll be taking the bean and adding structure to it based on the landmarks.
Why use Robo Bean?
In the last episode, we met the Bean. After you're comfortable with the bean, it's time to move on to his friend, Robo Bean.
The Robo Bean is great because it combines the motion from the bean with 3d form. Now we're able to show the side planes to show rotation and top or bottom planes for tilting and leaning. These drawings are going to be extremely stylized and by no means is it a finished drawing or how I'm saying you should draw.
This is however exactly what I'm thinking about when I analyze the form. So showing this simplistic exercise is a great vision into the thought process. It's also just a really good exercise to practice to see and draw three-dimensional form. You should be able to freehand cylinders and boxes from any angle and get the perspective right as I explained in the structure video.

Review cylinders and boxes
This exercise is very similar to the bean exercise except now instead of using balls we’re gonna use boxes. Boxes are little bit more advanced, but more effective because now you have plane changes to better explain the orientation of the forms. Spheres are not effective in showing perspective as I explained last week. You can't see a sphere as three-dimensional unless you add tone. Without tone a sphere is just a circle.
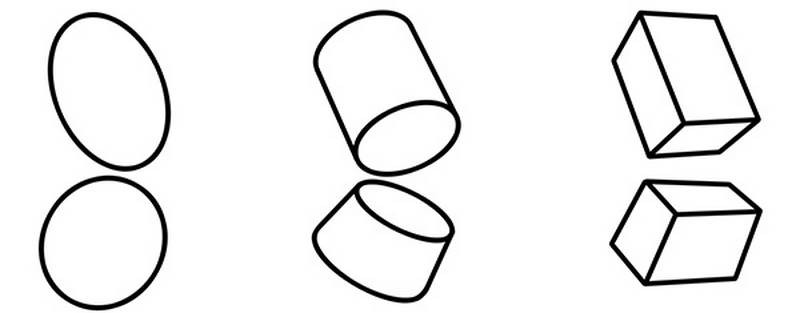
A cylinder introduces perspective because it has a plane change at the top and bottom. A box shows even more perspective because it has a plane change from the front to the side plane, along with top and bottom planes.
Landmarks
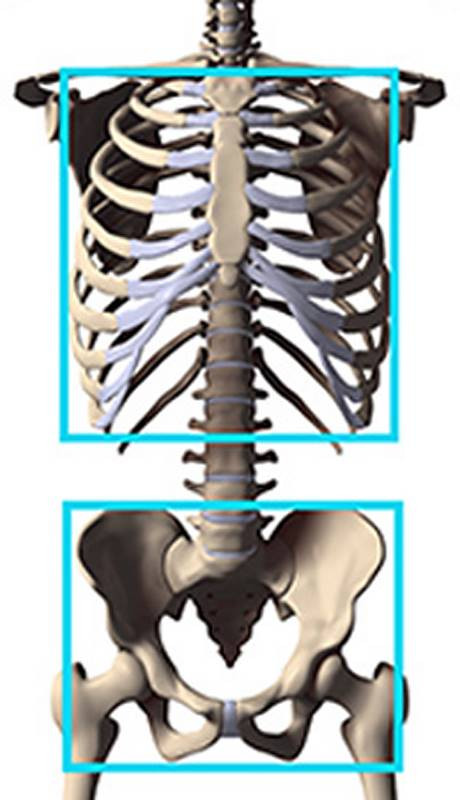
Ok so let’s take a look at the details of the Robo Bean and what exactly the boundaries represent. The top box is the rib cage and a portion of the shoulders. The bottom is the pelvis combined with the butt.
Remember those landmarks we went over last week? Well they're really going to come in handy as you construct the Robo Bean. Almost every edge or corner falls on a specific area along the body. Let’s start at the top!
On the backside, the ridge of the spine of the scapula provides the edge between top and back plane. Just stretch that back plane to the length of the ribcage.
Sometimes it's hard to tell exactly where those corners are because the ribcage in the back is covered by the muscles.
But the exact points are not important. Just make sure to get the length and angle correct.
The top plane is everything between the scapula and clavicles. You have to ignore the trapezius muscle to see this. This is a very important plane to show when the body is leaning forward or backward toward us. Usually I'll even extend this to the edges of the shoulders, but we'll save that for the mannequinization video.
Connect the side planes for the sides of the ribcage.. And the bottom plane doesn't matter much. The space between the boxes is filled with guts and other fun stuff.
Let's move on to the bottom box.
The most useful corners, I feel, are the ASIS. The corners on the front of the pelvis. They're extremely important to find the angle of the pelvis. Unfortunately, there aren't any good points to indicate the bottom of the front plane. You'll just have to use your imagination and extend them from the pubic bone. Follow the edge of the iliac crest until the PSIS for the side planes. The back plane starts before the PSIS, at the peak of the iliac crest. The rounded part at the bottom of the gluts is the edge where you can show a bit of a bottom plane.
Together all these points form the two boxes connected by the spine, which moves the boxes.
Differences between genders
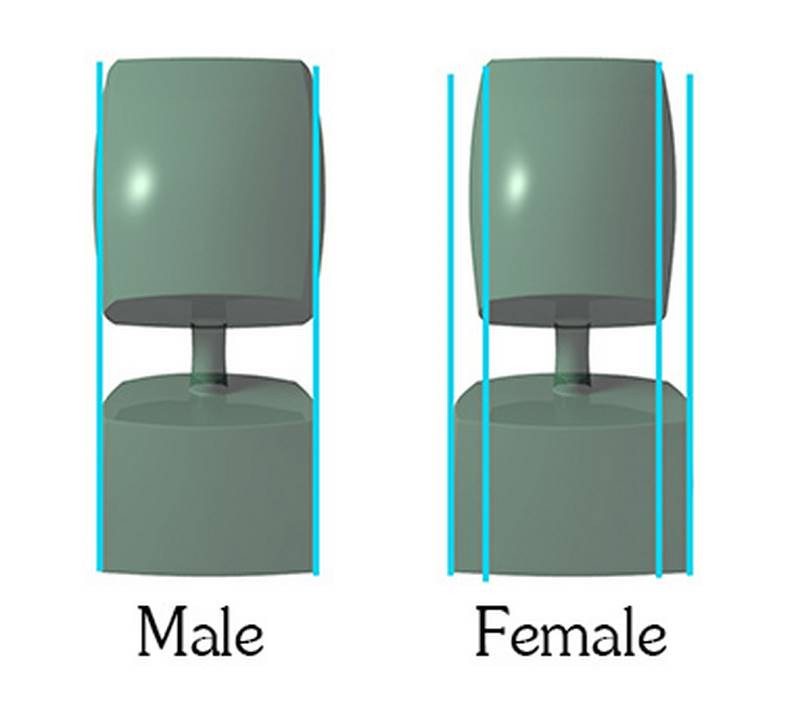
The proportions are going to vary from person to person. That’s why its good to know what landmarks youre looking for on the body. So that you can analyze those points on the person youre drawing and measure the proportions. Generally, the ribcage and pelvis on a male are about the same width. On a female the ribcage is thinner and the pelvis is wider. There’s variation within genders – some men have wider hips and some women have wider shoulders. Mentally identifying the body type before you draw it will help.
Motion
With the addition of the top, bottom and side planes we can show the motion and position of the body with more detail than with the bean.
The corners help to show the tilt side to side with the angles from one side to the other.
The top and bottom planes help to show the leaning forward or backward
And the side planes help to show twisting.
More about the Twist
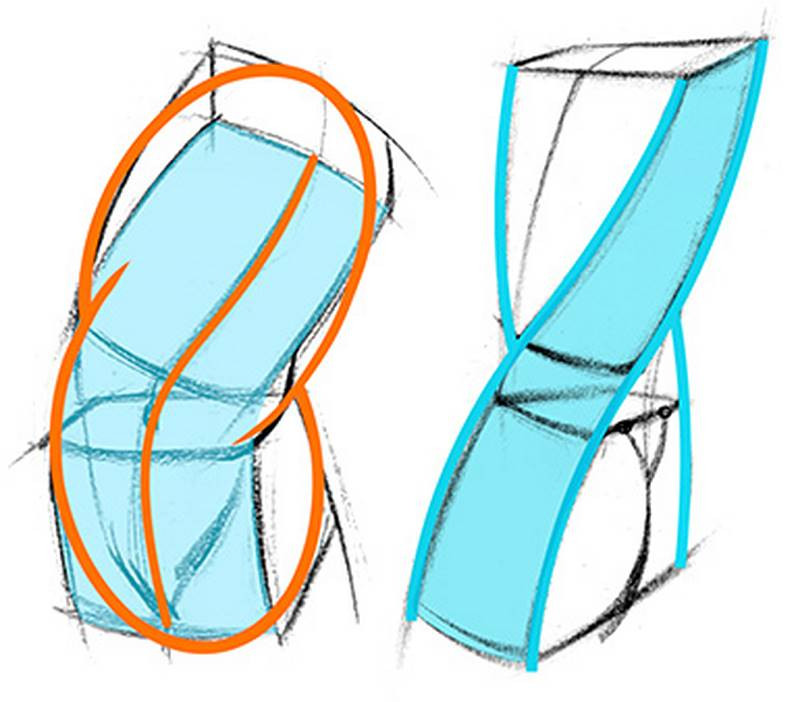
This brings me to an important part about the twist that I forgot to mention in the bean video. I showed with the towel that the overlaps come from the corners that are closer to us. This is true from the side view of the torso, but from front or back, its actually the opposite! And the front and back plane will wrap back around the side plane. If you’re looking at the front plane, then the same thing happens here, but now the side planes wrap behind the front plane and the center line is following this S curve rhythm. So basically the overlapping lines are going to follow the rhythm of the plane we're looking at.
Here’s a better explanation for getting the overlaps right. Figure out which side of the body you’re seeing completely. The overlaps are the ones parallel to this rhythm.
If you’re looking at the side, then the side plane is being twisted like the image on the right.
With the robobean its actually much easier to see why this happens. The left image shows the front and back planes, and the right image shows the side planes.
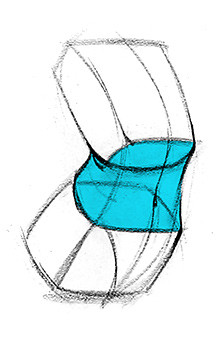
The Stuff Between
One of the hardest areas for people is the connection between the ribcage and pelvis. In the premium video I explain how to draw the area between the two boxes and show a lot of examples - /figure
The assignment for this lesson is pretty straightforward. Just find some poses (plenty available at proko.com/poses) and draw the Robo Bean for that pose. You’ll probably have a bunch of questions, concerns, and mistakes you might have made. So, after you’re done, watch the examples of me drawing the Robo Bean which hopefully will address some of your questions.
Post your work and participate.


