


So, I’m done with the loomis method for now and I’m going to move on to features. These tutorials will be based on things I learned from school, books, and through my own observation. In this lesson, we learn how to draw an eye.
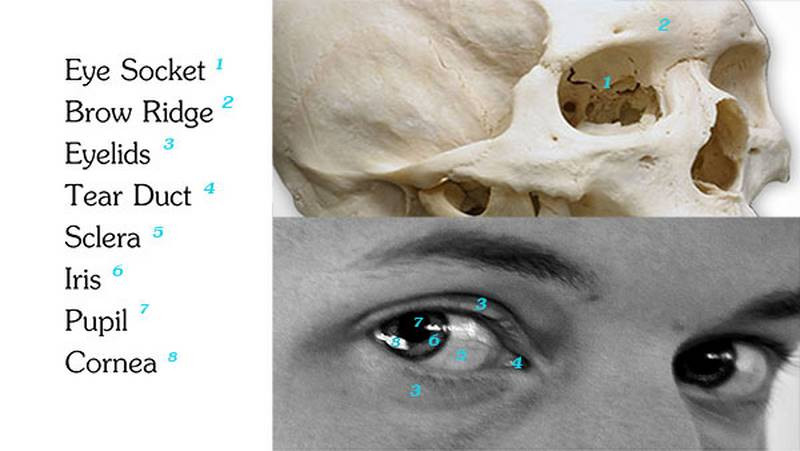
Let’s start by going over some common terminology. The eye socket refers to the hole in the skull where the eyeball sits. The top edge of this hole has a ridge that’s called the brow ridge. The eyeball is covered by a top and bottom lid. At the inner side of the lids, there is a tear duct. The white portion of the eyeball is called the sclera. And the window to our soul is made up of the iris (which is the colored portion), the pupil (thats the black dot) and the cornea, which is a transparent cover shaped like a contact lense.
Simplified
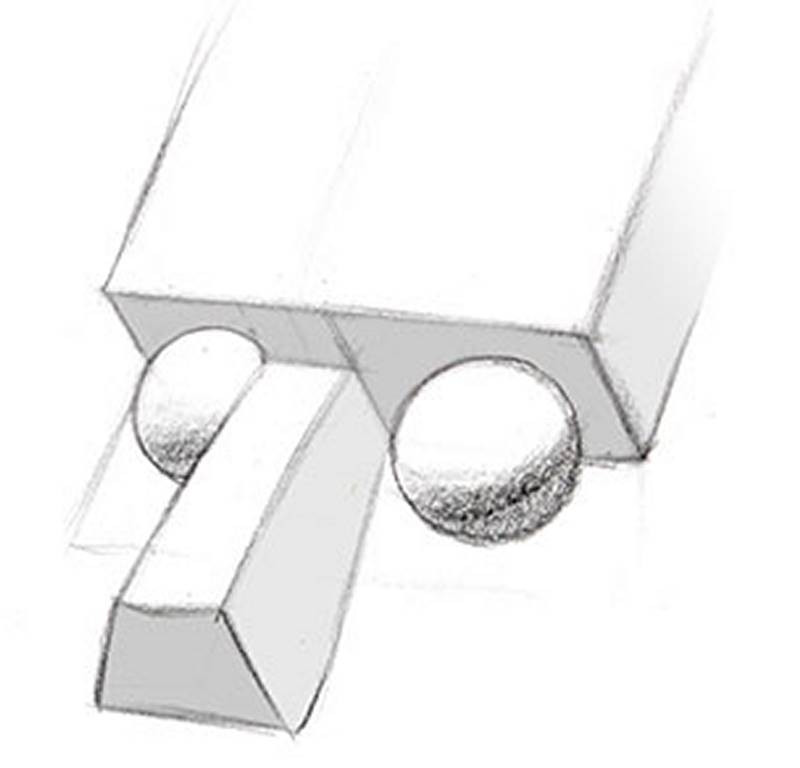
Now, all these little shapes make up the eye, but it’s important to first understand the simplified structure of the eye. These simplified forms should show through all the details. The brow ridge can be simplified into a block. The front plane represents the forehead, and the bottom plane is the roof of the socket. Of course, the eyeball is… a ball.
From the side you can see that the eyeball is deep inside the socket and the brow ridge acts as an awning to protect the sensitive eye from falling things like, rain, dust, asteroids, and bird poop…
Placement
When drawing the eyes, I start by finding their placement on the face. We already know that the face can be broken up into thirds. The brow ridge is represented by the top of the middle third. I like to find the keystone shape of the glabella, which is the space between the eyes, also known as the third eye. From there I’ll continue down the side of the nose to the bottom of the lid and back around to the brow ridge. Make sure to observe how far down the bottom of the lid is.
If the person isn’t looking up or down, but straight ahead, then generally the center of the eyes will be placed in the center of the face. Then, to find the horizontal position, I look for an angle from the wings of the nose to the tear duct. From the front view, this will usually be a straight line up. Of course, first you’d need to find the placement of the nose… which we’ll cover in another lesson. And as a general rule of thumb, this width of the eye is about the same as the distance between the eyes.
A common mistake is to make the eyes too big. But, this doesn’t really look good, does it? This is probably because we think of the eyes as more significant than the rest of the face, and so as a result we make them bigger. But this isn’t always the correct way to make something appear more significant.
Consider adding more contrast, sharper edges and more detailed shapes instead.

Now that we have the general forms, the placement and the size of the eyes established, let’s go a little deeper and explore each part individually.

Sclera
The sclera, or commonly called the white of the eye, is a sphere, and so it needs to be shaded like one. Even though it’s know as the white of the eye, a common mistake is to actually make it white. This will cause it to look flat. The part of the sclera that is visible through the opening in the lids usually has a soft gradation, which is enough to show its roundness.
Eyelids
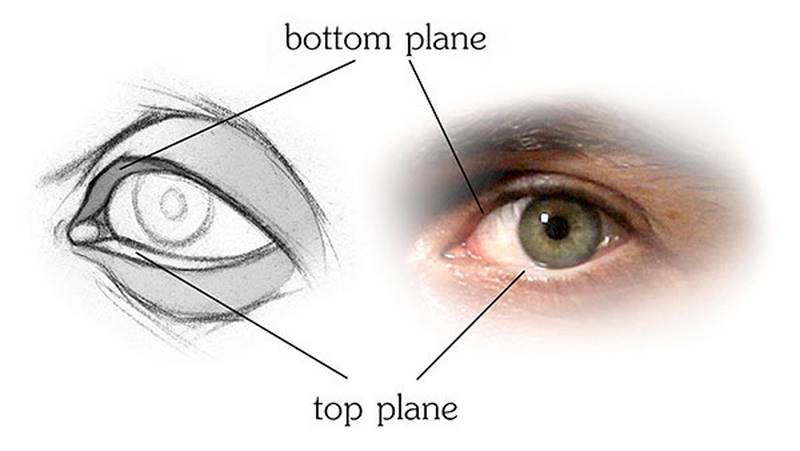
Wrap around the eyeball, and so again it’s important to remember the simple spherical form underneath and how it affects the outer forms. Construct the shape of the top lid using 3 planes. The side planes and the top plane. For the bottom lid, I use 2 planes. Pay attention to the differences between all these angles and don’t draw fish-shaped or almond shaped eyes. They taste good, but they don’t look good. Typically the peaks of these planes, won’t be symmetrical. Look for a diagonal angle between the peaks.
Another factor that will change the shape of the lids is the cornea. Since it is a convex form, as the cornea moves it will push the lids out. Notice how the shape of the top lid changes as the eye moves.
Also, the lids have some thickness to them, so showing the bottom plane of the top lid and the top plane of the bottom lid is very important. If the light source is above the eye, as it usually is, the top lid will have a shadow underneath and the bottom lid will have a highlight on the top.
Also, from the side, the top lid sticks out further to protect what’s under, just like the brow ridge.
And the last thing about the lids, is the epicanthic fold. Some people will have this skin covering the entire top lid, other have the entire top lid visible, and some only a portion.
Tear Duct
A few important points about the tear duct. It’s usually lower than center. When a person turns far enough towards side view, the eyeball and cornea will cover the connection between the tear duct and lids. And so, you’ll see a little piece of the tear duct peaking from behind.
Iris and Cornea
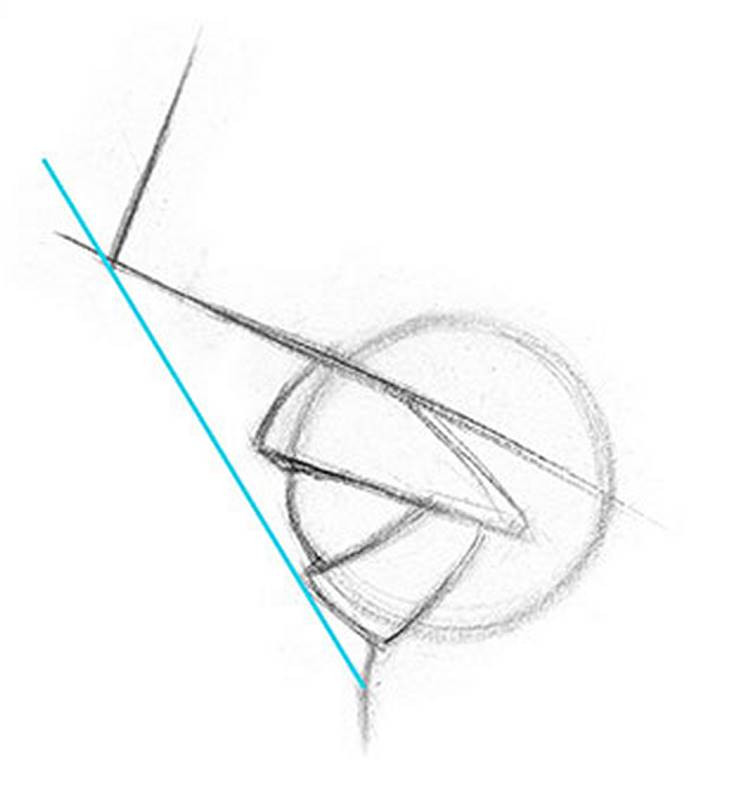
The shape and angle of the iris is commonly overlooked. It will only be a perfect circle from front view. When the eye turns to the side, the shape becomes an oval. The further the iris is from center, the narrower the oval will become.
If the eyes looks to the side AND up or down, that oval will be angled. To find that angle, imagine a straight line from the center of the eyeball to the iris. The angle of the iris will be perpendicular.
The cornea sits right on top of the iris. It is convex and transparent, like a contact lense. The iris, which is the colored part is also convex (according to anatomical diagrams). BUT I like to draw it as if its concave. This gives the eyes a more life like effect.
This is important to know when you start shading. Imaging the light source coming from the top right. The iris, as a concave form, will be lit at the bottom left. The cornea, as a convex form, will have the opposite light pattern. It will be lit at the top right. Since the cornea is transparent, only the highlight will be visible. So, an easier way to remember all this is… The highlight on the cornea will be on the dark side of the iris.

Pupil
For the pupil, remember that its on the iris, not the cornea. In fact, the pupil is a hole in the iris that lets light in. The pupil dilates to let in more light and contracts to let in less light. So, when drawing the pupil from a side angle, be sure to draw it on the iris, not on the cornea.

Eyebrow
The eyebrows sit on the brow ridge and peak towards the outer end. The outside ends tend to be lighter, thinner, and have less hair than the inside ends. The shape of the eyebrows varies from person to person. Men tend to have fuller and straighter types while women have thinner types that peak higher.

Lashes
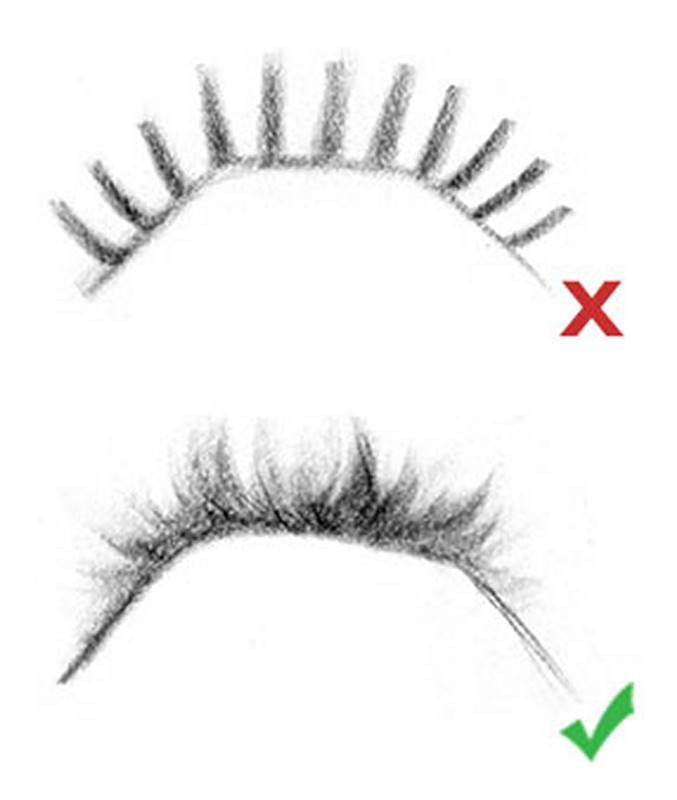
The trick with eyelashes is to simplify them. I like to group them together into chunks and draw them as simple dark shapes. From the front, the dark shape of the lashes will merge with the dark shadow under the top lid.
If the lashes are long and curl up enough to be seen as individual lashes, still try to simplify them rather than drawing each lash. I like to draw them blurry as if they are out of focus. From the side, the shape is like a curly triangle.
Ready for more? Go to the next lesson for a step-by-step example ofhow to draw the eyes.
***
Thank you to everyone who sent in their photos. In this video: Erik Hedlund, Marcus Agoy Sand, Matt Starbuck, Michael Gomes Jr, Leah Augustine, Gleb Dmitriev, Sarai Galindo


