How to Draw Pecs – Form
246K views
lesson video
How to Draw Pecs – Form
courseAnatomy of the Human BodySelected 3 parts (371 lessons)
-27%
$347.25
$477
You save $129.75
assignments 11 submissions
Luke Ng
Pec studies from reference. Critiques are welcome
LESSON NOTES

For additional help, watch my critique session on the pecs. I go over student submitted work and provide insights on how they can improve their assignment examples.

***

How to Draw Pecs - Form

In the previous lesson, we learned the anatomical structure of Pecs. Now, let’s take a look at how you can apply all this information to construct the forms of the pecs in your drawings.

The pecs make a curved front plane that faces slightly upwards. The bottom plane starts at or just below the nipple. The depth of this bottom plane determines how thick the muscle is.

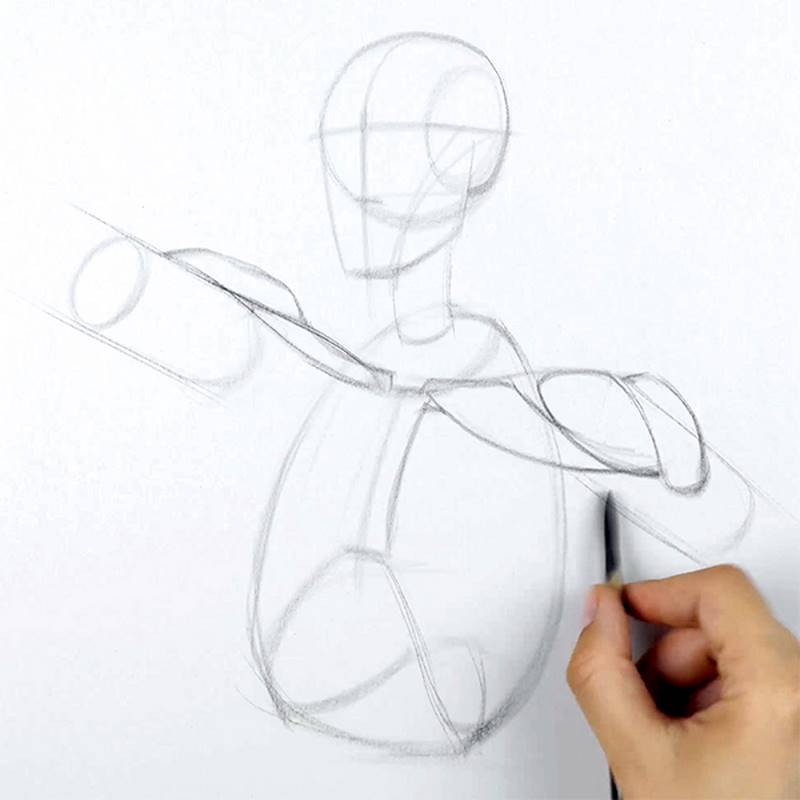
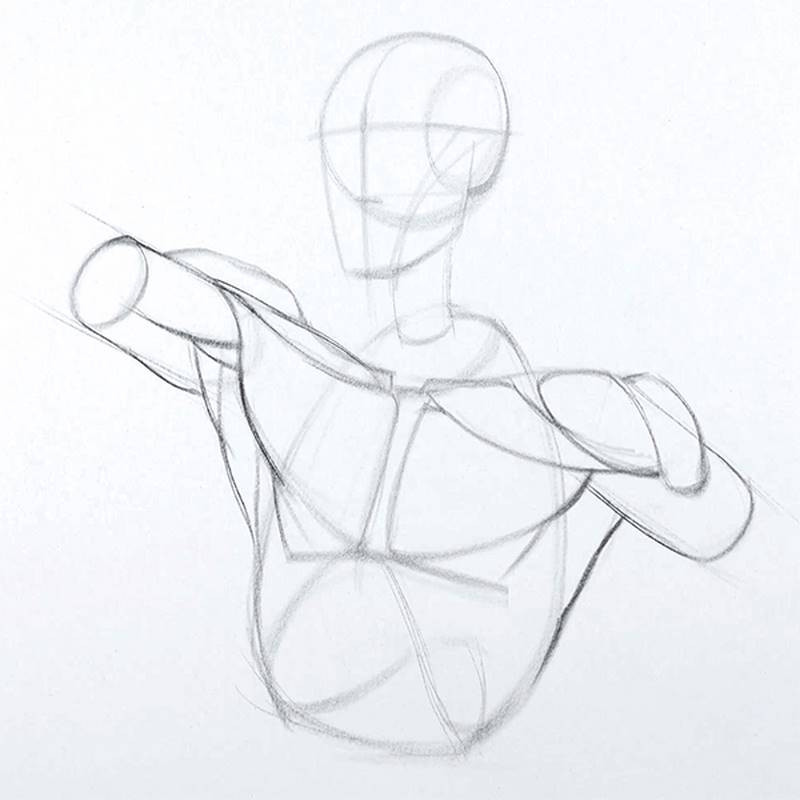
To do a drawing of the pecs, I suggest you start with a light lay-in of the skeleton to help place the muscle on top.

Let’s start with the clavicular portion. Originating from the clavicle and stretches the farthest of the 3 portions, until it’s covered by the deltoid.

Then the sternal portion, from the entire length of the sternum, converges toward the armpit and dips under the clavicular portion.

pec muscles drawing example clavicular portion

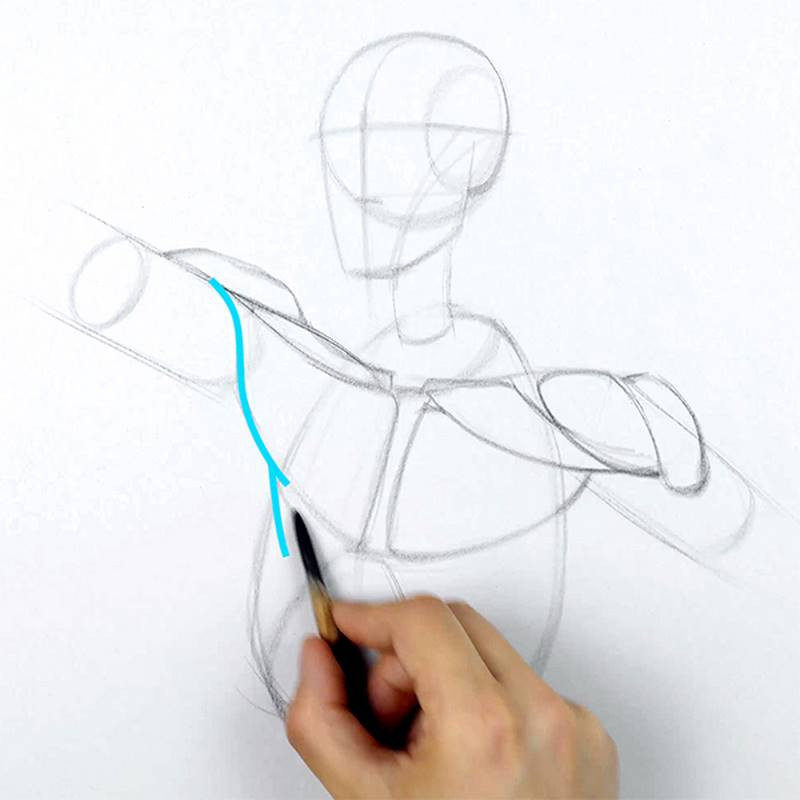
The lateral border curves up toward the arm. There might even be a double curve when the arm is abducted away from the body, because of how the sternal and abdominal sections overlap and attach to the tendon, as you can see here. When the arm raises the muscle mass keeps its thickness near the armpit where it attaches to the tendon. More of the stretching happens closer to the sternum. The tendon from the sternal section can extend an inch or two from the armpit and when a muscular figure flexes, it often creates a dimple, as the muscle fibers take a sharp turn inward.

pec muscle drawing example lateral border

The lower border of the pecs lines up with the bottom of the sternum. According to Loomis, the nipples are roughly one head measurement down from the chin, so the bottom of the pecs are just below that. It’s straight and horizontal, maybe leaning a bit down laterally. When drawing a torso that’s tilted toward you or away from you, this lower border acts as a natural cross-contour line. Use it to show the round form of the rib cage!

pec muscle drawing example lower border 2

In male figures, there’s a crescent-shaped fat pad on the lower outer corner that contributes to its boxy-ness. Man boobs are simply a result of that crescent-shaped fat pad gaining more and more mass and running over onto the rib cage. When the arm is raised, the lower mass of the pec thins, and the lower border becomes harder to distinguish. You might see ribs you couldn’t see before.
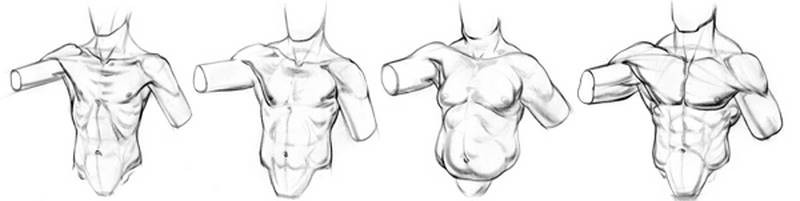
pec muscle drawing example final form

Variation

There are variations to the chest depending on the physique of the person, such as lean, average, muscular, and heavy. To learn more about these variations, head on over to the proko.com/anatomy. The premium section has longer lessons, 3d models, and additional demonstrations.

pex muscle drawing variations

Check out the Premium Anatomy course to see the full version of this video and all other Anatomy videos.

If you haven't done the assignment yet, refer back to our previous video to get the assignment images and instructions.

In the next episode, we’ll explore the female chest, and how it’s different and similar to the male chest.

Thanks for watching everybody! Do the chest-bump-worthy thing and share this video with your friends, give me a thumbs up and comment below. And if you want all the Proko news, look no further than the Proko newsletter!

ASSIGNMENTS

Assignment: Draw the Pecs

Your homework is a two-parter. For part 1, do a tracing over a model photo of the pectoralis major and all of its bundles. If you’re not sure how to do a tracing, refer back to the Anatomy Tracing lesson. For part 2 of the assignment, invent the pectoralis major on top of photos of Skelly. I’ve provided reference photos for part 1 and 2 in the downloads. If you have the Skelly app, you can create your own pose and draw the pecs on top.

Newest
@spideronthewall
practice
Peter Tinkler
It was good to do the tracings first, then the Skelly exercise. I felt more comfortable getting a feel for the shape and the overall structure. That said, the third Skelly exercise was extremely challenging, I got it very very wrong the first time I did it. I had to watch the video a few times. All good practice though, really feel I'm progressing, even if it's small steps.
Benjamin Green
The biggest thing that sticks out to me is that the pectorals are not attached to the ribs. The main body of the muscles should be following the curvature of the ribcage and in drawing 3 at the bottom, the top of the pec should be more tightly attached to the clavicle. The pec also looks fat on the top and thin on the side. Good job on completing the assignment.
Lenserd martell
自然に描きたいんですが筋肉の流れが難しい 想像力が必要です
James Miller
Here are my anatomy tracings. I would love some critiques! Thank you!
Jesper Axelsson
Hi @James Miller, nice studies! You'll learn a lot on your own by cheking out Stan's examples, so I won't go too much into specific tracings, but rather point out some general things to look out for: - Try to show the thickness of the muscles more; at the moment they feel a bit like flat sheets of paper connected to the attachment points. - Study the attachments more. Especially the abdominal origin and the insertion on the humerus. You put the abdominal origin too high at times, and the insertion on the humerus sometimes ends up too high, or too lateral. - Keep an eye out for symmetry between the sides of the chest. In image 5 for example, the distant pectoralis muscle has it's abdominal origin much higher than the close pectoralis. This can be tricky to get right. It helps to draw a guideline that you wrap around the chest to make sure they sit on the same level. If this is something you're unfamiliar with, you might want to complete the Figure Drawing Fundamentals course, before spending a lot of time with anatomy. The concepts taught in that course, like gesture and structure, are crucial for being able to use the anatomical knowledge you learn, in a drawing. Hope this helps :) Keep up the good work!
Sandra Süsser
Lesson notes pecs and my own versions of different Body type variants. (Why are the free videos up here? The premium lesson already covers all of the information given here and more)
Camellito
3yr
Here is my anatomy tracing. Criticism is welcomed.
Camellito
4yr
Here are my pec tracing assignments. I corrected the first two after watching the video.
Nihi Sus
4yr
Deja vu
necplusprocess
so flat...
necplusprocess
necplusprocess
Luke Ng
4yr
Pec studies from reference. Critiques are welcome
Julia Whitenight
Nice sense of "life" in the line here -- they don't look belabored; the second one is especially dynamic in that respect. No critique, just ... keep it up!
Account deleted
Great sketches :) I really like strokes and the movement in them and I feel like the little face details in the second sketch adds an extra spark of interest to the drawing itself. I have 3 small critiques (but they are my personal opinion). 1. In the second picture, the placement of the clavicles and acromium process could've been defined a little more, and overall what's happening in the neck area (like you have done in the other sketch). I know the focus are the pecs, but I think it would've made for a more cohesive drawing, that's all :) 2. The angle of the sternum in the second picture looks off and doesn't point towards where the end of the sternum should be with how you've drawn the ribcage. 3. In the first picture, the whole neck area looks like it might be a bit too pushed forward in relation to the angle of the ribcage.
Luke Ng
4yr
Pec studies from imagination. All critiques and feedback is welcome
Jesper Axelsson
Really cool!
Ryan Gromek
Help!
Browse the FAQs or our more detailed Documentation. If you still need help or to contact us for any reason, drop us a line and we’ll get back to you as soon as possible!