


So now that you have a successful concept for your caricature, from your [thumbnails] and [rough sketch], how do you take it to the next level? How do you go from a rough sketch, to a finished rendering?

Improving your skill at caricature is more about the art of visual development than it is about any kind of innate creativity. That means that you don’t need to have a special gift for exaggeration to draw good caricatures. You just have to work hard. If you ask me, creativity is a natural outcome of being persistent, bold and disciplined.
- Persistence, in that you need to do lots and lots of bad sketches before getting to one good one.
- Bold, in that you need to take big risks in your drawings and not worry about failing. And having
- Discipline means that you constantly work to improve your skills and follow a technical process to refine your rough sketches into a finished piece.
Today we’re going to learn a technical process that will take you from a rough, sloppy sketch to a correctly-structured linear design.
The Abstraction
The next step is a pretty simple one, in concept. We’re going to do a tracing over the rough sketch.
But we’re not going to just copy the original drawing. We’re going to change and improve it with an abstracted version of the head. So the original thumbnail sketch will only be a very loose guide. We’ll take from it what works, and continue to make new decisions about it as we draw. This tracing stage is a great time to push the exaggerations even further.
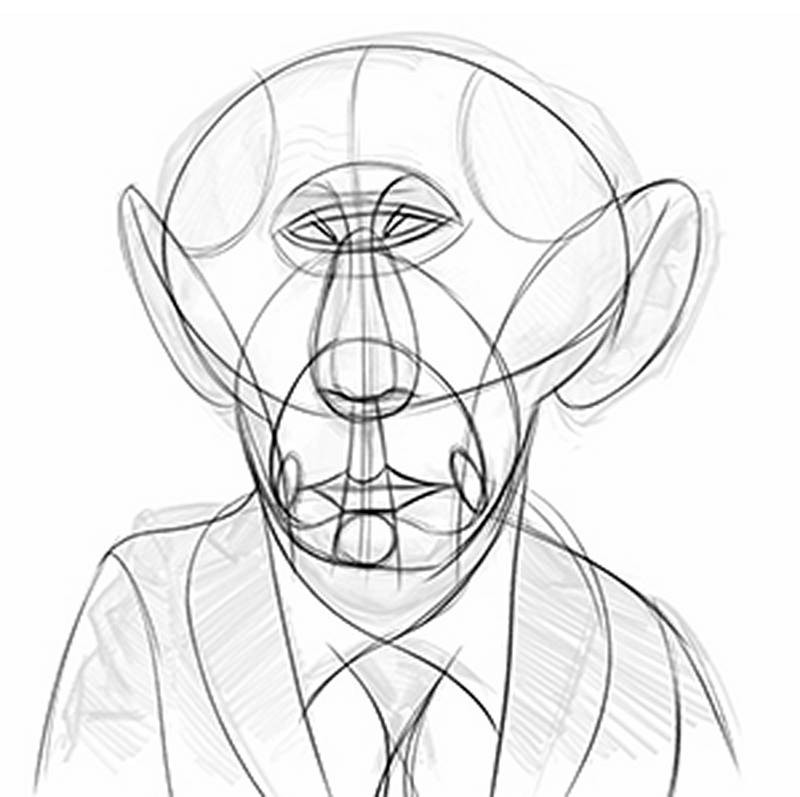
But what is the Abstraction? Put simply, it’s a linear representation of the head, using flowing rhythmical curves that trace the connections between shapes and features.
The rhythmical grid lines are based on the anatomy, but they are not meant to be a simple wireframe of the head. They’re rhythm lines help you find the placement of the features and how different parts of the head interlock and relate to each other
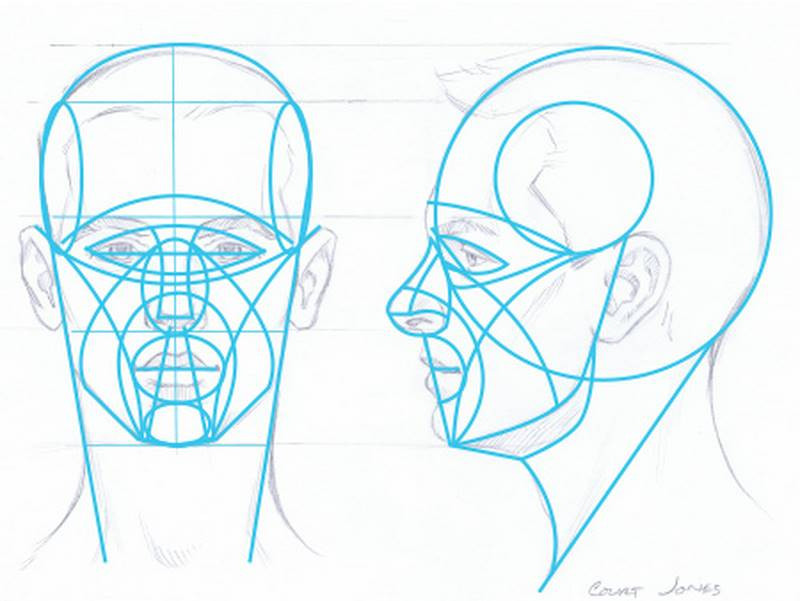
The Abstraction is a tool to help you improve the construction of your drawings, and is especially helpful in drawing heads at extreme angles.
You may feel like we’re working backwards here. We already had a realistic sketch. But now we’re re-drawing it with construction lines and stripping away the details. But this is one of the best ways to refine a sketch. We’ve already done the creative work of exaggerating and finding a likeness in the thumbnails and rough sketch. But by tracing over the drawing and stripping away the details, we can better find and fix those hidden errors and unintended distortions.
The Process
If you’re drawing on paper with pencil or charcoal, use tracing paper or a light box for this next step. Or if working on the computer, reduce the opacity of the rough sketch and create a new blank layer above it to draw the Abstraction on.
And start by redrawing the biggest shapes first. But use much more controlled simple lines. Not short scratchy ones. Your strokes should be simple C curves, S curves or straight lines And don’t draw every contour of the anatomy. Simplify the shapes so that the head looks more like an abstract robot version of itself.
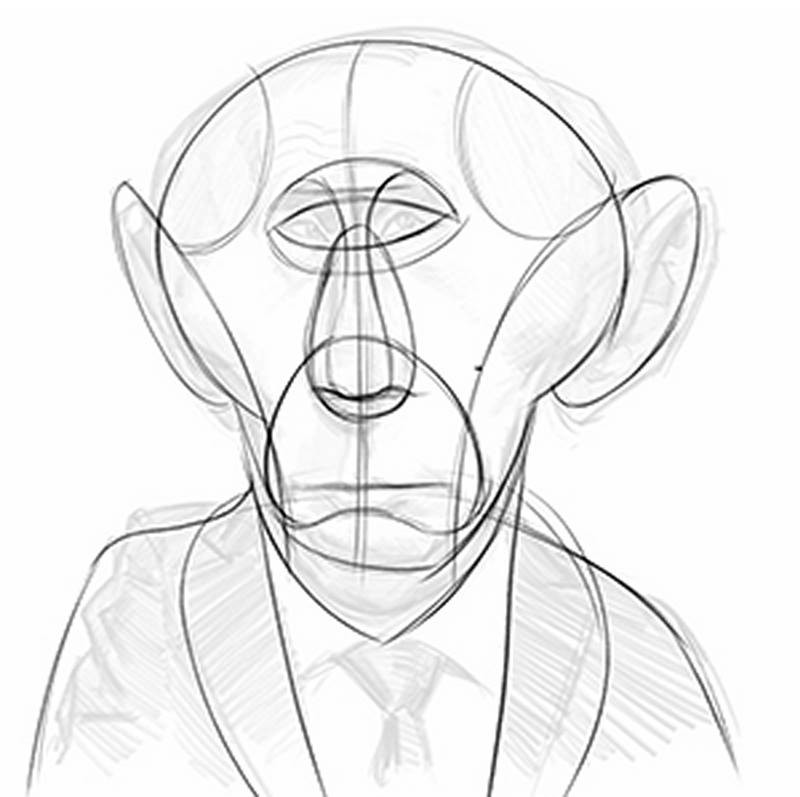
After establishing the head shape, neck and shoulders, trace the main center line of the face. This centerline is really important, because you’ll be using it to build all of your other anatomical rhythms around it. Mark the divisions of the brow nose and mouth, making sure the angle of those marks line up with one another in the correct perspective for the tilt of the head

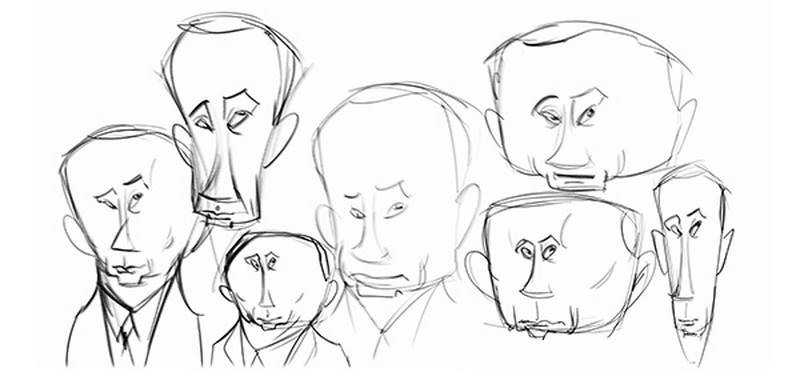
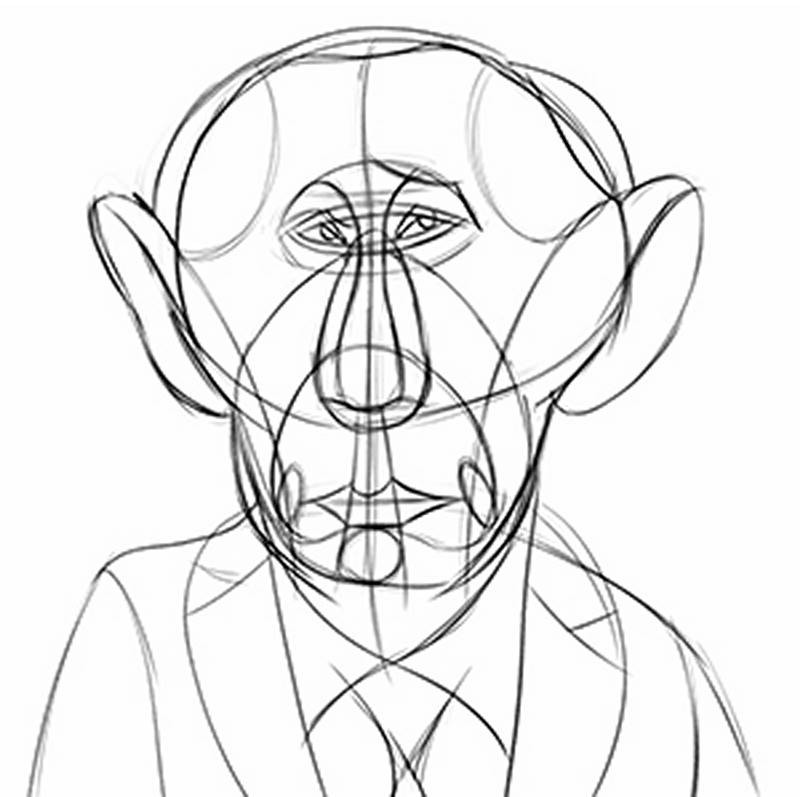
In my rough sketch of Putin, the ears didn’t quite line up as they should, so now you can see how I corrected them in this Abstraction sketch.
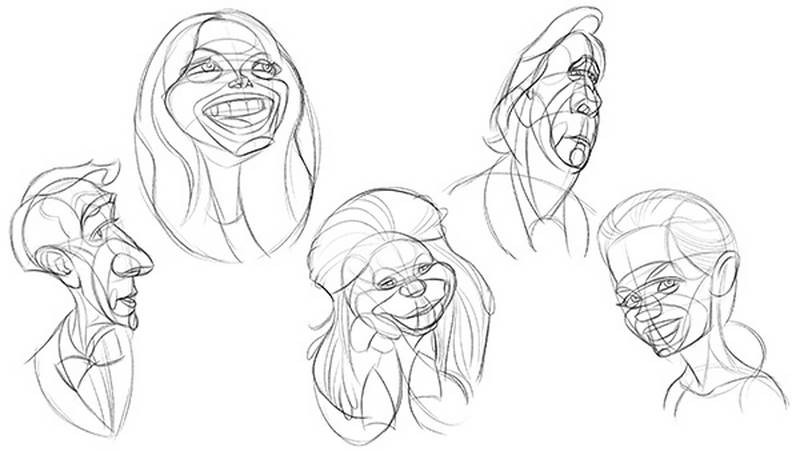
Once the ears are in place, I can draw the rhythm lines from the top of the ears to the sides of the chin. Those rhythm lines can be really helpful in placing the features on a head at an extreme angle. Another helpful rhythm is that of the muzzle area. This oval or egg-shaped rhythm follows the edge of the fat pads of the cheeks down to the jowls or outside corners of the chin. The muzzle can be very defined on older people and very hard to find on young people.
Now that the big rhythms are established, I can focus on the smaller features. As I‘m drawing the arcing rhythmical lines, I am continuously referring to the center axis of the face.
The center line helps me more easily see if the eyes in my rough sketch were drawn with even spacing, or if one is further away from the centerline than the other. The same goes for the angles of the bottom of the nose and the mouth. By reducing the complex lines of the rough sketch into simple geometrical lines and shapes, I can be a better judge of my own drawing.
I developed this technique of using the Abstraction to fix my own caricature sketches from years of portrait drawing classes at the Watts Atelier. When a student was having trouble with drawing the anatomy, the teacher would often draw on top of the students work using the simple lines of the Abstraction to show how the forms should relate to one another on the face.
Applying a portrait drawing technique to caricature turned out to be a great way of getting a more realistic, well-constructed sketch that was still exaggerated.
As I continue to abstract the features of the rough sketch, I make subtle corrections to the features as I outline and simplify them. And I indicate plane changes on the surface of the face by outlining where pockets of fat and the ridges of the bones protrude.
Now that I have the face almost finished, I flip the drawing in reverse to see if I notice any obvious problems. I make little changes where necessary to make the head feel more balanced. And once I’m satisfied it is, I now commit to my light sketchy lines by darkening them.
The only major change I make when I flip the drawing is to one side of his head, which suddenly feels like has too much bulk compared to the other side. So I highlight that area and move it in a little. But not so much that I ruin the fun light bulb shape of his head.

Satisfied that the likeness and exaggeration are still good, I clean up the area I shrunk down so it blends in with the rest of the head.
I’m not done yet, though. Since this stage of the process is all about fixing minor drawing problems, I’m trying to be critical and objective about the shapes and the alignment of the features. And if anything needs to be moved or redrawn, this is the time to do it. At this point, I’m zoomed in close to work on the eyes and I redraw them with more focus on their placement and angles. The muzzle rhythm and eyebrow shapes are also changed a bit to improve the likeness and anatomy.
Here I start adding a bit more detail than I normally would for an Abstraction, like shading, more eye anatomy and wrinkles across the forehead. Normally I would stop before this point. But I thought giving a bit more clarification to the sketch would help make the likeness more obvious for people viewing this demo. Even though the Abstraction helps correct major drawing errors, it can often strip a caricature of its personality.
But now that the Abstraction is completed and I’ve fixed the mistakes made in the rough sketch, it’s time to move on to the final sketch and put the personality back into it.
As I said before, learning caricature is more about the process of visual development, than it is about hitting a homerun on your first pitch.
Premium Section
Get the Premium Caricature Course to access lots more videos of me using the Abstraction to draw caricatures with more extreme angles and exaggerations. Also, Premium Students can download a step-by-step guide to drawing the Abstraction that you can print out, and an additional in-depth lesson on the origins, construction and use of the Abstraction in Caricature. This is a really cool and useful technique, and we only scratched the surface in this free lesson. To get a true understanding of this drawing tool, get the Premium Course.
Assignment
Your assignment is to take your rough sketches and apply abstraction to them. As you’re getting familiar with it, use the the step-by-step pdf below to help guide you.
Make sure you’re using the rhythms to improve your rough sketch. Don’t just trace over it. Look for ways you can improve the exaggeration and correct anatomical errors.


