


Check out the Premium Anatomy course to see the full version of this video and all other Anatomy videos
Anatomy of the Pecs
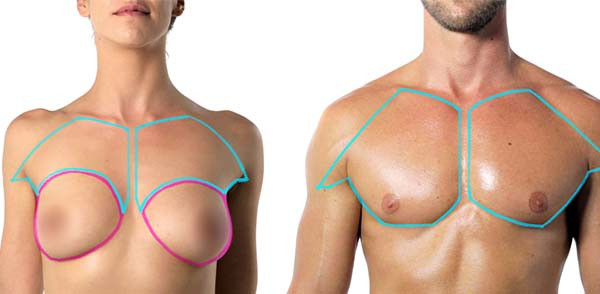
As you might have guessed, this lesson is about the Pectoralis Major muscle. Even though male and female chests look different, both have the same muscles. On a female, the pectoralis major is still visible under the breast tissue.
Origin and Insertion of the Pecs
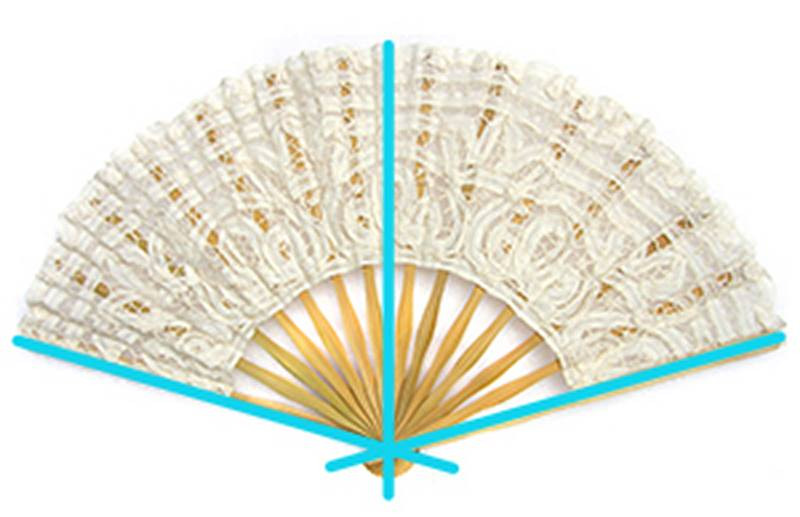
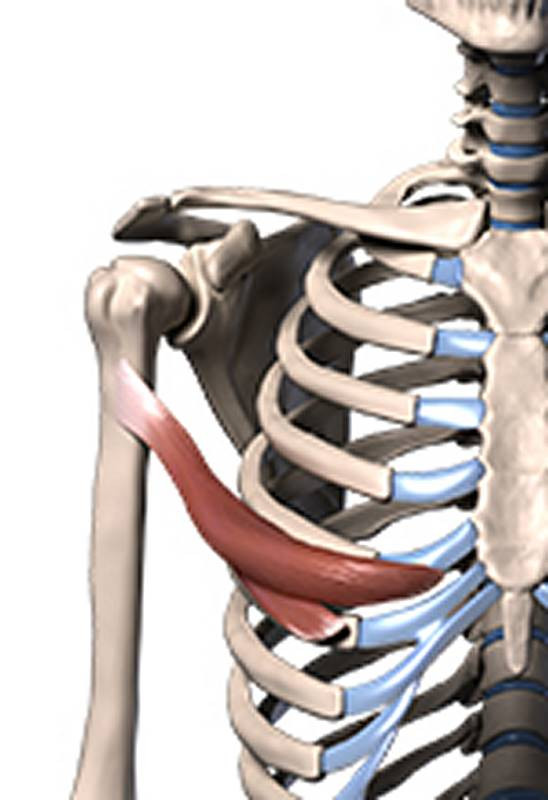
The pectoralis major is like a really flat box tucked into the corner of the clavicle and sternum that converges toward the humerus. Its shape is simple,but it gets a little tricky because the muscle fibers overlap in a folding fan pattern. Let’s start with the basics.
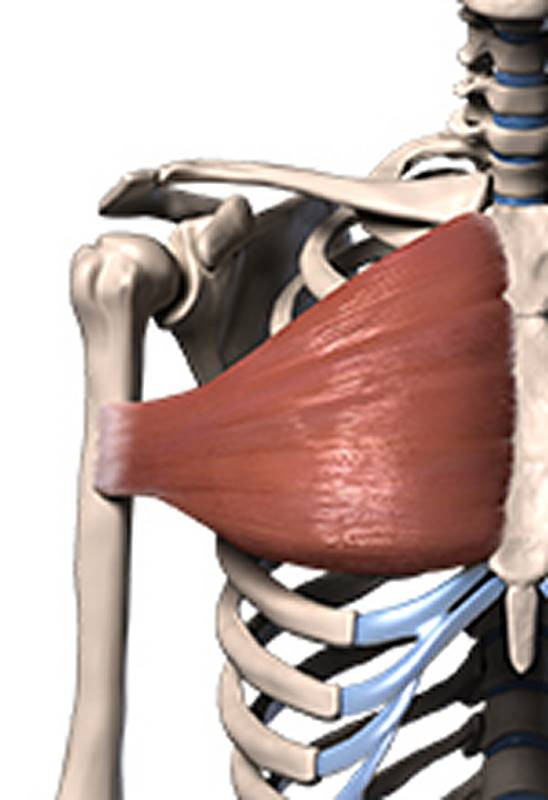
The pecs originate from the medial half of the clavicle’s front plane, the entire length of the sternum, and the top of the external oblique’s aponeurosis.
The pectoralis inserts onto the humerus at the bicipital groove, which is a deep, oblique groove across the upper third of the humerus.The pectoralis major doesn’t insert into one small point. It attaches with a tendon that’s as wide as your wrist! The anterior deltoid head passes over the insertion and covers the tendon.
The pectoralis major has not one, but four functions, all pertaining to shoulder movement.
The pec pulls the arm forwards, like for a high-five. Interestingly, the pec also helps to lower the arm. It can also adduct the arm sideways toward the body like a slap and rotate the arm medially, like for arm-wrestling. That’s right, arm wrestling involves your chest.
But how can the pecs do so many different things?
Anatomical Structure of the Pectoralis Muscles
The answer is in the Anatomical Structure.
The pectoralis major is structured like a folding fan.
The muscle bundles radiate out from the armpit. They actually cross over each other where the pecs lift off the rib cage. This twist means that the lowest bundles on the chest insert the highest on the humerus, and vice-versa. There are three key sections.
Clavicular Portion
The clavicular portion originates, unsurprisingly, on the clavicle. It’s a narrow triangle that angles downwards to the insertion. It’s also the thickest portion, and it canobscure the front plane of the clavicle. This is why you usually see just the top plane of the clavicle on a muscular body type.
On a leaner person, the muscle is thin enough that you do see the front plane of the clavicle.It’s separated from its clavicular neighbor, the deltoid, by the infraclavicular fossa. That’s a fancy word for the little triangular groove between the two muscles.
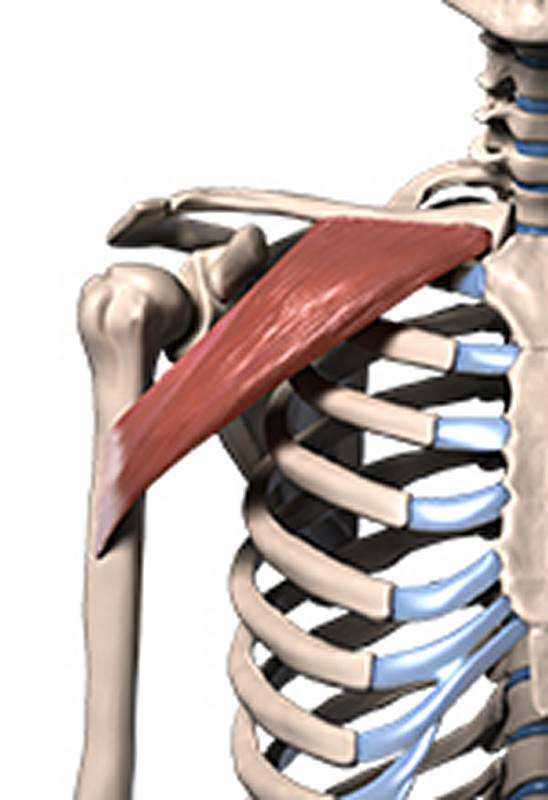
On the surface the clavicular portion appears to stretch the farthest to the arm. You’ll see it rolling over the other sections just before it disappears under the deltoid. The other two portions of the pec go under this clavicular portion.
Sternal Portion
The sternal portion is the largest of the three. It’s also very thin, and you can sometimes see the ribs through it. You can distinguish the ribs from the pecs by their consistent horizontal angle. Pectoralis bundles are more oblique, and their angles radiate.
Be aware of how the two pecs share the sternum. In the top half, the sternal bundles originate very close to each other, sometimes with no visible distance. On the lower half, the pecs insert closer to the edge of the sternum, so there’s a triangular depression there. But this also varies.
The gap between the pecs can be wild and crazy like a Rubin vase, or it can be a straight line down with a narrow gap. You pick which fits your character and picture better.
Abdominal Portion
Lastly, is the abdominal portion. This is the deepest and smallest layer of the pecs, pointing up laterally to the insertion. It originates from the aponeurosis of the external oblique along the level of the 5th rib. Remember from the last lesson that an aponeurosis is a large, thin tendon. The aponeurosis of the external oblique covers the rectus abdominis, and the abdominal portion of the pec attaches to the very top of it. On some people this section is very distinct and clearly lower than the other two sections, and on other people it’s totally buried. Genetics.
Much like the cherry on top of the proverbial ice cream, the nipple is the last thing to go on your man-chest sundae. The nipple’s not a consistent landmark, since fat can sag the skin and move the whole nipple lower, but they’re somewhere around 1 head measurement down from the chin. If you draw a 45° angle out from the pit of the neck, it’ll line up with nipple and the edge of the serratus muscle.
In the next lesson, we’ll look at how you can apply all this information to construct the forms of the pecs in your drawings.
Premium
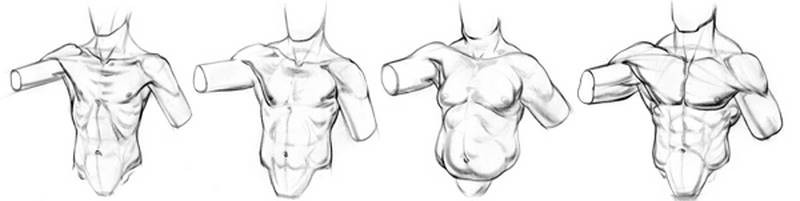
There are variations to the chest depending on the physique of the person, such as lean, average, muscular, and heavy. To learn more about these variations, head on over to the premium section. The premium section has longer lessons, 3d models, and additional demonstrations. Just sayin’.
Go to the next lesson to learn about how to draw the form of the pecs.
Assignment: Draw the Pecs
- Do a tracing over a model photo of the pectoralis major and all of its bundles. If you’re not sure how to do a tracing, refer back to the “How to do an Anatomy Tracing” lesson.
- Invent the pectoralis major on top of photos of Skelly. Use the photos below or if you have the Skelly app, you can create your own pose and draw the pecs on top.
I’ve provided reference photos for part 1 and 2 in the downloads. Download those and start drawing!


