


Drawing the Hand Bones
It’s important to understand the bones if you want your drawings to be anatomically solid, and if you ever want to invent. This is especially true with the hands. Science tells us that hands are like, 90% bone. Get this part right, and the rest is easy. Thanks science!
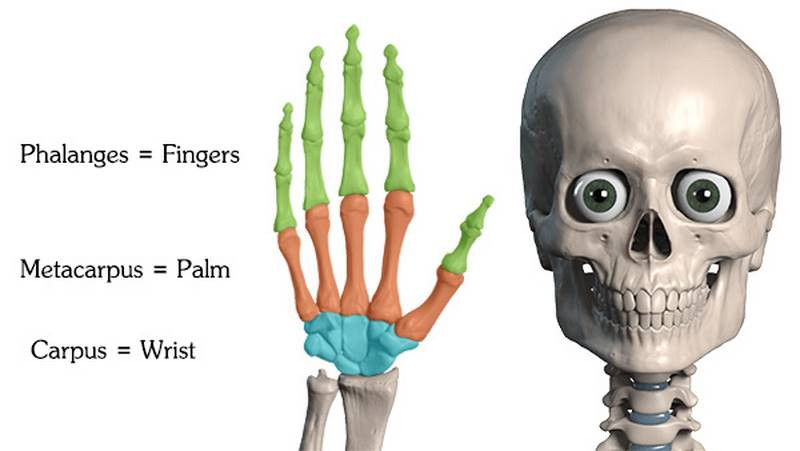
Let’s start with proportion. The length of the whole hand is about equal to the length of the face. Within the hand there are three important divisions... the wrist, palm, and fingers. Or, to use the bone terms, the carpus, metacarpus, and phalanges. We can quickly and accurately find these proportions with the halving method.
Take the distance from the wrist to the end of the middle finger and divide it in half. This marks the end of the metacarpus, at the knuckles. To find the three finger joints, divide in half again, and again. You can divide that last unit in half again to find the fingernail. The knuckles don’t line up horizontally, so draw the rest of the fingers a little bit shorter than you drew the middle finger. Find the knuckles with curved rhythms. You can divide that last unit in half again to find the fingernail.
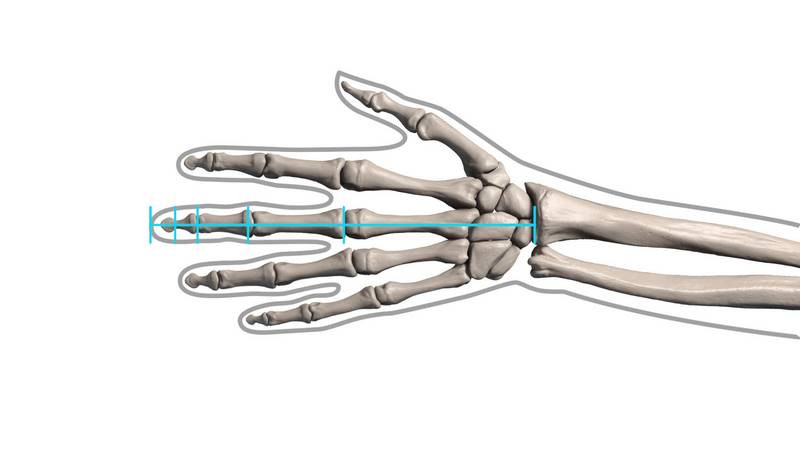
The webbing of the palm extends beyond the knuckle, about halfway to the first joint. So, fingers appear longer when looking at the back of the hand and shorter when looking at the palm. Keep that in mind when you’re measuring. The halving method is based on the length of the bone, not the skin.
That said, let’s jump right into the wrist!
Carpals
There are eight wrist bones, and each one is completely irregular. Nope, they’re not easy, but they’re not important, either! Individual carpal bones are basically never visible, even when the wrist is fully flexed, so you don’t need to study each one!
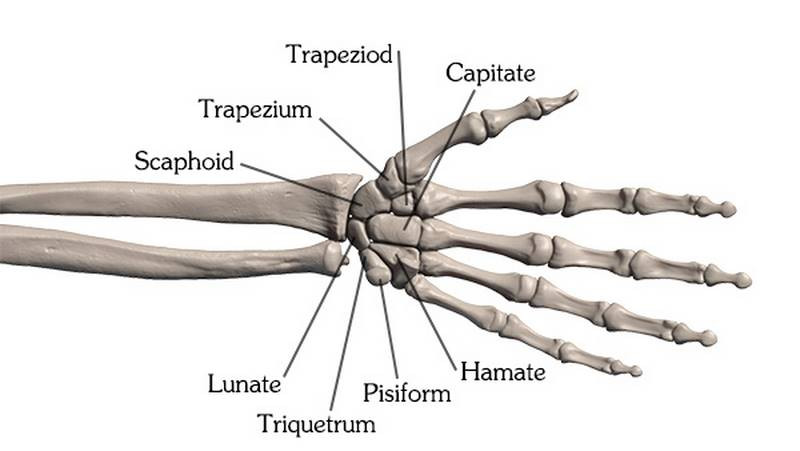
Instead, let’s study the big form. From above, the wrist bones have a half-circle shape. They pop right into the concave socket of the radius.
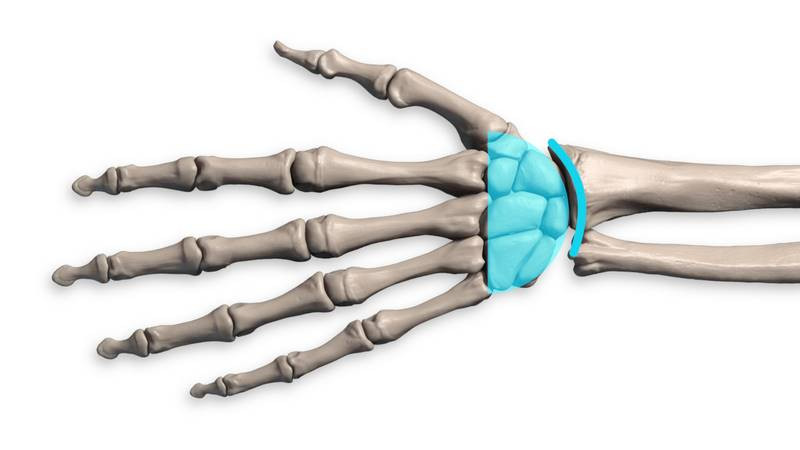
Together the wrist bones form a tunnel, hollow on the palm side, which tendons and nerves pass through to get to the fingers. This is the “carpal tunnel” of “carpal tunnel syndrome”.
Metacarpals
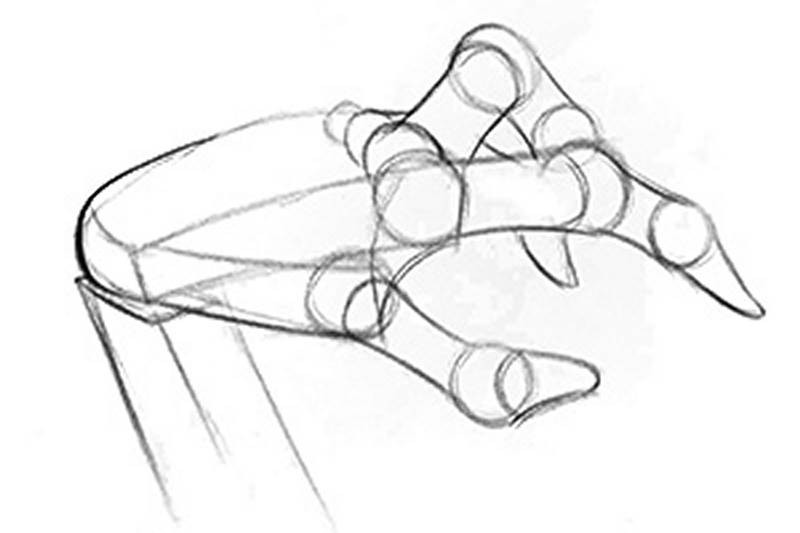
“Metacarpus,” meaning “beyond the wrist,” refers to the bones of the palm. Their overall length and width make a square shape. The palm has distinct top, bottom, and side planes, so think of the metacarpus as a box plus a triangle for the metacarpal of the thumb.

That tunnel shape we saw at the wrist echoes throughout the whole hand. Here, the palm is hollow, and the highest point of the “tunnel” is at the middle finger. This is especially visible when you’re drawing a fist. The middle finger knuckle sticks out the most length-wise, too.
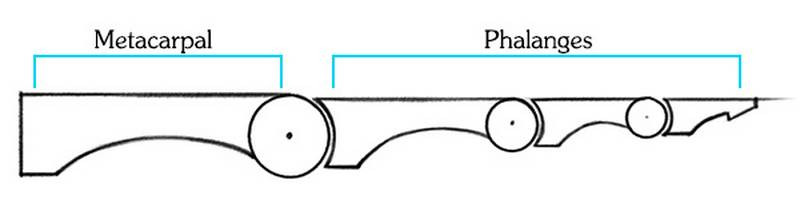
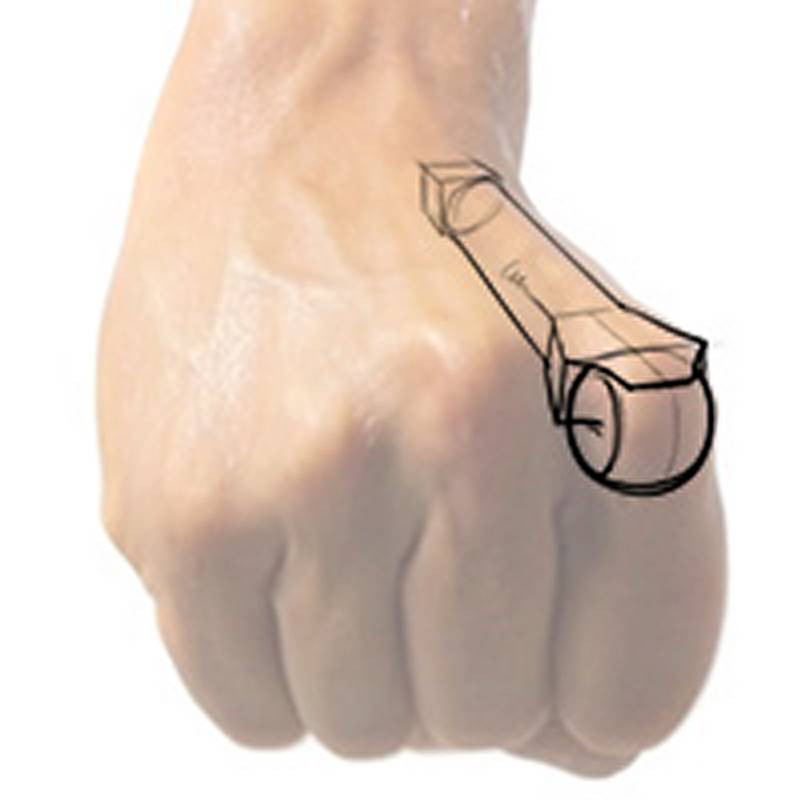
The metacarpals and phalanges use roughly the same design. The shaft can be simplified into a cylinder or box form that tapers to be thinner towards the fingertips. It’s straight along the top, but concave along the bottom. The far end has a convex bump that fits into the concavity of the next bone.
The metacarpals can be easily felt and seen on the back of your hand, especially at the knuckles. The form of the knuckles is a wide box with a ball at the joint. The top plane between the ball and box is a trapezoid.
Phalanges
Each finger, has three sections, called phalanges, connected by hinge joints. The thumb is different. It only has two phalanges past the metacarpal. But, I prefer to think of metacarpal of the thumb as its third phalanx. As far as joints and functionality, it’s more similar to the phalanges of the fingers, than the metacarpals of the fingers.
As I said, technically, the thumb has only two phalanges, but because its metacarpal is extra flexible, It has great range of motion.
The fingers do not extend from the palm in straight, parallel lines, but actually curve towards the middle finger. It’s subtle, but it’s there.
The form of the phalanges follows the same pattern we saw with the metacarpals. Each section is boxy with a slight arc at the bottom.
The fingertips taper off ending with a flat plane.
Assignment: Draw the Hands
Your assignment is to simplify the hand bones into their basic forms. Draw from life using your own hands or draw from the 3D models of the hand bones I provide you. Download the images for the assignment in the downloads tab and get to work! If you have the Premium Anatomy Course, you have 3D models of five dynamic hand bone poses that you can draw from any angle. You might even try drawing the same hand from multiple angles. And if you really want to challenge yourself, look at the model from one angle, but draw it from a different angle. After you’re done drawing, you can rotate the camera to match your drawing angle to check your accuracy. This exercise will help develop your ability to invent hands from imagination.


