


Ears are very much like megaphones. It’s easy to see the resemblance when you look at Shrek’s ears, but how does this apply to humans? Well, it’s a lot easier to see from the back.
The ear is connected to the head at the concha, which is a tubular form that pushes the helix away from the head. The concha pushes the ear out in the back, but not in the front, so the face of the ear is rotated slightly forward.And of course, this can vary quite a bit between two different people.

Also, the concha pushes the ear out more at the top than at the bottom. So, from the front, you’ll usually see an angle to the ear.
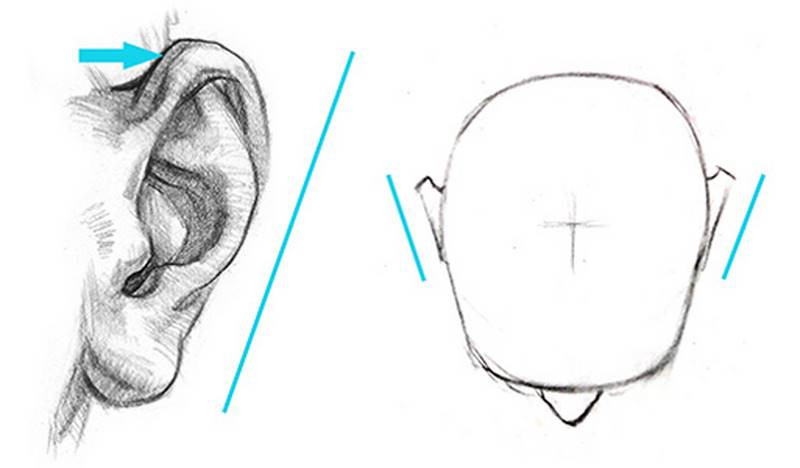
The placement of the ear is important. It can be a very good indicator of any up or down tilt to the head. From straight on, the ear will fit pretty much right in the middle third.

Top of the brow, to bottom of the nose. As the head tilts down, the ears move up, and as the head tilts up, the ears move down.
From the side, generally you will find the ear starts at the end of the jaw, about center of the cranium. Notice that the ear is NOT straight up and down along that center line, but rather tilts back at the top.
If you’re using the loomis approach to lay in the head, you will find the ear somewhere in the bottom back quadrant of the side plane.
Ok, so lets take a look at the mess we’ve got going on inside the ear. To help simplify what appears like just a bunch of random squiggly shapes, always remember “WHY?”… or

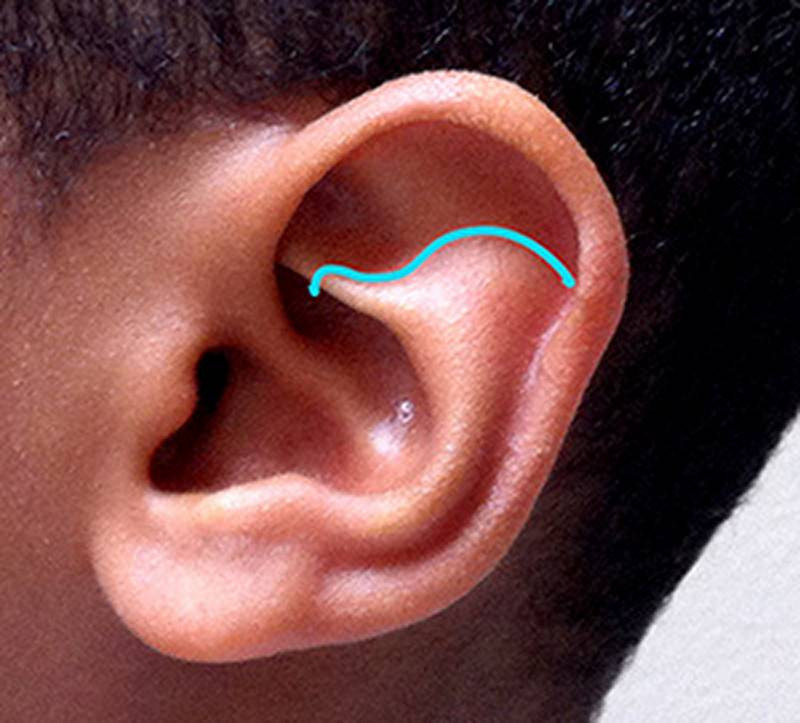
See the resemblance? The helix, or the ring around the perimeter of the ear is the hook of the question mark. The ear lobe is the dot. And the Antihelix is the Y on the inside. Those 3 pieces take up most of the real estate of the ear and will get you almost a complete ear.
The helix starts inside the ear, attached to the concha at about the halfway mark of the whole ear. Since it’s inside the ear, this portion will usually be in shadow. As it comes out, it will be hit by light, and as it curls around the ear the placement of the shadow will slowly change. To clarify this concept, think of a donut.
The light is coming from the top. So the top planes will be lit and bottom planes will be in shadow. So, this portion of the donut will have light at the outer planes and shadow on the inner planes. This part of the donut, will have light on the inner planes, and shadow on the outer planes. So, right about here, the shadow jumps over to the other side. The same thing happens on the helix. The top is lit, and bottom in shadow, then right about here it switches, and the outer portion is in shadow and inside is in light.
Inside the Helix is his evil twin, Antihelix. That’s the guy shaped like a Y. At the top, the helix usually casts a shadow onto the two branches of the antihelix. Make sure to wrap this cast shadow around the branches to show the cylindrical volumes.
The upper branch is wide and soft and the lower branch is thin and sharp. At the bottom, the helix and antihelix connect to the ear lobe at about the same line.
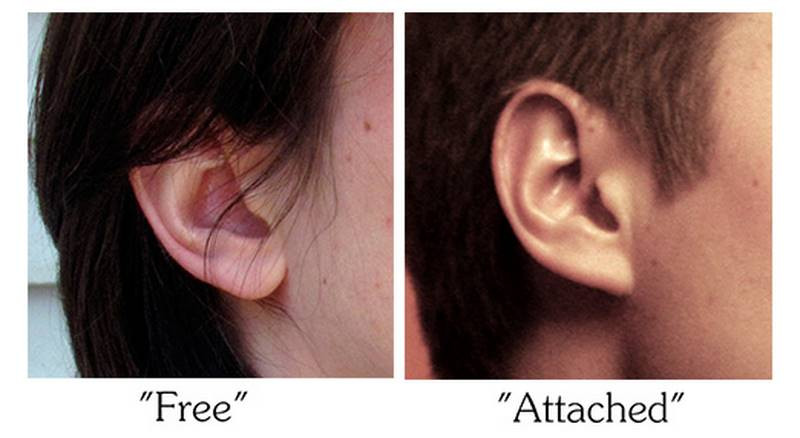
The ear lobe is fatty tissue attached to the bottom of the rest of the ear, made mostly of cartilage. Some ear lobes hang down from the connection point to the head. These are called “free”. Other ear lobes have a smooth connection to the head, called “attached”.
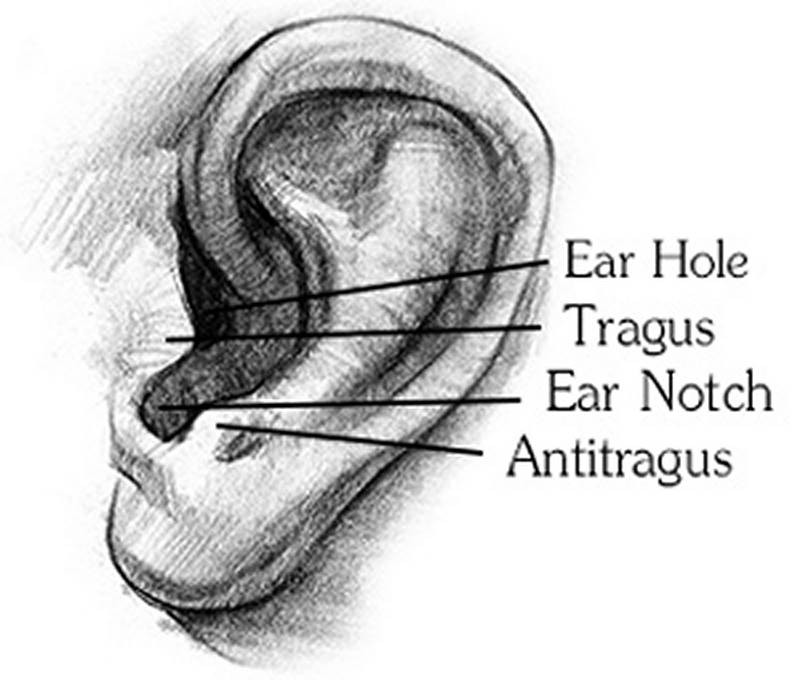
So far we’ve covered most of the ear, except this area. On the side is a node called the Tragus, and just across from it, is the other evil twin, Antitragus…
Between the tragus and antitragus, there is a keyhole called the Ear Notch. Just inside of that is the main reason we have ears. The Ear Hole.
Ready for the next lesson? Learn how to draw the ears step by step with this tutorial.


