


The most commonly asked question so far has been, “What kind of pencil do you use?” So, I do have a specific pencil and a specific way of sharpening it. I do this because that’s the way I was trained at the Watts Atelier.
This page contains affiliate links, meaning we get a commission if you decide to make a purchase through our links, at no cost to you.
Basic List of Supplies
- Conte 1710 B or 2B
- Primo 59B
- Wolff’s Carbon 6B
- General’s 2B and 4B
- Ritmo B
- Razor Blade
- Sand Paper Block
- Smooth Newsprint
* paper –newsprint is NOT archival. It will yellow and wrinkle overtime. - Kneaded eraser
- Clipboard
How to Sharpen a Charcoal Pencil
Main pencil – Conte 1710 B or 2B
I also like to use the Primo 59B and Wolff’s Carbon 6B. And there’s a bunch of other options out there. They’re all slightly different, and the best way to see the difference is to just try them out. They’re not very expensive.
The Primo and Wolff’s Carbon feel a bit more like drafting pencils compared to the Conte and so I use them more for linear work. And the Conte is thicker and softer, so it’s easier to be tonal and more painterly with it.

I’m right handed, so I control the blade with my right hand and hold the pencil in my left hand, like this. The first thing I’m going to do is expose about an inch of the charcoal removing the wood. Push the razor forward with the left thumb and control the position and angle of the blade with the right hand. Take off thin pieces of the wood and rotate the pencil. Make sure not to go to deep.
If you try to take off all the wood at the same time, you risk cutting into the charcoal. Keep rotating until all the wood is off and there is a smooth taper from the wood to the charcoal. Sometimes there will be a layer of glue still on the charcoal. Chip away at it to remove all the glue.
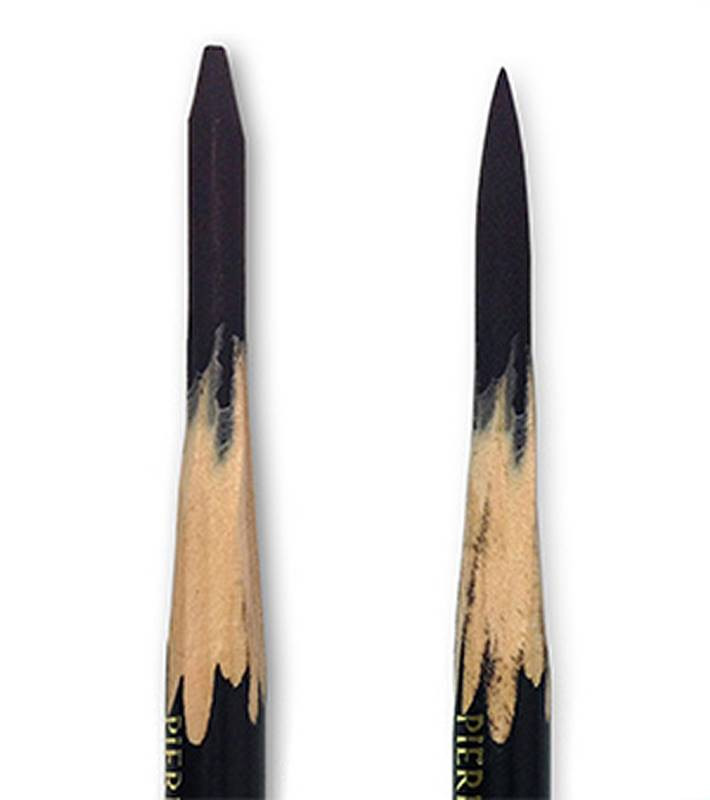
Now let’s focus on getting the charcoal to the right shape. Right now, the charcoal has these sharp corners towards the top. What we want is a smooth taper to the point.
If you have any rough edges or sharp corners on the side, the pencil won’t work properly.
We want a smooth taper so that we can use the side to shade smooth tones.
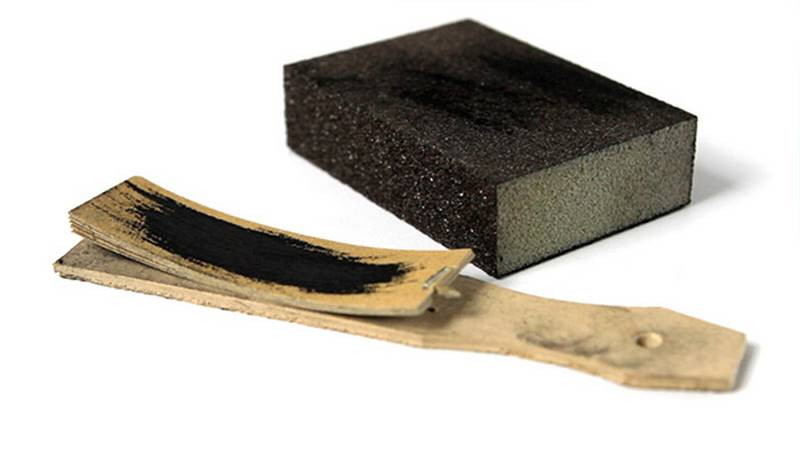
I like to use sandpaper to soften the sides. One of those little ones that you can get at most art stores works fine and fits in a pencil box. I prefer to use these larger blocks from Home Depot because you can clean and reuse them. Medium grit sandpaper works best. Use a forward and back or side to side motion while constantly rotating the pencil.
When you first start sharpening the pencil this way, you’ll probably break a bunch of them. That’s ok, it becomes much easier over time. You can actually get quite fast at it..
AND don't forget to wipe off the excess powder. It gets all over the paper and then you can’t erase it..
Paper
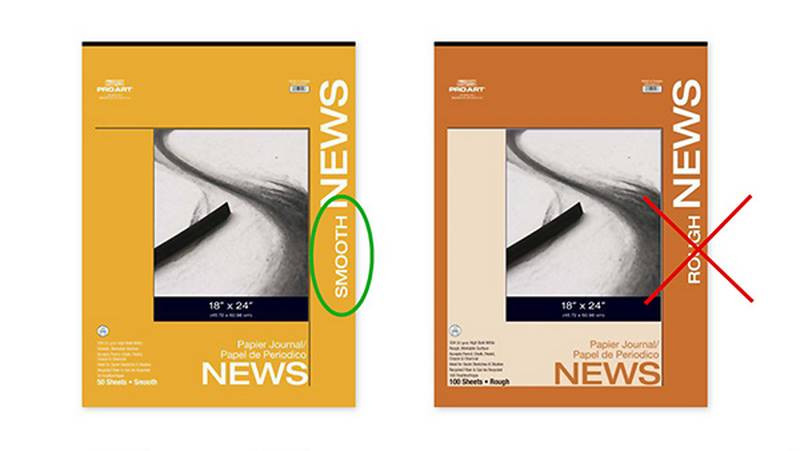
First, the paper. I use smooth newsprint when I do studies because it’s cheap and allows you to shade very smooth tones. It’s important that you buy the ‘smooth’ newsprint and not the rough. Nothing wrong with the rough, it’s just that the smooth gets better details. The rough has some texture that breaks up the details a bit.
Before you start the drawing, make sure you’re drawing on a thick stack of newsprint. This provides some cushion and gets smoother tones when you’re shading. If you’re getting towards the back of the pad, some of the texture from the cardboard will begin to show through.
I do want to point out that newsprint is NOT archival. It will wrinkle and yellow over time if exposed to heat, light, moisture, and oxygen. I use it only for practice. When I want to do a drawing on archival paper, I use watercolor paper and I pick ones that has a soft and cushiony feel. Or I’ll use bristol paper with graphite pencils. I’m always trying out new paper and I encourage you to do the same.
Eraser
To erase, I like a kneaded eraser because I can shape it to erase large areas, or small details. It also doesn’t fall apart while you’re erasing and you can knead it to clean it up a bit.

Clipboard
You’ll need either a clipboard, a piece of wood, or foam board with clips to hold your paper. Put the pad towards your knees, and lean it against a table or the back of a chair.
Hold the pencil like a paint brush, sit up straight, move from the shoulder, and you’re ready to begin.
***
For more supply recommendations, check out my second video. It covers the materials I use for my longer and more professional drawing sessions.
Want to learn more? Be sure to check out the Portrait Drawing Fundamentals course, which includes step by step instruction, real-time demos, 3D models & Full Demonstrations.


