


In the premium version you'll learn how to mannequinize with more detail, considering the volumes of the pecs, breasts, abs, trapezius, erector spinae, obliques and adductors of the leg.
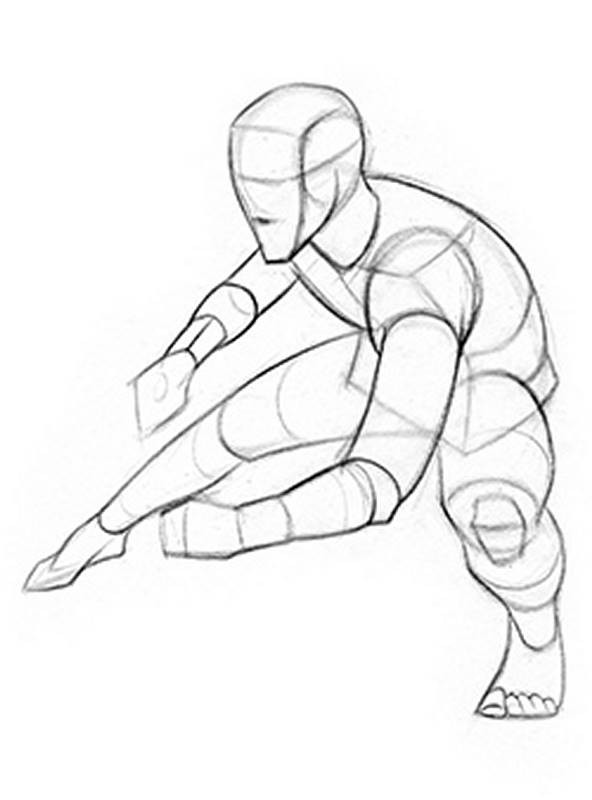
In the last lesson we simplified the torso into two boxes. Now we'll add the forms of the rest of the body to complete the mannequin.
Watch “Structure Basics” for an introduction to structure principles.
What is Mannequinization?
What I think of as mannequinization is constructing the pose from simple 3 dimensional forms that lock together all the way down the body. And when you look at all the parts they form what resembles a person. All these parts, they're all separate, but they all connect to the whole. And what brings them together is the gesture. Each part follows the flow of the gesture.
Along that gesture, you'll see a lot of interlocking shapes. So, the end of one will be shaped like the beginning of the next and they fit together like puzzle pieces.
Why Mannequinize?
Mannequinizing the figure is very hard. Much harder than it seems. But it’s an important skill when you want to add depth and volume to your figure drawing.

If you just rely on contour/outline to draw the figure, you’ll get flat drawings. Constructing the body as forms in perspective will give the drawing a sense of solidity.
It’s also helpful when you start shading the drawing. Having established the plane changes makes it much easier to imagine the angle of each plane relative to the light source. You’ll be able to sense some subtle gradations across forms that could have been missed otherwise
One of the biggest benefits is if you have to invent the figure from your imagination. Starting with simple forms makes the problem much more manageable.
Basic Overview
When you're drawing the edges of the boxes and cylinders, don’t look for the literal lines on the body. They’re not there. The edges between planes on a box are hard, so they can be indicated by a line, but on a real person, the planes are soft, everything is rounded off, so you won’t see the lines.
You must learn how to see an organic, complex form, and simplify it to a basic form or a combination of basic forms.


There could also be multiple ways of simplifying the same object. In this pose the whole torso could be simplified to a cylinder. Or you could make it a little more complex and add some boxes. Mannequinization is just a tool. You are the artist and you decide how you want to use it.
Most people you draw will have similar basic forms, but they do vary depending on the body type. A lean, muscular, or overweight model will change some of the decisions you'll make.
Most of the surface forms of the body are muscles. Muscles are soft. They stretch and compress to the position of the bones.

So, the exact forms will change from pose to pose. This pose calls for a rounded form in the belly. While this one has the abs stretching, so it would be a flat plane. These decisions are made on the spot as you’re constructing your drawing. But you also want to have a generic mannequin in your mind. Typically you'll see something like this:
- A box for the hip region with the edges slightly rounded off. Making it kind of a combination between a box and a flattened cylinder, depending on the person you’re drawing.
- The ribcage is shaped like an egg, pointier at the top and wider at the bottom. I also like to think of the bottom as a boxier form with the corners at the 10th rib.
- The waist is cylindrical. Women tend to have a thinner waist. Whereas, men are bulkier on the sides at oblique muscle. But, this area will change greatly with different physics.
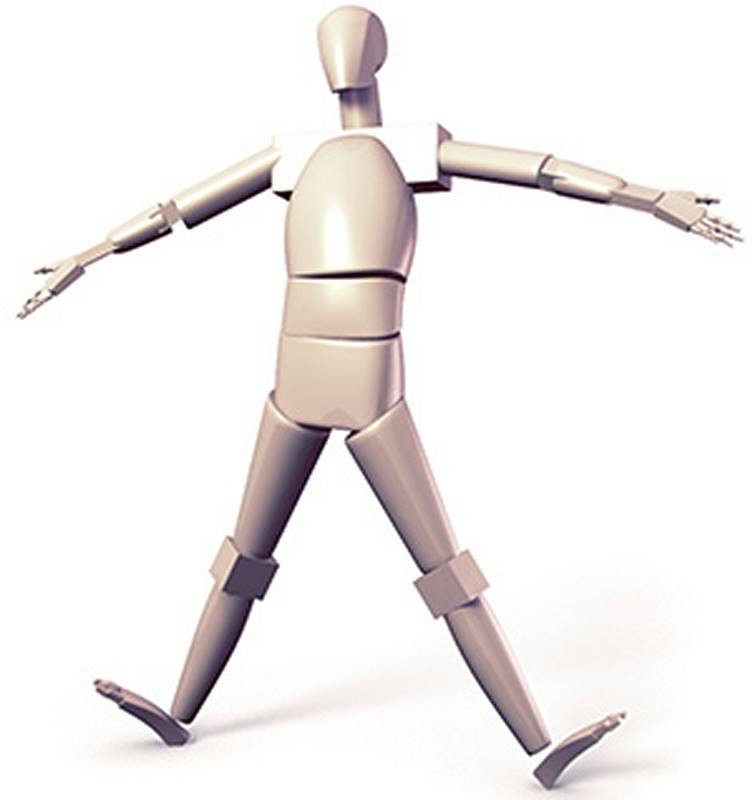
- A box for the shoulder area similar to the robobean
- Cylinder for the neck
- A ball for the cranium and boxy shape for the jaw like I went over in the Head Drawing Fundamentals series
- A cylinder at the upper leg tapering thinner as it goes towards the boxy knee
- And another tapering cylinder for the lower leg, which is actually widest at the calf about ? of the way up
- A boxy shape for the foot and all the toes
- And the upper arm is a cylinder, which does not taper. It generally stays about the same width from top to bottom
- Another boxy or pyramid-like shape for the elbow
- The forearm is round and cylindrical at the top and transitions to a box for the bony part of the wrist.
- Another box for the palm part of the hand ending at the knuckles.
- The fingers are a combination of cylinders and boxes for the knuckles.
So, these general forms I just listed are a good starting point, but the body is more complex than that.
In order to accurately simplify the body, sometimes you need to be more specific with some of the anatomical nuances of the particular pose you're drawing.
So, let’s go through the body and look at each part in more detail.
Neck and Head
The rounded cranial mass is a ball with the side chopped off for the flat temple area. Add a triangular shape for the jaw, paying attention to the angle of front plane and bottom plane. The add a rhythm from the side of the head down to the chin to establish the pane change from side of the jaw to front of the jaw. I also like to put a rhythm in there for the brow ridge and an indication for the bottom of the nose.
Simplify the neck into a cylinder. The connection of the neck to the ribcage is diagonal, lower in the front and higher in the back. Also, notice in this pose we can see the bottom plane of the jaw. So make sure to wrap the jaw rhythm up to the chin and back down to the other side.
Here’s another example with a top view. This one has a more common, triangular shape for the jaw.

Here’s a back angle of the head and neck. From the back it's helpful to add the connection of the trapezius muscle to the back of the head since it covers much of the cylinder of the neck. This connection is about in line with the eyes.
In a neutral position the neck angles forward. It doesn't go straight up.
Torso
I’ll usually use an egg shape or a cylinder for the rib cage. Sometimes I’ll make the bottom of the ribcage boxy by showing the side and front plane, just like in the robo bean lesson. To be a bit more specific you could indicate the thoracic arch on the front of the rib cage. Generally men will have a wider arch curving outward and thinner, inward curves on women.

From the back, I just use an oval or egg shape for the rib cage, without any corner. Then attach a box for the hips.
Sometimes on women, you can combine the ribcage and waist into a cylinder that locks right into a ball shape for the hips. As you can see there’s a lot of options for the shapes you use. So, observe the body type and pose and simplify it in the way you think is best.
When I’m drawing a male, I will almost always choose to use more boxes. This adds more structure and feels more masculine. Balls and cylinders have rounded edges that show the softer forms of a female.
But boxes are also great to use when you’re concerned about the perspective of the body. Here’s an example where I was drawing the pose imagining I was looking from higher up, looking down. I established the angles to the vanishing point first and that helped to construct the boxes of the torso.

Arms
Like we did with the robo bean, the shoulders can be simplified to a box. I always look for the top plane to help me construct this box. You will see the top plane of the shoulders if you're looking down at them. Otherwise, you’ll see a corner. Here’s another example from the back. In this pose we see a very thin piece of the top plane. Attach the cylinder for the upper arm, and in this case the elbow is pointing away from us slightly. Then connect the top plane to the arm with the deltoid. This is basically the side and back plane of the box, which comes to a point on the side of the arm.
The elbow is another box which with really help to show this arm coming toward us just a little bit.

Find an angle to the wrist. And attach the round part of the forearm. At the wrist, add another box.
Make sure to think about the direction of the cross contour curves to show which way the cylinders are pointing. You can also think of the deltoid as a ball, with the cylinder of the arm wedging into it.
Legs
Similar to the arms, the legs can be simplified to cylinders. Taper the cylinder to be thinner at the knee.
Legs don't necessarily have to be attached to the bottom plane of the box. If they are bent forward they will be on the front plane. Someone doing the splits will have them on the side planes. Anything in between will be on a corner. Don’t worry about it connecting perfectly to one of the planes..
From the back, the orientation of the cylinders will affect the shape of the gluts. The gluts curve with the direction of the cross contour of the leg cylinder. The right leg pulls the glut down and it will curve down with the leg cylinder. On the left side, the leg pushes the glut up and it will curve up just as the cross contour of that cylinder would. This connection is a great place to design your shapes to better explain the forms.
Both of his legs are pointing in our direction, so I’ll start by indicating the connect of the cylinders. Then find an angle to the knee and indicate the boxy form at the knee with a top, front and side plane.
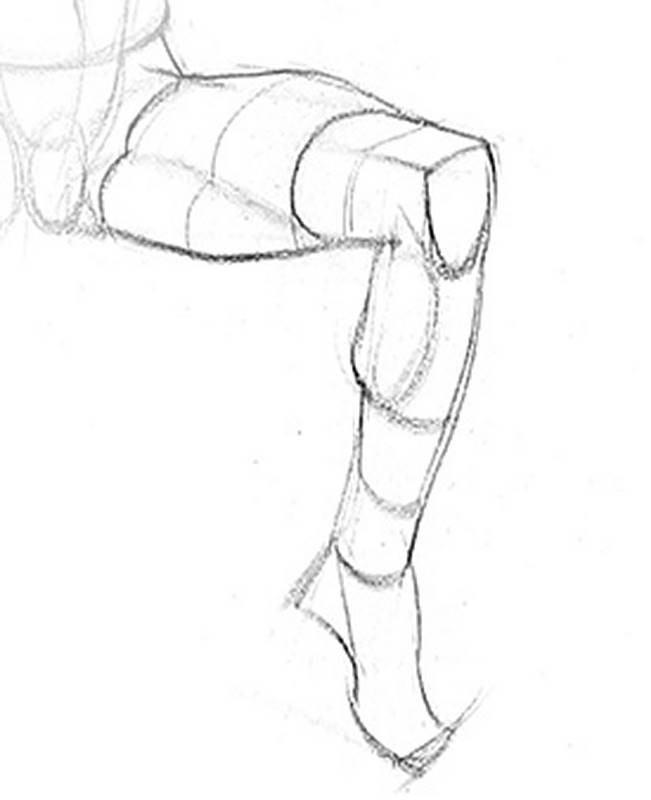
I usually use a box in the joints. The joints are more bony and have more distinct plane changes compared to the meaty areas between the joints. So, the joints are great areas to show the orientation and perspective of the limbs.
The connection of the shin to the foot can just be a cylinder, or sometimes I like to use a wrench shape to show the interlocking forms. A narrow cylinder at the ankle and wider round form at the calf.
Procedure
When you're doing these mannequin sketches, always start by establishing the gesture. Finding the flow, major angles, and checking proportional measurements. Then as a second layer, start adding the 3d forms.
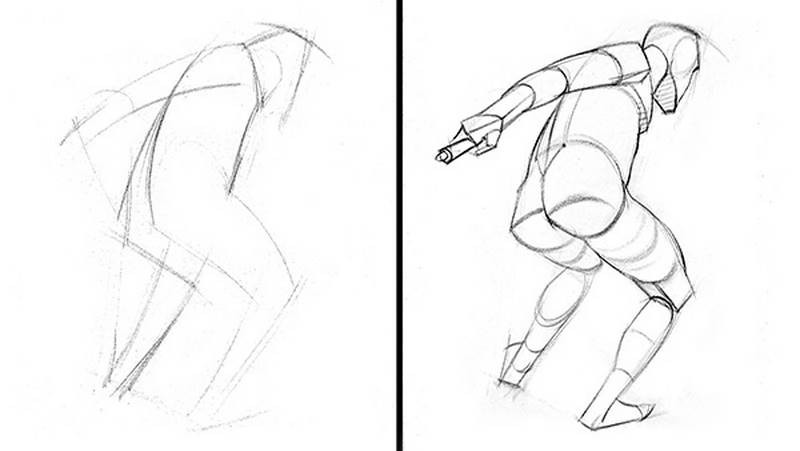
When you’re doing these mannequin sketches, always start by establishing the gesture. Find the flow, major angles, and check your proportions with measurements. Then as a second layer, start adding the 3d forms of the mannequin.


