Hello everyone, my name is Jose Vega. I have been working in the animation industry at PowerHouse Animation for the past couple of years as a lead supervisor for Frederators Castlevania on Netflix along with some other projects, and I want to take some time and explain some of the benefits that 3D has in a production pipeline.

Now this could benefit if you work in the animation, video game or movie industry where speed and time is crucial in production. Personally I use Blender these days but the concept of using 3D is general and does not really matter what software you use, as long as the right mentality goes behind it.
The process of using 3D is very similar to when you are drawing.
If I wanted to draw a hand and try to understand it, I need to be able to see it in its most basic form. From there I can then start adding medium shapes, small shapes and final details.

If we take the same concept and idea into our 3D we can practically do the same thing when we model. We look at our concept or reference in its basic form and we add our medium shapes, small shapes and details.

When designing, we want to think three-dimensionally, and inside this 3D world it allows us to edit, look around from various angles, add lights to see how the form will be affected, textures, colors, etc in a much faster way than if we were doing this traditionally with a drawing. We can then take this basic model, pick our angle and continue our design process in photoshop.
From here we can design multiple options based on our 3D base and once those are approved and finalized we can go back to 3D and finish the model if needed or simply just use this approved design in our paintings.
Now, let's take this a bit further and imagine we are working in an animated show and have this location where our characters interact in the script. We have maybe 20 cuts in this sequence and you are in charge of developing this area for production, from the visual development to the final production paintings and layouts.

Let's start with visual development since that's usually what comes first. We have to conceptualize this area so we know what sort of design we are going to have, we do not know how it's going to look so we have to turn in some development sketches to our Director.

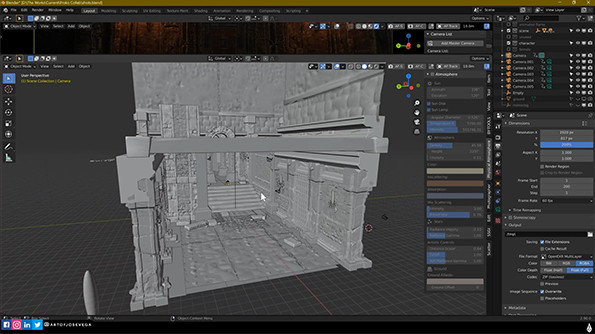
In Pre-production 3D allows us to visualize the area, room or landscape in all its angles. Even with a very basic 3D model we can move around, get a feel for the space, maybe do some basic lighting and mood and this is all important in order to design the space for it to work with the sequence and the characters.
And this is crucial because we are not only doing just 1 painting from 1 angle, we have to provide as much information as possible about this location so not only you, but everyone else working in the project understands how this place works. We can't really show everything with just 1 image. Sometimes we have to make 3, 5, 10 images to showcase a location.
So one of the main reason as to why I think its powerful to have some sort of 3D is CONSISTENCY!
Consistency is KEY, because we need to keep track of many elements in our location. So if we have an interior room, we have to keep track of things like, how many books on the shelf, window design, the lighting, the direction of the wood plank floor, the size of a carpet, etc.
And this is when 3D becomes very powerful. Not only does it allow me to design the whole area at once but it also allows me to bypass a lot of technicalities and that way I can concentrate on the design. Also it allows me to provide way more information to the rest of the team as well as cut down the time to showcase the area.

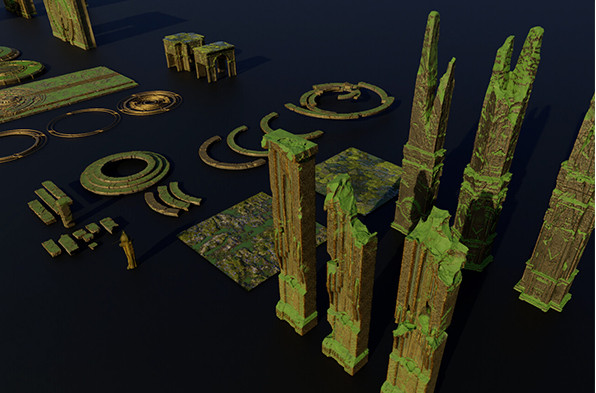
Now this requires more time beforehand but in the long run it will save a lot of time. Because now we have a kit where we can pull from and pretty much play legos with it, where we can build anything that we need from that and since it's all coming from the same kit it will maintain the same aesthetic, look and feel of the location. This is where it really becomes super fun because you already did the heavy load of the work and now you can concentrate on using the pieces to design the space without worrying about technicalities.

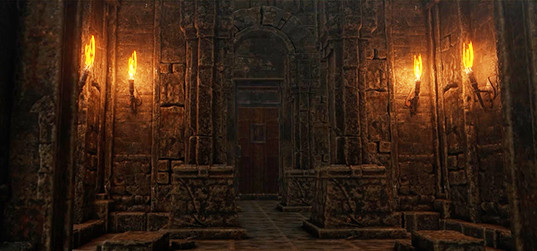
Now let's say we get a new assignment. Our location is going to be a dungeon, and we as BG Designers for our animated show, we have to do 8-12 BG paintings. So let's say we have our 3d kit already designed and textured and we have the models. With all this done, we have a lot of information here that we can use to build our location. we're going to be doing a type of dungeon location and two of the characters are going to interact.


Let's say we have these two concepts. These will tell us a lot about the mood and the final look that we want to have for the actual scene in terms of light textures, lighting color, and everything related to that.

Once we get those concepts approved, if you're working in an animated show we can use the storyboards to pick our shots using our camera and render these out for the different scenes.


Now with my different camera angles, I can go ahead and add in a 3D model and make 6 different shots.

So as you can see, I get a lot of information from the 3D background. Then from here we just take the render and then we can do our final paintings.
Now in this painting there's a lot a lot of things that we won't be doing as background designers for a show like the rain coming in or the fire. Those are things that the post-production artists will work on. What we are doing is more of a proof-of-concept idea.
But you can see that from here to here it really won't take as much time compared to if I was going to do the final image completely from scratch.

Now you can see how powerful this process could be. Doing this, even though it may require some more prep work at the beginning you will see how much time you can save later in the process and the less work we do for this part the more we will have to do later on.


So whether you are new to 3D or a veteran, I believe this is a great tool for any artist to use. And like any craftsman in any industry the more and better tools you have the better you can get the work done.
Thank you for watching! If you want to see more 2d and 3d art tips check out my Youtube channel where I give you my industry pro experience and techniques in dozens of videos. You can find my work on Instagram and on ArtStation. If you really want to dive into more about this subject, you can pick up my blender basics course along with other tutorials. You can also see my work on Netflix in the hit animated show Castlevania!


