
$135.15
$159
You save $23.85


Bundle discount Each additional course part in your cart adds 3% off all courses, up to 15% off.
Full course
You will be given unexpiring access to watch the videos online .
$135.15
$159
Give a gift
Give a gift card for art students to use on anything in the Proko store.
Or gift this course:

About instructor
Founder of Proko, artist and teacher of drawing, painting, and anatomy. I try to make my lessons fun and ultra packed with information.
LESSON NOTES
Hey guys! In the last video, we talked all about paper and sketchbooks. In this video, we’re going to cover pencils and erasers. I’ll show you how to use them and how to understand what you’re buying.
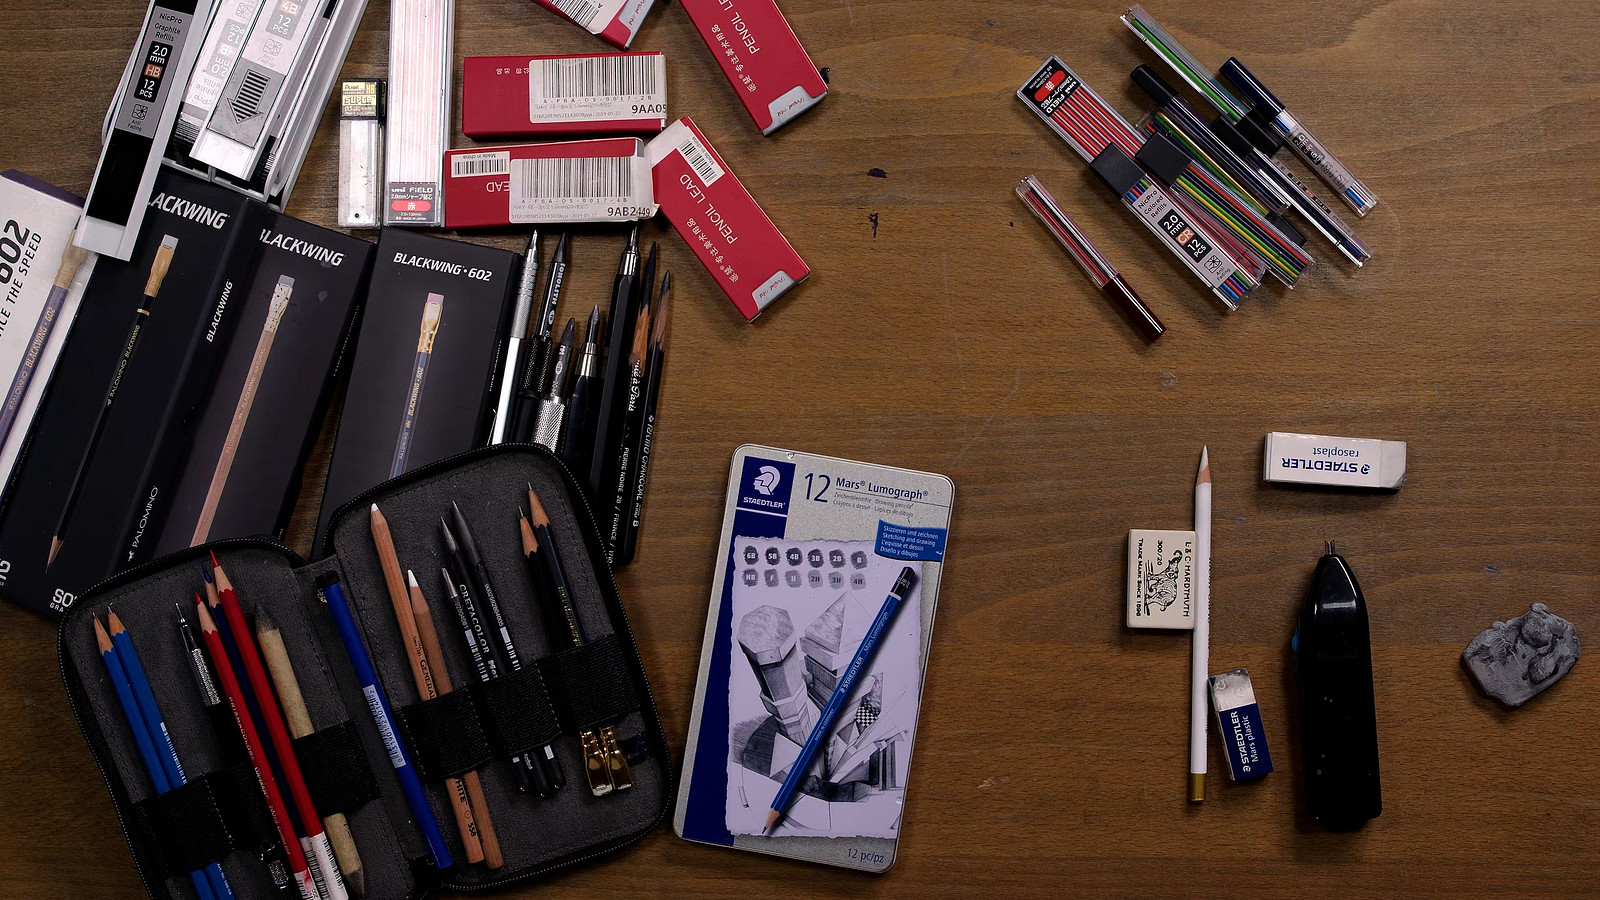
Which Pencils Should I get?
Pencils are simple right? Well… they’re a bit more complicated than you’d think. If you want the full lessons where I'll go into much more detail about pencils and erasers, get the premium Drawing Basics Course.
DOWNLOADS
ultimate-guide-to-pencils-and-erasers.mp4
545 MB
ultimate-guide-to-pencils-and-erasers-transcript-english.txt
16 kB
ultimate-guide-to-pencils-and-erasers-transcript-spanish.txt
17 kB
ultimate-guide-to-pencils-and-erasers-captions-english.srt
26 kB
ultimate-guide-to-pencils-and-erasers-captions-spanish.srt
27 kB
COMMENTS![]()
![Stan Prokopenko]()
![]()
![Lilah Rak]()
![]()
![@elizaqp]()
![]()
![Shanna Sinaga]()
![]()
![Sabás Alvarez]()
![]()
![WaffleTheGreat King]()
![]()
![Jacque Longley]()
![]()
![The Wonkee]()
![]()
![Juice]()
![]()
![@roblewisart]()
![]()
![Nate Ferguson]()
![]()
![@schmal]()
![]()
![Nate Ferguson]()
![]()
![@tomasorganista]()
![]()
![Patricia G]()
![]()
![David Hilton]()
![]()
![IlIIll IIIlllIIIIllll]()
![]()
![Brianna Huber]()
![]()
![Basil Godevenos]()


A beginner's guide to pencils and erasers! A breakdown of the many different pencil and eraser options out there. I’ll go over the different types, how they each differ from one another, the best way to hold them, and the most effective way to use them.


NOTE: I am working on these assignments at my night job. So I have no access to quality lighting. I also know myself and that I will not remember to post these once I get home. For me its either post with bad quality of not at all. Lol.
Thoughts:
I now understand why the grain of the paper is so important. Even though printer paper is lower quality than what I have, the lack of grain in printer paper would have ended up making this practice better.
I have never used the side of the pencil before, it took some time to get the hang of it. By the second page I was starting to understand it more. It was very helpful to do two versions of the tip and side only going as light as possible and dark as possible.
Things I learned:
-Side of the pencil makes things darker automatically
-As @Stan Prokopenko said, the side also makes the grain more visible
-The difference between two pencils (2h and h) when side by side is negligible. It is only when looking at it with the full range is it truly visibale
-Blending with my finger after using the side of the pencil is a much smoother, "finish" rather than using the tip and blending.

Me dejé llevar por los ejercicios, rompí varias puntas de mis lápices grafitos jeje, a seguir avanzando!


When I buy the basic drawing course, why they play button didn't appear? Is there anyone with the same issu?


I don’t have any problem with the play button. I’m using different equipment during the day to watch some videos. Recently bought the course 3 days ago.


Hi guys I’m a new art student here and sorry if my pic is wrongly at that side but I just want to know if you can critique me if my shading of HB, B, 2B and 4B is alright or no if I make some slight mistakes that’s the only graphite pencils I only had this is also my first time in traditional paper drawing because I’ve been using digital for art

I can see light and dark areas within your boxes, keep practicing, and even though it’s the tripod grip, try moving the pencil from the elbow. It’ll take awhile to build that muscle memory for nice even strokes with the same pressure so keep making boxes and filling them in👍

Im already getting so much value out of this course! Ive been taking really detailed notes over each of the talking points, even if it seems simple or mundane. Ive had a Woodless Pencil for years but had no idea what It was for or what to do with it, same with the Blending Stumps! Got to experiment with these tools for the first time tonight! Ill call that a victory! :) This is making education FUN, even though its been my biggest fear throughout life. Long live Proko!

I dont know where to ask this. But i try here. I had day light lamp ive used when I draw and take photos of my drawings. But it just broke today. After maybe 2 years. The plastic broke. I wasnt 100% satified with it and that it just lasted 2 years makes me want to get anything else. 2 bad things with this one is that it blinds others and that it gets like a dark corner on my drawings where it doesnt reach. Do anyone here knows a good lamp? I use it in my arm chair so it needs to stand on the floor and be able to stand close to me and my easel. I attach picture on the lamp i have now.


I feel like I am "all the gear and no idea" 🤷♀️ but I am loving this course so far.

I think I have the full range of tools with an added tinted white charcoal pencil that can be used for highlights I'm assuming. Don't have a 2h or any mechanical pencils. So I'll add those as i progress through the course. I really liked the diagram of which pencil to use at certain stage of the drawing. Very handy.


hey guys! I am not new to drawing but using this course to get teh fundamentals right and tighten up those i know already. i tried the assightment with trying to get the same shade in the square. Is there a way to concentrate properly to not get out of the rythm while bringing down the lines or is it just muscle memory and practice?
I'm gonna say practice is the key to creating smooth and straight line work as well as having accurate shading technique. I'm right there with you. It's just putting the time in.
Una pregunta a los que saben.
Me ha gustado la idea de usar un buen lápiz rojo borrable, pero en España es casi imposible conseguir el prismacolor col-erase.
¿Sabéis de algún buen lápiz rojo borrable para hacer los bocetos? Que se pueda conseguir en España y no sea muy caro, claro.
Muchas gracias


Aquí en Brasil también es muy difícil encontrar lápices Prismacolor, así que creo que me compraré el Caran d'ache Sketcher, pero aquí en Brasil es un lápiz caro (no sé si en España es igual) y su color es azul.


Haha, I love the fact that Proko refuses to use the F pencil. I will follow suit. That abomination no longer exists. In fact, after scanning the exercises for this class, I think I should probably restrict my range to 2B-9B since anything lighter really isn't picked up by my scanner.
Can you adjust the sensitivity on your scanner? You could also try taking photos of your pages instead if you want to be able to use lighter pencils. They might show up better that way. If you're fine with what you're doing now though, then carry on.

I have a whole case of 2mm 2B refills. I now clearly see the value (ha!) in getting more of these lead holders and a range of leads!