


In the last lesson we covered the different types of joints, if you haven't seen that lesson click here to watch it and download the assignment images!
How to Simplify the Joints
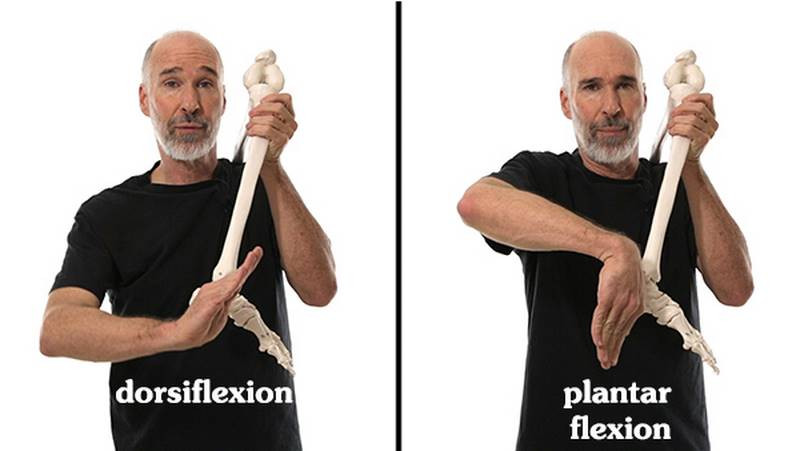
Let's use some real bones as reference. It's good to have a full sized human skeleton, one cast from real bones, so that you can compare this to your actual body. But the problem is that these thing are riveted so that it doesn't move like a human skeleton moves. There is a spool in here that allows a foot to go into dorsiflexion and plantar flexion that we can't do on this because it's stuck together. But we don't have that limitation when we draw and when we have the 3D model.
This is an extended foot. I like to begin with a rough something to contain the proportions. It's okay if you take some time with that. But to make it look three dimensional, even when I do that rough something, I'm thinking of height, width, and depth. And we letter those systems as X, Y, and Z. And with just those coordinates, we can build a Lego foot standing non-extended. Which, even if it doesn't look like a foot, it looks 3D.

Then when we put this cylinder in there, it runs along X which helps us draw the ellipse, and we know that that is the fulcrum of the foot. That means it's the center axle of the foot's rotation. If I draw it from the side, you'll see that we have the depth. That's the Z line. The height, that's the Y line. And then we're looking straight down on X where that ankle joint is.

And when that foot moves on that hinge joint and makes an arc, goes into extension, we can see that Z will not line up on Z. It will aim up. So when we do this refined foot, I'm going to chisel some of the plane so it looks a little bit more like a foot. It's not all right angles. And the big foot, we'll put into an extended position rather than a straight up and down position. So let's get the ankle bones. That would be the tibia and the fibula. And they come down kind of like a wrench to grip that spool bone of the talus. I'll refine this a bit, badly.

Let's put that spool in there. Since it's extended, the Y lines won't point straight up and down. They'll aim off in that direction. And cross contours make us sure of the form, and we don't have all right angles there. We've got some beveled, slanted lines. Before I turn this into an abomination, it is so embarrassing to be seen in the privacy of one's hesitations.
There, that's better. There we are, all dressed up for the debut and no embarrassing personal scratching.

Premium Content
Marshall's other demos for the Joint assignment are in the Premium section of the Anatomy Course. If you'd like to see Marshall construct these joints while explaining some perspective principles, he has 5 more great in-depth demos. Get all of them and more by signing up for the course.
Critiques
For additional help, watch my critique session on joints. I go over student submitted work and provide insights on how they can improve their assignment examples.


