


Deliberate Practice: The Secret of Getting Good Fast

When you make a mistake, (not if, but when you make a mistake) like I did with these drawings, analyze the mistake. Don't ignore it. Figure out exactly what you did wrong and imagine in your mind what it would look like if you did it right.
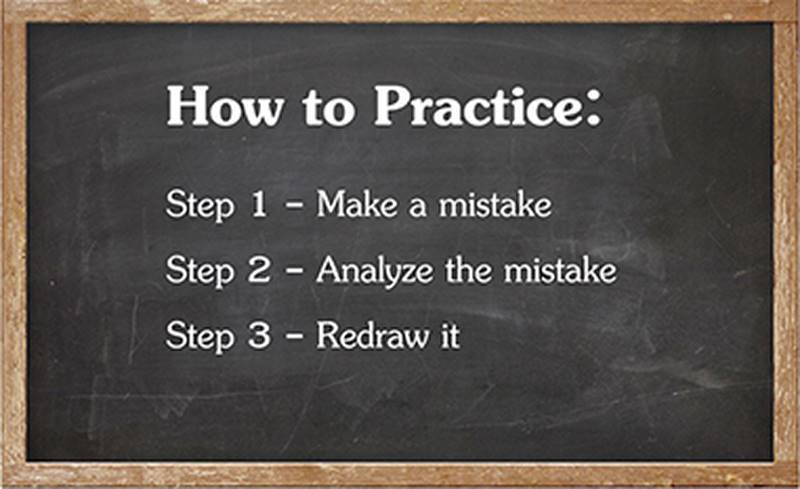
So, I'm going to take my own advice and redo these drawings correctly.
Example 1
Let's starts with the first one. Very extreme extension in the lumbar section. The pelvis is tilted forward, so we're seeing a lot of the top plane of the cylinder. Sides, showing the tilt. And a bottom plane. Sometimes I like to add a centerline in there to show which way the front is pointing. And an angle between the ASIS landmarks.
Ok, so the relationship of the pelvis and rib cage is really important in this one, so before I do the spine, I want to find some gesture lines and a rough shape for the rib cage. This will help me with placement of the spine.
Now Ill add the lumbar section with the extreme curvature pointing back.
Add the thoracic section. And that continues into the cervical section.
That hole in the top of the rib cage isn't visible from this angle since we're looking up at the rib cage. So this cylinder is going to be really flat.


Angle of the sternum. Angle of the thoracic arch. And then follow that bottom rib around the back of the spine to the other side. And complete the thoracic arch.
Forgot about some cross contour lines at the section divisions to help show which way the spine cylinder is pointing.
Finally the skull. It's almost side view, but we're looking up at it, so we will see a little bit of the bottom of the jaw... Side plane... Divide the front plane into thirds... And side plane of the jaw.
Now that looks much better than my first attempt. Definitely more dynamic gesture.

Example 2
My first attempt at this one was also too stiff. So, let's try it again and make it dynamic. The pelvis is tilted and the rib cage really thrusts forward.
That looks pretty good. Now let's add the lumbar section of the spine. Starts out pointing forward and then curves up to get that back extension. Notice how I'm showing the top and bottom caps of the cylinder. This forces me to think about it as a 3d form rather than just curvy lines.
Finding the relationship between the pelvis and rib cage. A really important angle in this pose is the left edge from the pelvis to the ribcage. See how the muscles stretch tight there? This angle is really important to get right, otherwise I won't capture that dynamic gesture.


Thoracic section leaning back.
Imagining the bottom rib swinging around the spine. And then add the thoracic arch to the bottom of the sternum... And completing the shape of the rib cage.
The cervical section leans to the right Start the construction of the head using the Loomis method. When doing this, I like to compare the cranium to the sternum. They should be about the same size. Remember to consider foreshortening. If the heads is leaning toward the camera, the cranium might be bigger than the sternum. And if it's leaning away, the cranium might be smaller than the sternum.
Extreme up tilt on this one. So, the brow ridge will be all the way up here. nose here. and chin here. Then I can connect the jaw shape to the chin. Clean up some contour lines. And add a center line.
And just for fun, let’s add the angle between the ASIS landmarks. In the next lesson on the pelvis, I’ll show you why this angle is so important.
Ok, I think that looks pretty good! If you did the assignments last week, go back and see if there’s anything that you can improve. Do them over and over again until they seem easy!


Critiques
For additional help, watch my critique session on the spine. I go over student submitted work and provide insights on how they can improve their assignment examples.


