


We've finally made it to Feet. This is the last body part we're gonna study in this course. We're getting really close to the end.
If you missed the foot bone lesson, go watch it! The form of the foot is considerably made of the form of the bones. When you know the bones, you're 90% ready to draw a foot.
Premium members, you have an extremely valuable tool available to you. The 3d model of the robo foot. Study this form! Draw it from all angles and learn how to articulate it. In this lesson, we're gonna take this simple structure that we learned about in the foot bones lesson, add the fat pads, toenails, and skin folds to draw a fleshed out foot.
Then in the premium lesson, we'll learn about the muscles, tendons, and veins, so we can take our foot drawings to an even more informed and detailed finish.
Review the Basic Form
Since the foot forms are determined so much by the bones, let’s do a quick review of the foot bones lesson.
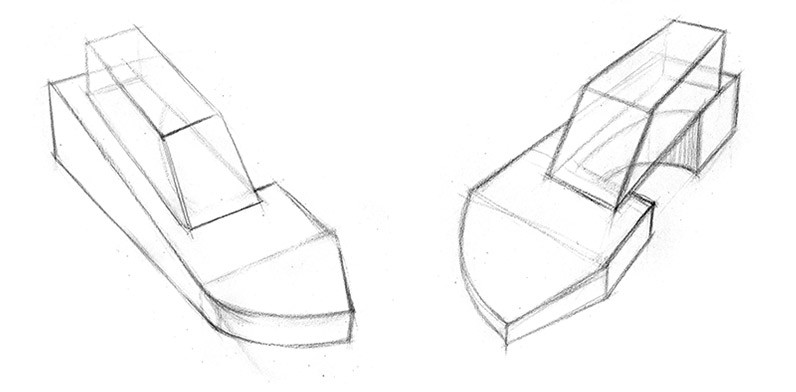
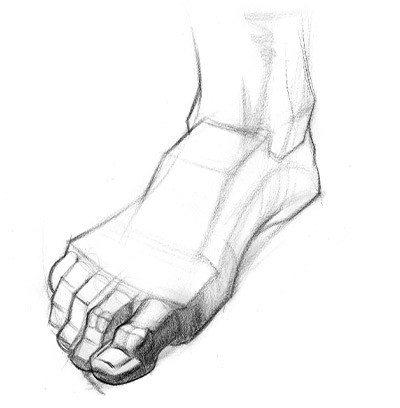
The proportions of the foot fit nicely into 3 blocks. So, the height is roughly the same as the width. And the length is 3 times that.
Most importantly, let's remember the basic forms. The heel is a big block, with a half cylinder on top of it that the shin bones sit on top of to create a hinge joint.
From the top of that blocky heel, we extrude this twisting, rounded form that completes the arch of the foot, or the bridge. In fact the foot has 3 arches. A tall medial arch for flexibility. A flatter lateral arch for stability. And a transverse arch across the foot. This transverse arch rotates and flattens as the bridge goes toward the toes. So, the top plane is not in the center. It's way over on the medial side. From the top plane, there's a slanted plane toward the pinky side, and another slanted plane down toward the toes.
The toes attach along a curve going up and forward. The 4 smaller toes have 3 phalanges, and the big toe, separated from the others, has 2 phalanges.

If you're a little confused, here's an even simpler way of thinking about the form of the foot. Imagine the shape of a footprint. Extrude that down to make it a blocky footprint. And then stack another block on top of it, shifted toward the medial side. The front of it slopes down toward the toes. So, the lateral side is flat against the ground and extends out. The medial side has this cave, under the bridge of the foot. Only the ball of the big toe extends out. Go ahead and try to draw these forms. Not just from the angles I just showed you, but also from slightly different angles. Make sure you're understanding these forms instead of copying the lines from my drawings.
So, those are the basic forms, mostly created by the bones. Things soften out and get really squishy once we add the fat pads.
Fat Pads

Under the foot, large fat pads cushion the bones like the sole of a shoe. There's also a thin layer of fat covering the muscles between the heel and toes, which hides most of the muscular forms from being visible on the surface.
Feel the contrast on your own foot: top of the foot – hard and bony. Bottom of the foot – soft and fatty. The bottom of the foot has a serious job absorbing the shock when the foot hits the ground. Form follows function. There's a reason things are structured the way they are. And that's usually to serve some function.
The fat pads are thickest at the weight-bearing points that touch the ground - the heel, the metatarsophalangeal joints where the toes begin, and the tips of toes.
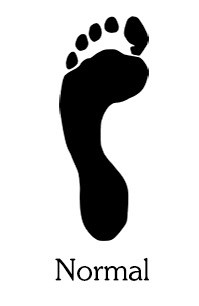
You're probably familiar with the shape of a footprint. These are the parts that touch the ground and because of that they're the fattiest areas. There are variations, but an average sole is shaped like this. With a good amount of the middle portion raised off the ground.
When we walk, the weight transfers through the foot from the heel to the toes. It starts at the lateral side of the heel, moves through the lateral side of the arch, to the fat pads under the metatarsophalangeal joints, and the toes. Then the heel lifts and the weight goes even more toward the toes and the big toe is the last one to push off the ground, with its mighty wide cushion.
The shapes of the fat pads from the bottom view are kinda like this. Oval for the heel, circle here, long oval or teardrop here, little circle for the 4 toes, and a wedge shape for the big toe. The big toe fat pad can actually be divided into 3 chunks. They remind me a bit of the way we designed the calves. One side was lower and curved in dramatically. The other was higher and more straight. And then there's this more blocky bump up high in the middle. The overall shape is wedge-like, but it's not symmetrical and there's a little variety in the way each corner is designed.
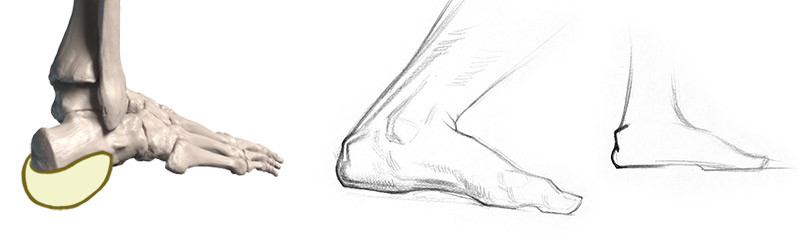
It may surprise you how much of the heel is fat. The heel bone is a rounded block. The fat pad is underneath and wraps around it, like a donut.

There's only one part where the bone shows itself. So we only see the bone of the heel up here in the back, where the thick cable-like Achilles tendon attaches. Long tendon, blocky bone, round fat pad.
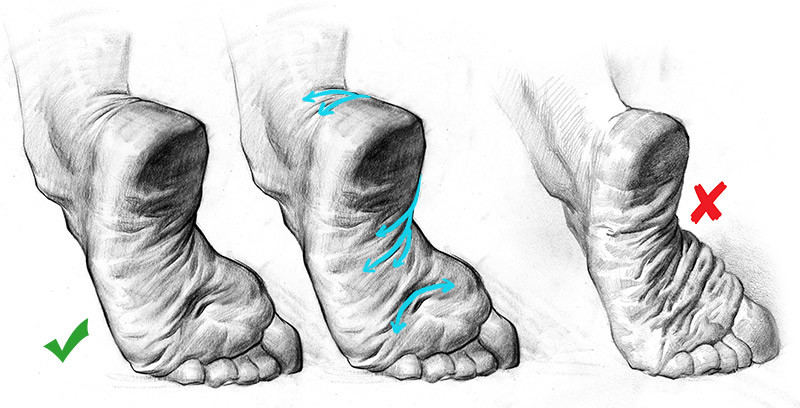
Arching the foot creates a bunch of very prominent skin folds across the foot. Remember that wrinkles are a great way to show tension / compression. Don't arbitrarily copy or draw a bunch of horizontal lines. Use it to enhance the gesture. Since the skin is thickest and toughest at the heel and thin and delicate in the middle of the sole, especially the medial side, you'll see different thicknesses to the wrinkles. Much thinner in the sole.
Now, let's try not to be too immature about this, but these two fat pads are called the balls of the foot. The arch of foot drops down to the metatarsophalangeal joints where the foot rests on the ground and the toes begin. These fat pads protect the joints.
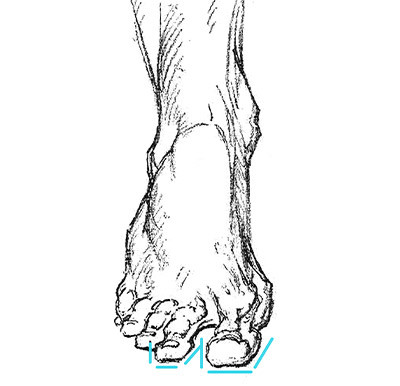
They cover about half of the proximal phalanges. That's the first bone of each toe. This makes the toes look shorter when looking at the bottom of the foot. We saw this same thing with fingers. Palmar-view fingers look shorter than dorsal view fingers. The toes look like they begin above the balls of the foot. When looking at the dorsal side, the toes continue past the webbing skin between each toe. The webbing between the toes is highest between the 2nd and 3rd toe, and drops at both sides.
Drawing Dynamic Foot Shapes
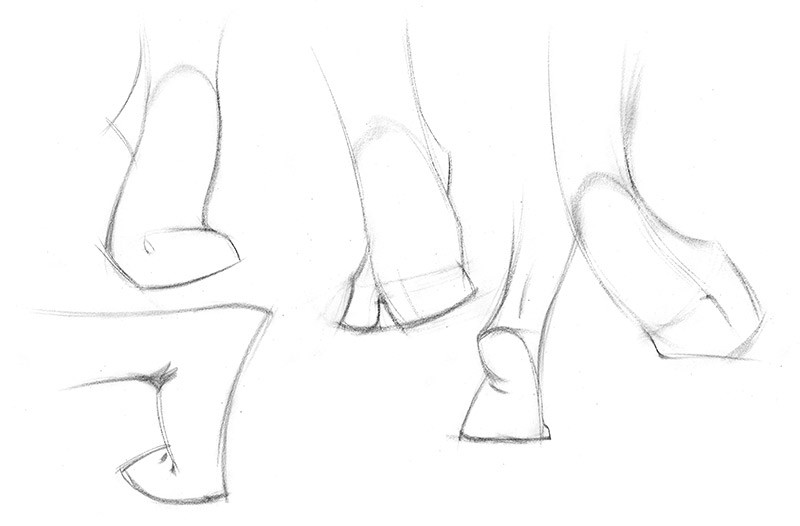
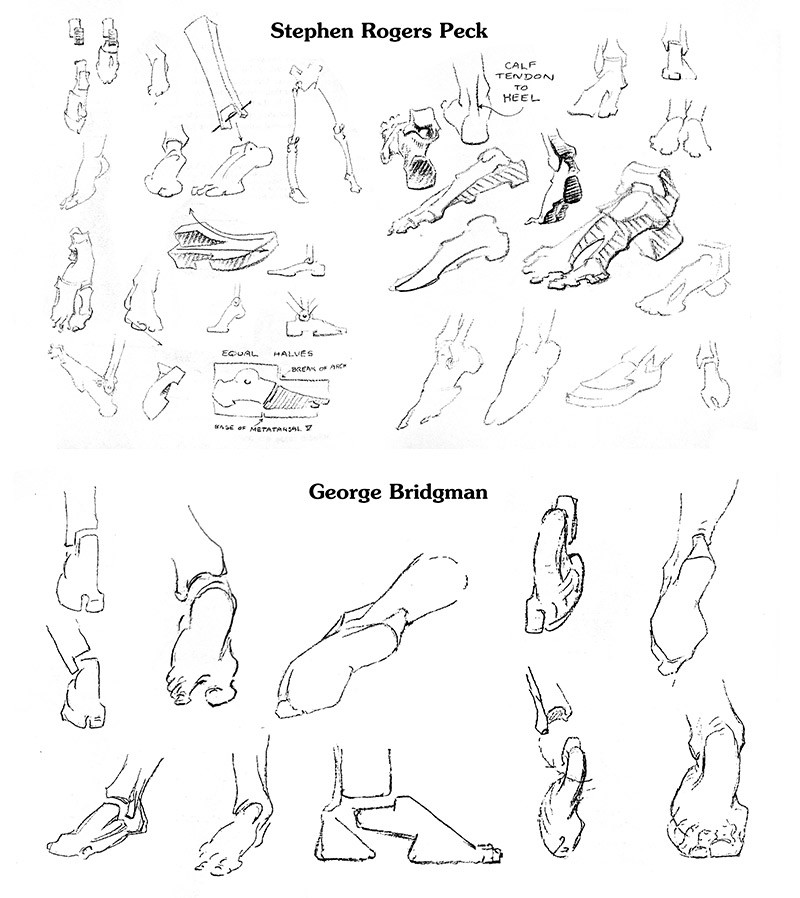
It's useful to have some shorthand ways of designing the foot. Quick shapes that indicate the gesture and the structural forms. Some poses are graceful, usually continuing the gesture of the leg to the toes. Some poses will show a lot of tension. Look for sharp corners, overlaps, and zig zags. Feet hold the weight of the body. Sometimes it's important to show this and make them structurally stable. Bridgman and Peck are a goldmine for these shorthand indications.
A major thing I learned from these masters is how to design the foot to be dynamic. Don't think of the gesture of the foot as a straight line from heel to toe. Remember that the body is made of asymmetrical peaks bouncing back and forth along the contours. The foot is no different.
Since the foot is taller on the medial side, the medial malleolus is higher than the lateral malleolus. So the angle at the ankle is like this. When we group the toes and the balls of the toes into a simple shape, it looks like this. It mirrors the diagonal at the ankle. The side of the big toe is lower because we're using the big bump of the metatarsophalangeal joint as the widest point. And we're using the base of the metatarsal of the pinky on this side, which is much higher up. And of course the general angle of the toes, follows this angle too.

To accentuate the gesture, we can connect the ankle and toes with a curved bridge this way. For this dynamic shape design, we can borrow an idea from the bean. Stretching on one side, compression on the other. This foot has energy. This one is static and boring.
Toes
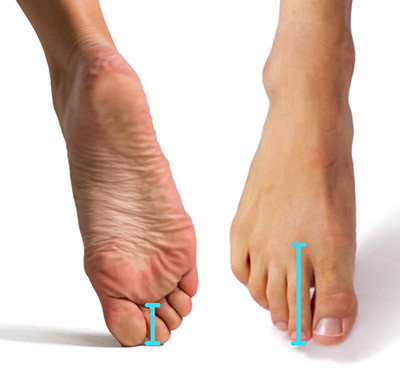
There are 3 common toe length variations. But the one you'll see in old artwork and anatomy books is the Greek foot, with the second toe being the longest.

The big toe is separated from the others with a gap, while the other 4 sit side by side. That's why we group them together. Unless you are flexing it, the big toe likes to sweep up at the end like a ski slope. The middle three toes curve down a bit. And the pinky curves way down and in, like a cold puppy. It's important to think of the differences between the toes so they don't end up like 5 sausages side by side. Add a little variety to the tips of the toes. The big toe is a large wedge, the pinky is round, and the middle three can be squared off, pointy or rounded.
When you're trying to show depth and perspective, choose to push the box in the design as much as possible. Notice how Bridgman pushes these angles to suggest strong planes based on a simple box. This makes it very clear to the viewer what is a front plane, side plane and top plane.
The three middle toes do have strong top planes with an angle change at each joint. If you want to get a little more descriptive, the joints have two round bumps that are sometimes visible. The bumps make the toes wider at the joints from top view.
At the last joint, there's a steep drop to the nail. Notice how the toes actually have their own bridge-like structure, adding even more stability to the foot. The fat pads at the balls of the foot and at the tips of the toes touch the ground. The two segments between create an arch. This kinda creates a stair step design, which can be even more pronounced if the last phalanx is hyperextended. Usually when the toes are pressed against the ground or gripping.


Toenails are like saddles. They press into the soft form of the toe and cause flesh to swell up around them. The nail curves around the cylindrical form of the toe, which is really useful when trying to show the perspective of the toe. It's the same concept we learned about nails when we studied hands.
And that's how you draw the foot! We'll continue the journey with another Premium lesson that will cover muscles, tendons and veins of the foot, so you could draw it like a pro.
Assignment
It’s a 2-parter. Download the 3 photos and start by drawing the simple structure that we learned in the beginning of this video. We can call this the “mannequinized” foot. Then do another drawing of the surface forms, starting with the gesture, then adding structure and shading.


