


Check out the Premium Portrait course to support the lessons and get access to every portrait video.
Drawing the Head
In this first lesson I’m going to attempt to summarize and simplify Andrew Loomis’ approach to drawing the head. Here we go.
If we take the head and remove the eyes, nose, lips, and ears we are left with 2 simple masses. A ball for the cranium and a boxy shape for the jaw.
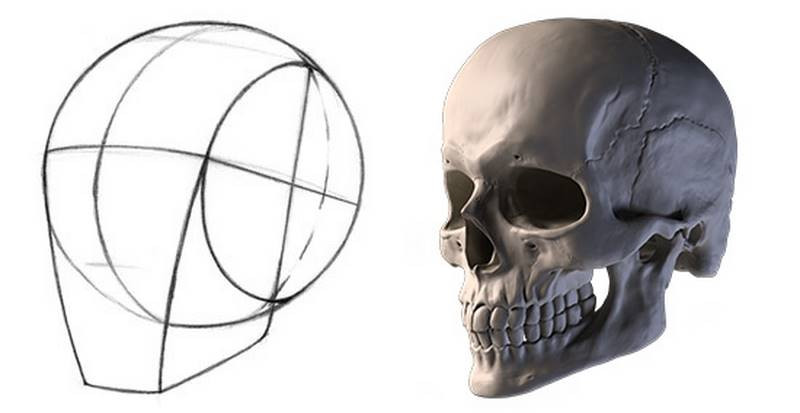
The cranium is spherical, but with flattened sides. So, chopping off a slice from both sides gets us a very close representation of the cranial mass.
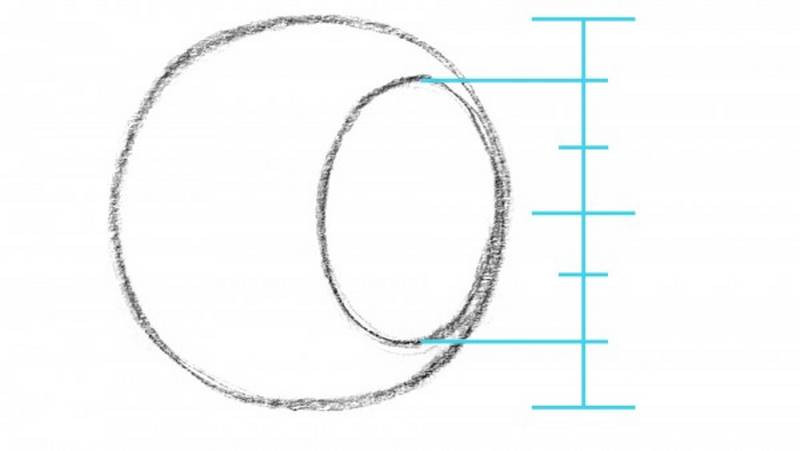
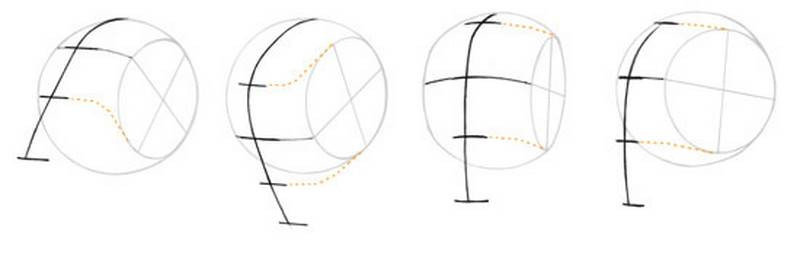
When drawing the head, I’ll start with a ball and draw an oval to indicate the flat side plane. The sizes are important here. Make sure the ball is a perfect circle. Don’t be sloppy. The oval is a bit more tricky. The height will always be the same, no matter what angle you’re drawing the head from. It’s ⅔ of the height of the circle. From the center and top of the circle, divide that area into thirds, and this will give you the top of the oval. Do the same at the bottom.

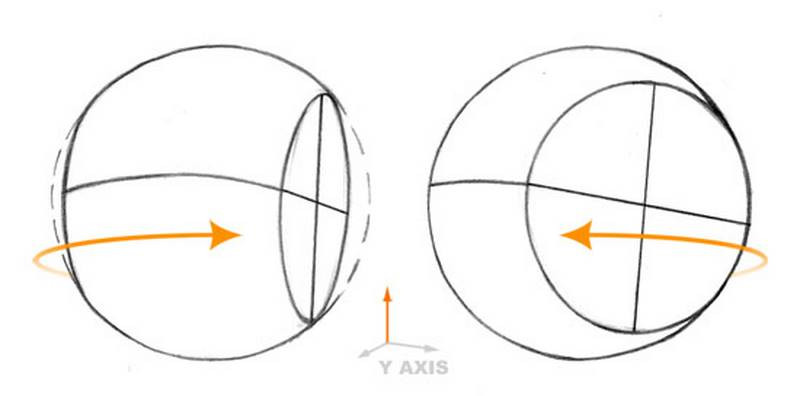
Finding the Left and Right turn: The width of the oval will depend on the direction the person is looking. Compare the size of the front plane to the size of the side plane. The top portion of the oval falls on the corner of the forehead, where the front plane meets the side plane. This area is usually rounded and so it’s open to the artist’s interpretation. I've found that it usually lies near the end of the eyebrow. The line on the front plane represents the brow so pay attention to the angle from one brow to the other.
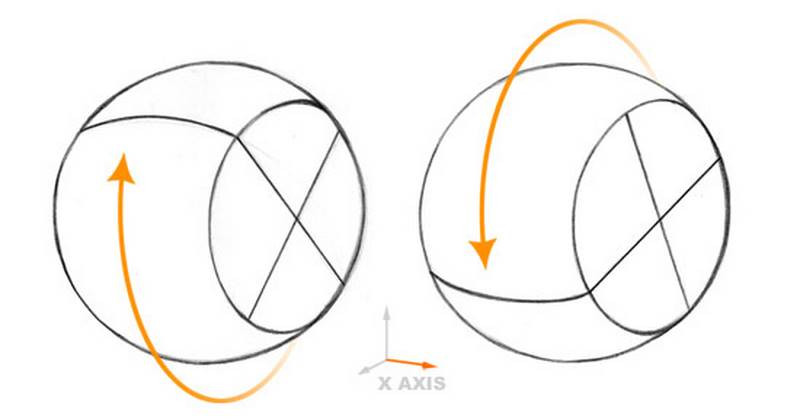
Finding the Up and Down tilt: The vertical tilt is indicated by an angle along the side plane. If the head is tilted up, the angle will point up and if the head is tilted down, the angle will point down. The degree of the tilt will determine how steep to make this line. I like to use the angle from the ear to the brow.
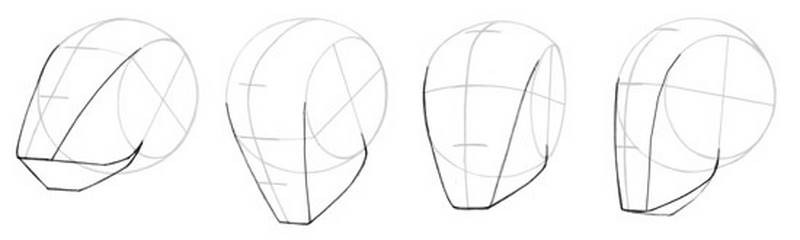
Then, at the base of the vertical line, draw a curve identical the the brow line. This represents the bottom of the nose. Drawing the same line again from the top of the oval brings you to the hairline.
The face can be broken down into nearly perfect thirds, chin, nose, brow, and hair.
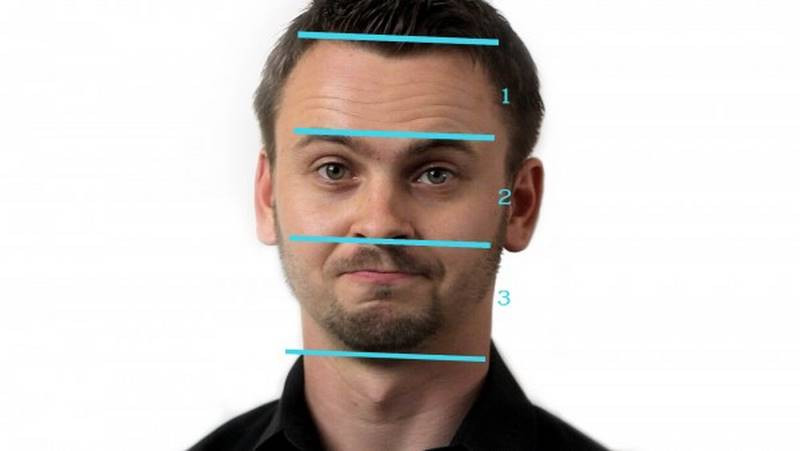
We can use the measurements we’ve already found to find the where the chin should be.
Observe the general shape of the jaw and draw in the major angles starting from the brow and ending at the side plane of the head. It’s usually about halfway into the oval, or a little bit farther back.
Now that we have the foundation of the head established, we can finish it by putting in all the features! Don’t worry, I’ll explain this step in more detail next time. Each feature deserves it’s own lesson.

- Start with a circle for the cranium
- Oval for the side of the head
- Angle to show the person looking up or down. I’ll go with a subtle down tilt.
- Draw an identical curve to find the nose
- Double that distance to find the chin
- Attach the jaw
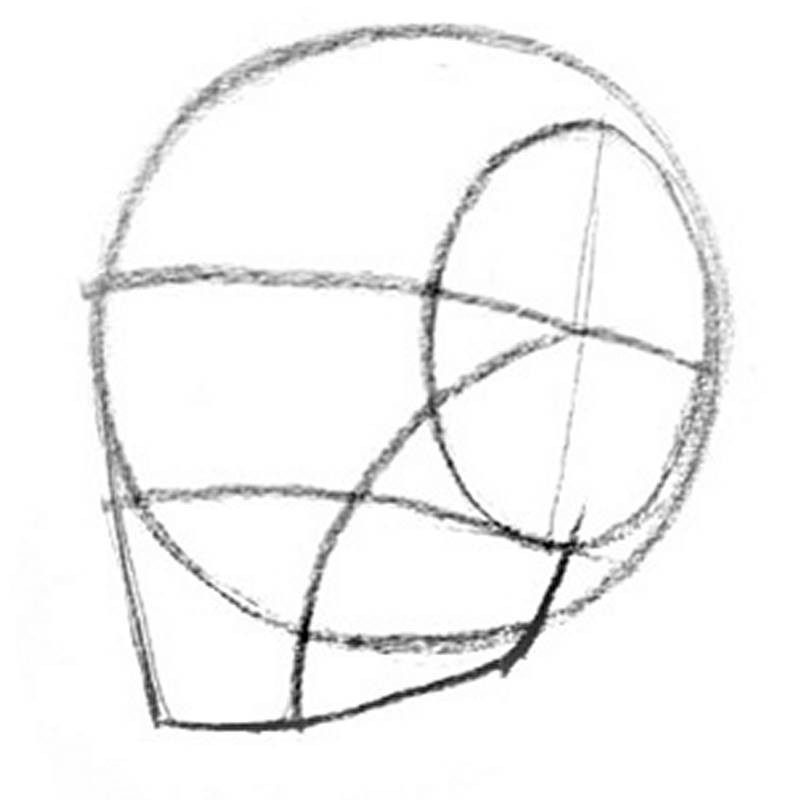
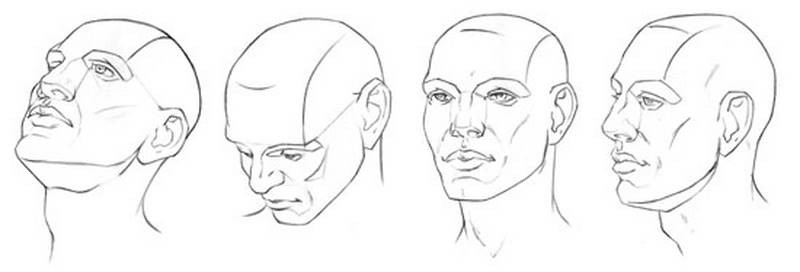
Now you have a 3D representation of the head ready for the features. This approach is really good to establish the perspective of the head. A good exercise is to try to think about the head as a simple elongated box.
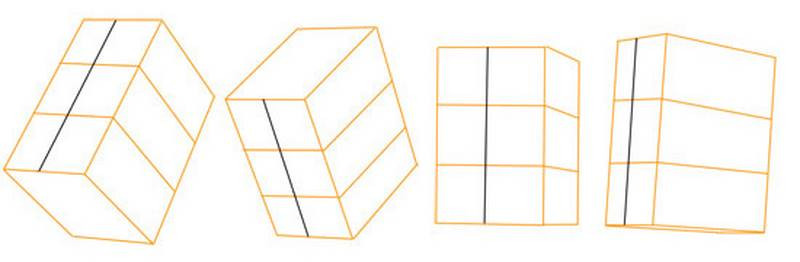
The angles on the front plane of the face such as hair line, brow line, nostrils, lips, and chin will be the same as the angles on the front plane of the box. The angle from brow line to ear is the same as the angle on side plane of the box.
These angles are really important because they establish the head as a 3-d form in space.
This may seem overly technical with so many details to remember but with practice it actually becomes very easy so get that sketchbook out and practice it a hundred times with a variety of angles! You’ll find you improve much quicker than you think.
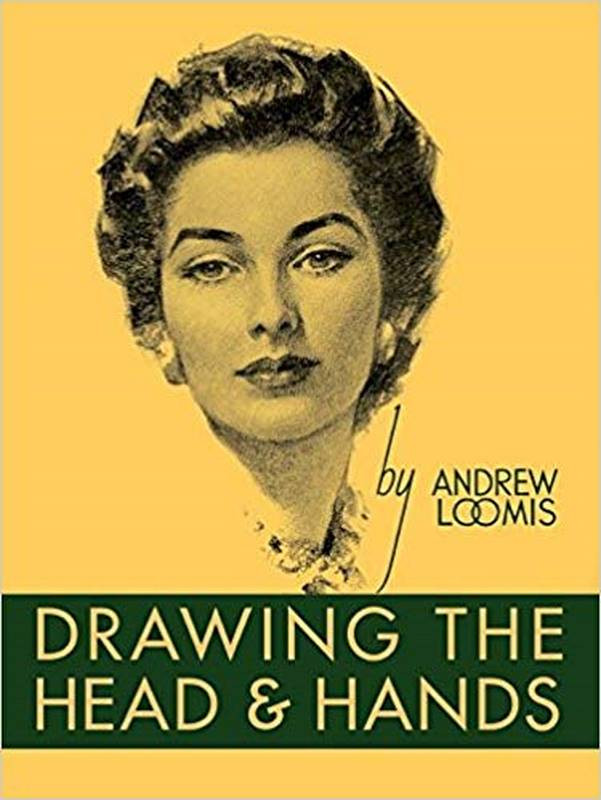
Drawing the Head and Hands - by Andrew Loomis
This video summarizes this book. The full version is a great resource.
Like what you learned? Check out the next lesson How to Draw the Head from Side View!
Draw the Loomis Head
Take a bunch of pictures of either yourself or someone else and then use them to construct the head using the Loomis method. Focus on getting the up and down tilt correct. Make sure to make careful measurements that I mentioned in this video and keep your lines clean. Remember that every person has individual proportions that will be different from the average loomis head. At this point, just draw the average proportions. Once you’re comfortable with that, you can try to capture the distinct characteristics of the person you’re drawing.
If you’re having trouble drawing the circle or oval of the head, spend some at the beginning of each day warming up your hand with a lot of circles and oval.


