


One of the most common challenges for artists drawing from reference is accurate proportions. In this lesson, I'm going to show you how you can train your mind to improve your accuracy, tools you can use along the way, and most importantly how you can give yourself quick feedback so that you can improve faster.
When we're establishing proportions in our drawings we’re usually using a combination of eyeballing and measuring.
Eyeballing
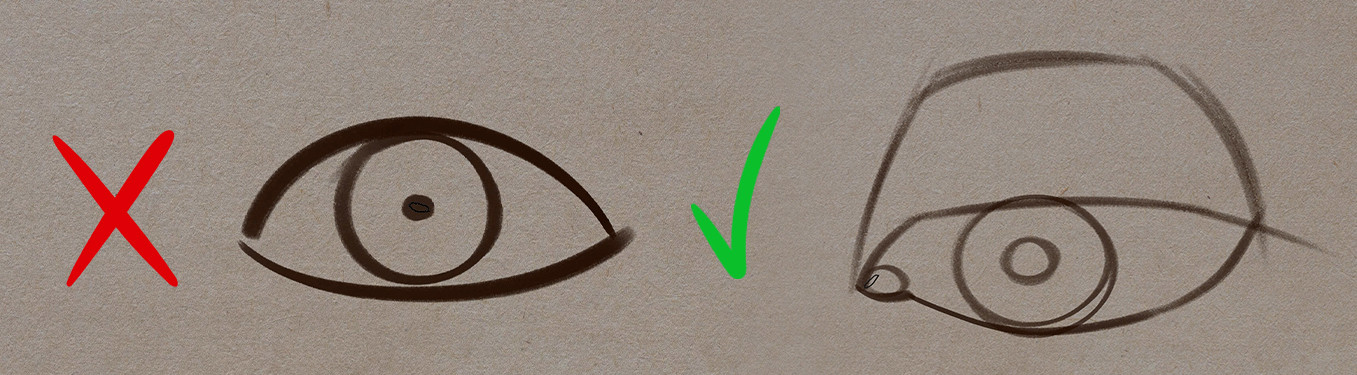
Eyeballing is just using our best judgment. This is something that will take time to develop, so it's good to start practicing that now to improve your intuition without relying on measuring everything. A big part of this is going to be learning how to see what's actually there and not let your brain misinterpret what you’re seeing.
You're drawing an eye and you have an idea of what an eye looks like and you end up drawing that idea instead of what the eye actually looks like. To do this successfully you have to set aside those pre-existing ideas of your subject. Initially it's helpful to pretend that this is not an eye, it's just a shape. So, what is that abstract shape? You'll often hear artists talk about flipping their reference upside down to help ignore those pre-existing ideas. This does help, it’s effective. But I never really liked doing this. Instead I tried to get good at switching into that mode in my mind.
Measuring
When eyeballing isn't enough, or when accuracy is crucial we can always fall back on measuring. Using tools like plumb lines, angles, sighting, and units.
Now I do want to mention that there is something called the sight-size method which involves a pretty strict process of transferring the scale of the subject you're seeing from a specific vantage point. We're not going to be using that in this course, instead we're going to use comparative measuring which involves transferring relationships of shapes in your subject to your drawing. Doesn't matter what size your drawing is, as long as the proportional relationships are the same, then the drawing is accurate.
Let's go over some of the things we can use to help us measure better.
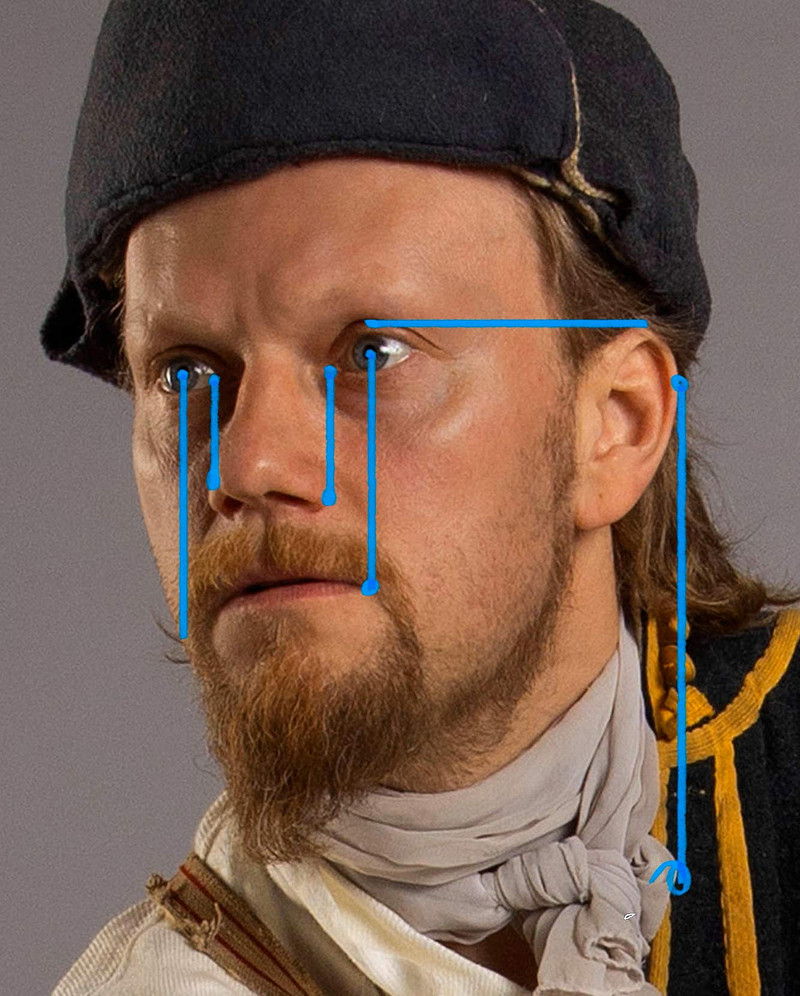
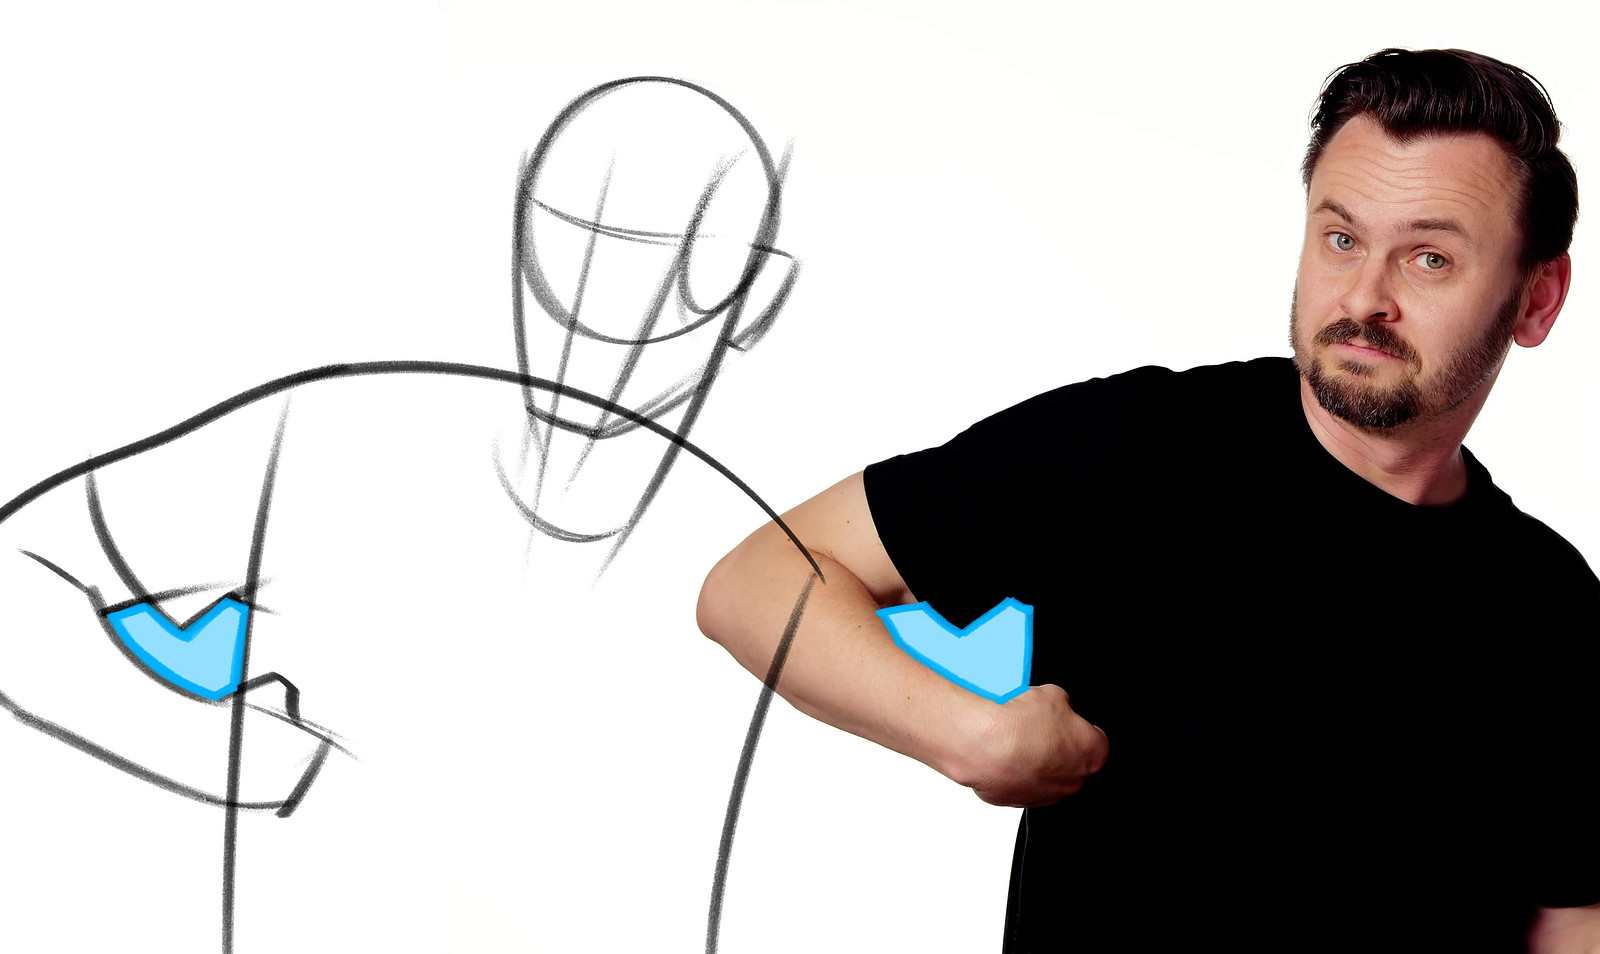
Sighting
Sighting is using your pencil to help measure what's in front of you or a photo. I explained this in detail in this video I made a while back, so I encourage you to go back and watch it. Basically you hold out your arm straight, making sure the elbow is locked. Tilt your head toward your shoulder, close one eye, align the tip of the pencil with one point on the subject and the top of your thumb on another point. Take that unit and relate it to something else on the subject. Now you're not going to transfer that size over to your page. Remember this isn't the sight-size method. Instead you're going to use that same relationship in your drawing. I measured that the center is about at his belt. Now I can mark the top of his head, bottom of his feet, and now I know that his belt will be here. One measurement down, 999 to go! Woohoo!
Plumb lines
Another great tool is a Plumb line. It's just a vertical line. Artists used to hang a lead weight on a string to measure a vertical line. The Latin word for lead is Plumbum. So, plumb line.
We don't really use strings and weights anymore, we just eyeball vertical lines. The point is to find alignments. You drop a vertical line or even horizontal, whatever who cares.. And you look for things that align with that other thing. This is great to know because you can just make sure those points also align in your drawing.
Angles
Angles are kind of like plumb lines except they're more difficult. It's easier to measure a perfect vertical or horizontal but getting the exact angle of a diagonal takes practice. The benefit of angles is that we can measure the angle relationship of any two things, not just the things that align vertically and horizontally. When you can rely on your angle drawing skills, your measuring game gets stronger.
Units
It’s helpful to use something from your reference as a unit of measurement. It can be anything, but a common one in figure drawing for example is the height of the head. When you use one common unit to compare the size relationships of everything in your drawing, it helps to keep everything working together.
You can have stuff over here relating to other stuff over here and then you have other things here relating to these things here.. Things from those two areas might not relate to each other. But when everything relates back to the head, things throughout the drawing are more likely to align. Now that doesn't mean that you should only use that one unit to measure everything, but it's nice to have something you can fall back on and double check other measurements.
Straights (and slightly curved C’s)
We already went over this in the line lessons. Straights are easier to control. You’re just thinking of placement and angle. When you have to consider the curvature of a complex line, that's much more to juggle at the same time. A lot of artists start their layins using only straights and slightly curved C’s. Sometimes you just need that extra little bit, you know?
Negative shapes
Sometimes you might find problems with your positive shapes by observing your negative shapes. Positive shapes are the shapes that make up the object you’re drawing. Negative shapes are the ones around or between. If I put my fist up on my hips this hole between my arm and my body is a negative shape! Seeing how that negative shape looks different gives me a clue to fix the shape of the arm.
Even if you're drawing from imagination you should still consider those negative shapes and design them to look good.
There are other tools people use like rulers, proportional dividers, viewfinders, and gridding. These are all totally valid and you can certainly use them. Personally I trained with just my pencil as a measuring device because you always have a pencil. And if you get good enough to draw accurately with just a pencil and your eyeballs, then you can draw accurately anywhere at any time. You don't have to be prepared with all your gadgets.
Big to Small
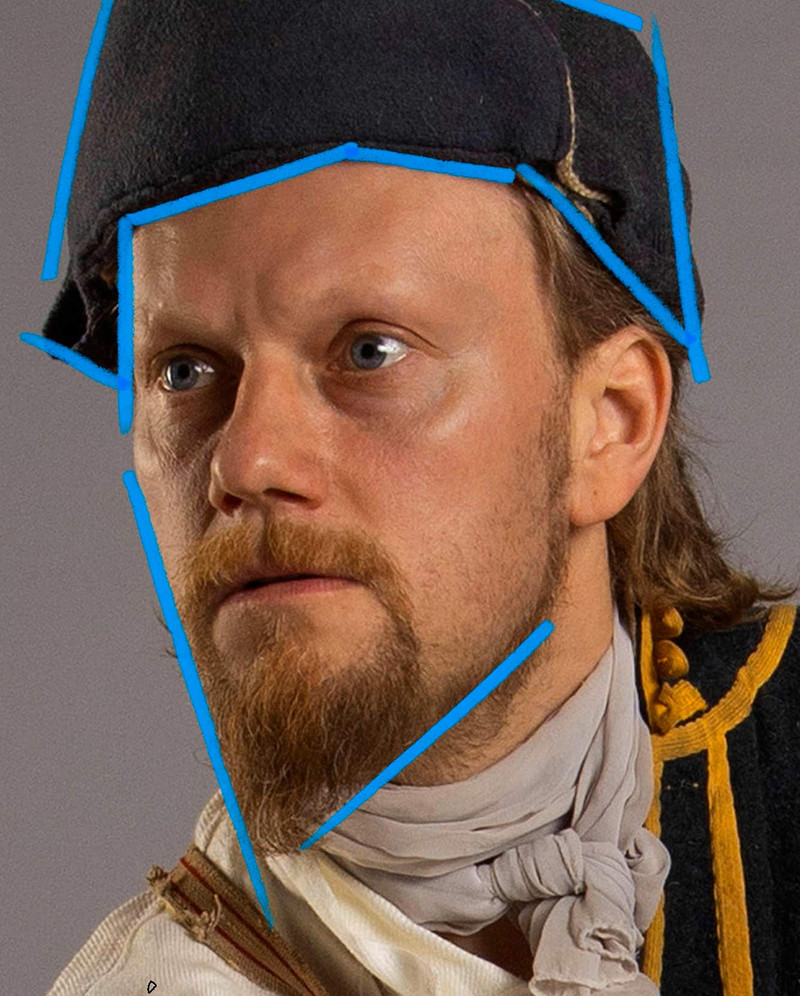
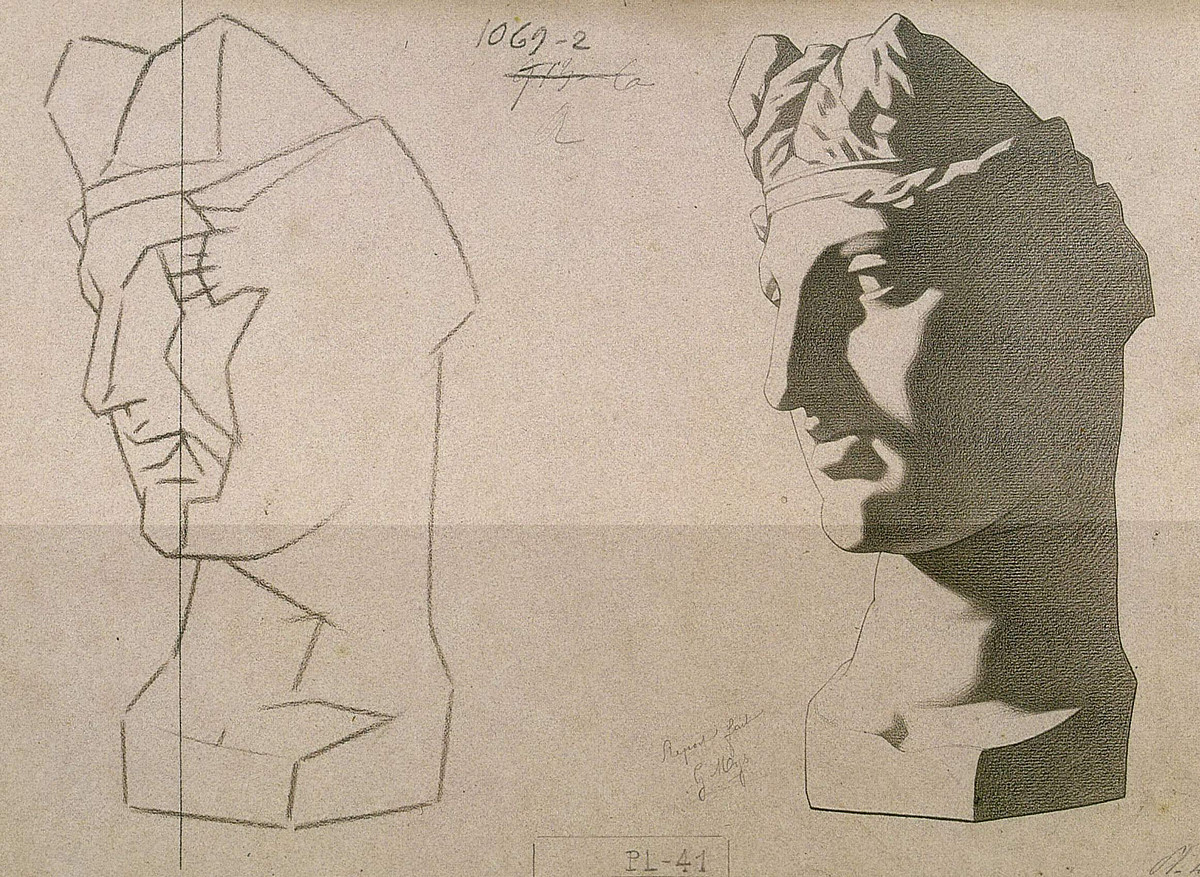
An important concept that I stress a lot is working big to small. You can start with the biggest shape like an envelope (which contains your whole subject) and then break that down into smaller and smaller shapes. But you don't have to always start with that biggest shape, you can start with the medium shapes, design those to look good and relate to each other accurately on the page. For example I can draw the shape of the head, shape of the neck, the hat, the shoulders... these are not the biggest shapes, but they're big enough for me to have only a few shapes that I can control to determine the composition on the page before I move on to the details.
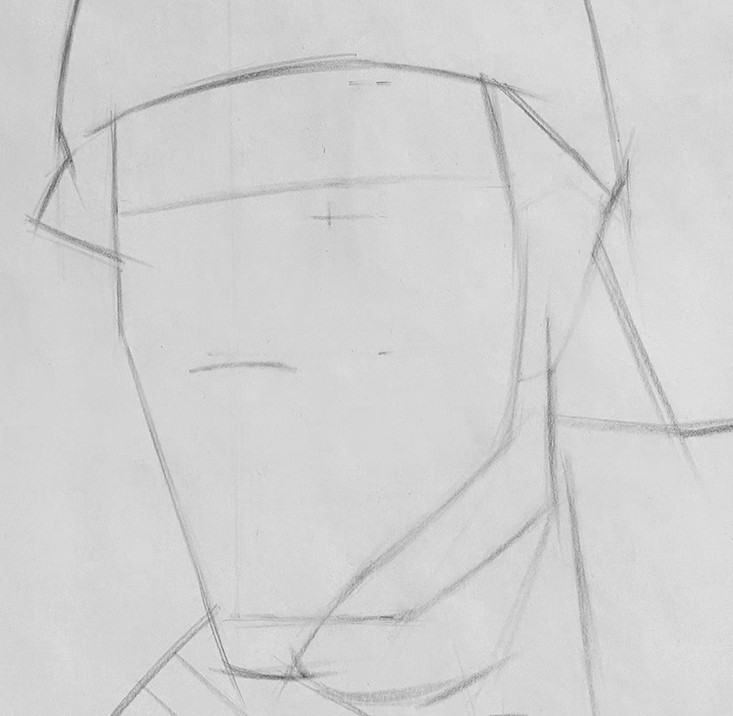
Sometimes an envelope is very helpful but sometimes you might prefer to just start with the relationships of several major shapes. Either way, the beginning of a layin should establish the major proportional relationships on your page. When you draw for example the head shape of a figure drawing, you need to consider the size and location of that head shape. It’s easy to get distracted by the details of the shape and make it too big or in the wrong place. A common mistake in life drawing is to have a figure slowly get bigger or smaller as it goes down. Or to start with a shape that is too big and run out of space for the rest of the body. Or default to putting it in the middle of the page and end up with a bunch of empty space and a bad composition.
The Small Stuff
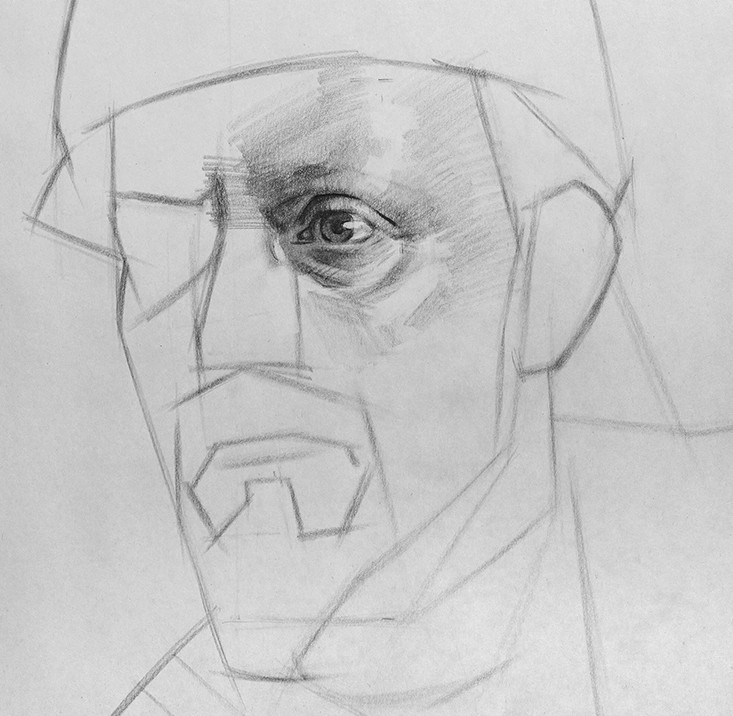
When you're done establishing those biggest shapes, then you're going to break them down into the major shapes within each. Initially you start by breaking down the whole page, now you focus on the face and break down the face into its major shapes. For example the eye sockets, big rectangle for the container of the nose, the beard, the ear, and some others depending on your subject. Then you could focus in even further and break down the eye socket shape into an eyebrow, eyelids, the white of the eye, and the iris.

When you think you're done with the linear layin, then you can move on to shading. And even in the shading process you're going to break things down into smaller and smaller shapes. Really small shapes. Like a few shapes for the tear duct, a tiny highlight, the pupil, a few indications of eyelashes, and hairs on the eyebrow if you want to get that detailed. But you see how none of that really matters if you start with the wrong head shape?
So, if you struggle with proportions, I highly encourage you to hold back on the shading for a bit. Spend that time doing more layins. When I was a full-time student we had a whole 10 week class dedicated to layins. And I took that several times. It's called 20-minute layins. We would spend 20 minutes starting a drawing and then move on to starting another drawing. We would do that for 3 hours. The beginning of a drawing is very important so it makes sense to practice doing that to make sure that you’re good at starting your drawings strong.
Self Critique for a Rapid Feedback Loop
As you're doing the layin, remember to step back or lean back and observe the whole drawing. Fight against tunnel vision. Also periodically step away... reboot your brain and come back with a fresh perspective. Sometimes you might come back and immediately see a bunch of mistakes.
After you're done with the layin and you think you've made it as accurate as you can, now you can check yourself to get instant feedback. We don't always have access to an instructor whose eyeballs we can borrow, but most of us have access to a camera and a computer. A really important part of improving your observation skills is increasing the speed and frequency of feedback.
I used to do this a lot... I would take a good quality, undistorted photo or scan of my drawing. Take it into Photoshop and overlay it on top of the photo reference as a multiply layer. If it’s hard to see, I would make my lines into some bright color. The way I do that is select all, copy the drawing, hide it, create a new layer, fill it red, create a mask, alt click on the mask, paste my drawing into the mask, invert it with Ctrl or Command I, and click back on the layer. Sometimes if my lines are light, I'll boost the contrast with a levels adjustment. It's a lot of steps but it only takes me about a minute. Then I just sit there for 10 minutes and observe all my mistakes.
Getting this feedback is super important. It helped me improve my proportion accuracy. I hope it will help you too.
Join us in the premium course to get access to more lessons, assignments, demonstrations and critiques!
Okay that's it for this lesson. I'll see you next time.


